Ubuntu System Installation
This article describes how to flash the Ubuntu 24.04 system image onto the Rhino Pi IQ9N.
Reminder
Flashing formats the system, so back up your data beforehand.
Prerequisites
| Item | Description |
|---|---|
| Rhino Pi IQ9N | The device to be flashed |
| System image | The Ubuntu 24.04 image obtained from the Image Download page |
| Windows PC | Used to install the flashing tools |
| USB TYPE-A to TYPE-C data cable | Connects the PC and the device; TYPE-A end to the PC, TYPE-C end to the device |
| DC power adapter | DC 19V / 65W |
Installing the Flashing Tools
Before using the Rhino Pi IQ9N, developers need to preinstall the necessary software on a local Windows PC:
- USB driver:
USB_Driver_qud.win.1.1_installer_10061.1.zip - System flashing tool:
QPST_2.7.496.zip - ADB tools:
platform-tools.zip
For software download links, see Tool Resource Download Links.
Installing the USB Driver
Extract the
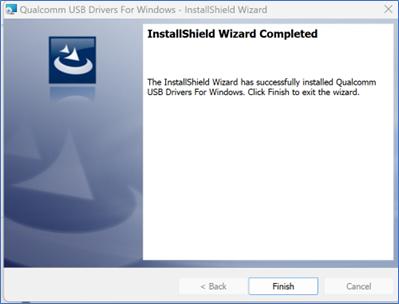
USB_Driver_qud.win.1.1_installer_10061.1.zipfile.After extraction, double-click the
setup.exeprogram and wait for theQualcomm USB Driversinstallation interface to appear. Follow the prompts and clicknextto complete the installation.
Installing the System Flashing Tool
Extract the
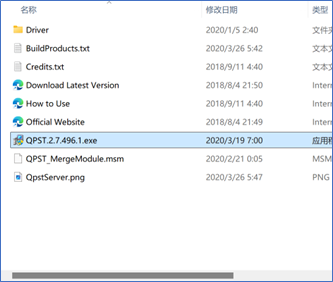
QPST_2.7.496.zipfile to the current folder.Navigate to the extracted
QPST_2.7.496directory and double-click theQPST.2.7.496.1.exeprogram to start the installation.
Follow the prompts and click
nextcontinuously to complete the installation.Default installation path after completion:
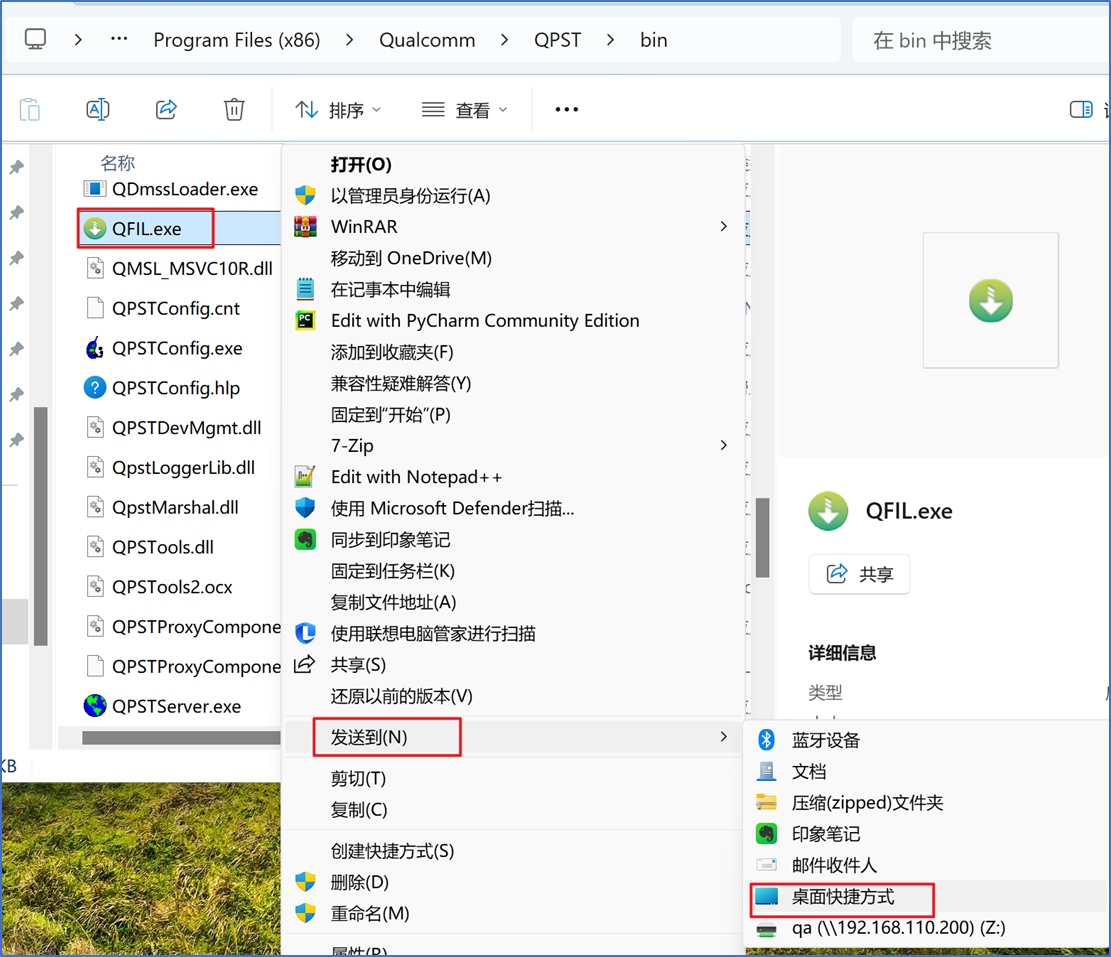
C:\Program Files (x86)\Qualcomm\QPST\bin.You can navigate to this directory and send the
QFIL.exeprogram to the desktop.
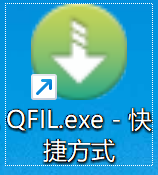
- The desktop icon is as follows.
Installing ADB Tools
- Unzip
- Extract the
platform-tools.zipfile to the D drive.
- Configure ADB Environment Variables
- Copy the path of the extracted
platform-toolsfolder.
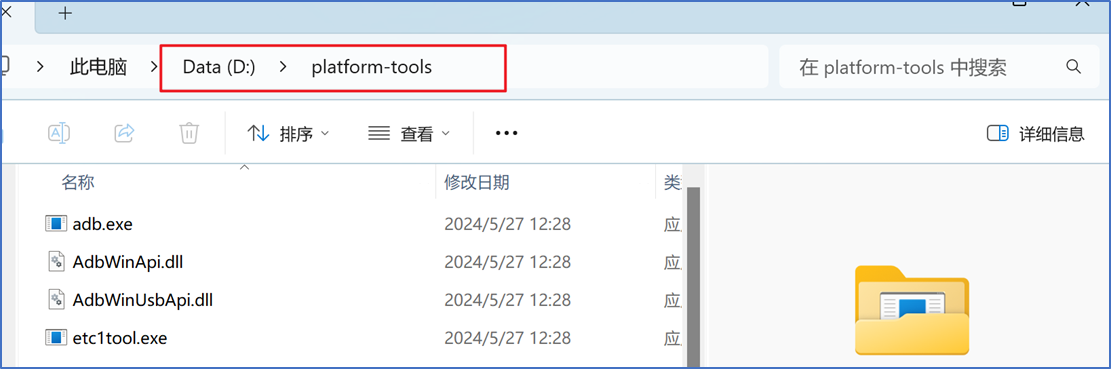
- Right-click "This PC" and select "Properties".
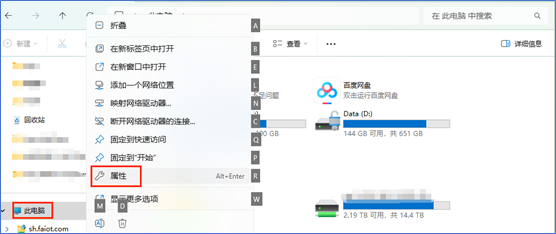
- In the pop-up settings window, click "Advanced system settings".
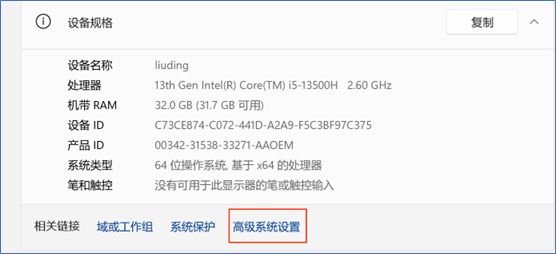
- In the Advanced tab of the pop-up System Properties window, click "Environment Variables".
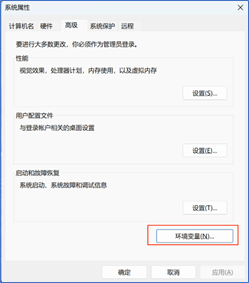
- In the pop-up Environment Variables window, select the Path variable in the "System variables" section and click "Edit" below.
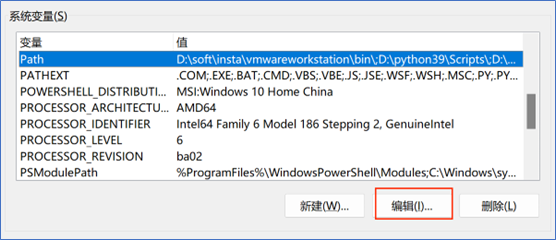
- In the pop-up Edit Environment Variable window, click "New" and add the previously copied platform-tools path.
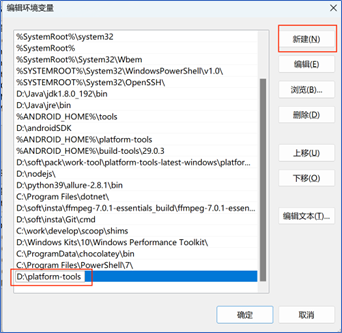
- Click "OK" in sequence to save the variable settings and exit.
- Verify if the ADB Environment Configuration is Available
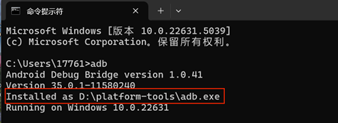
- Open the
cmdwindow and enteradb. No error is reported.
Switching to Flash Mode
Method 1: Switch over ADB (system boots normally)
Use a USB TYPE-A to TYPE-C data cable to connect the PC and the device.
On the Windows PC, press
WIN + Rand entercmd. In the window that opens, runadb devicesto confirm that the device is listed.- If the device status shows
offlineor the device is not listed, wait a while and runadb devicesagain; as soon as the status becomesdeviceyou can continue. If it still does not work, unplug and replug the cable and retry.
- If the device status shows
adb devices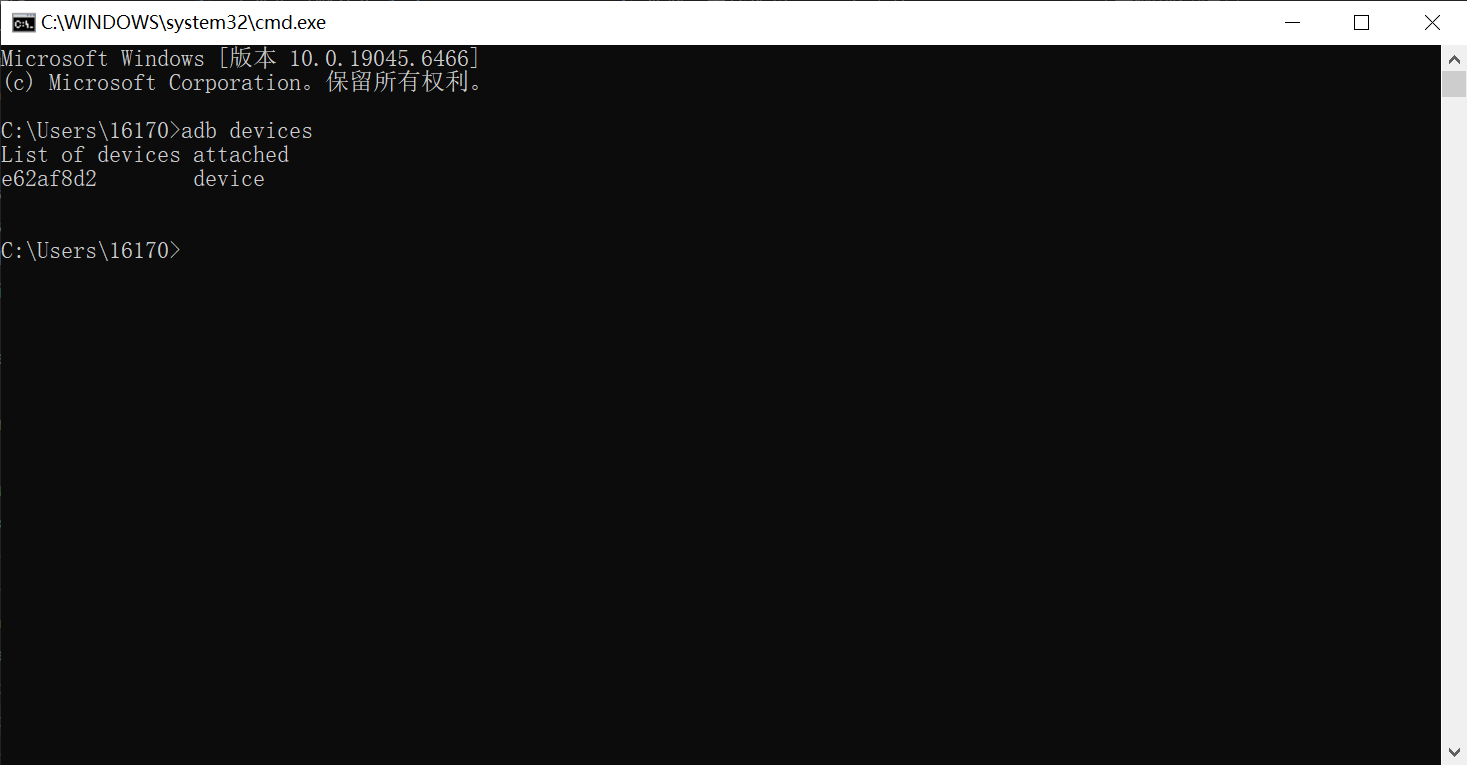
- Run the following command to reboot the device into EDL mode.
adb root
adb shell reboot edl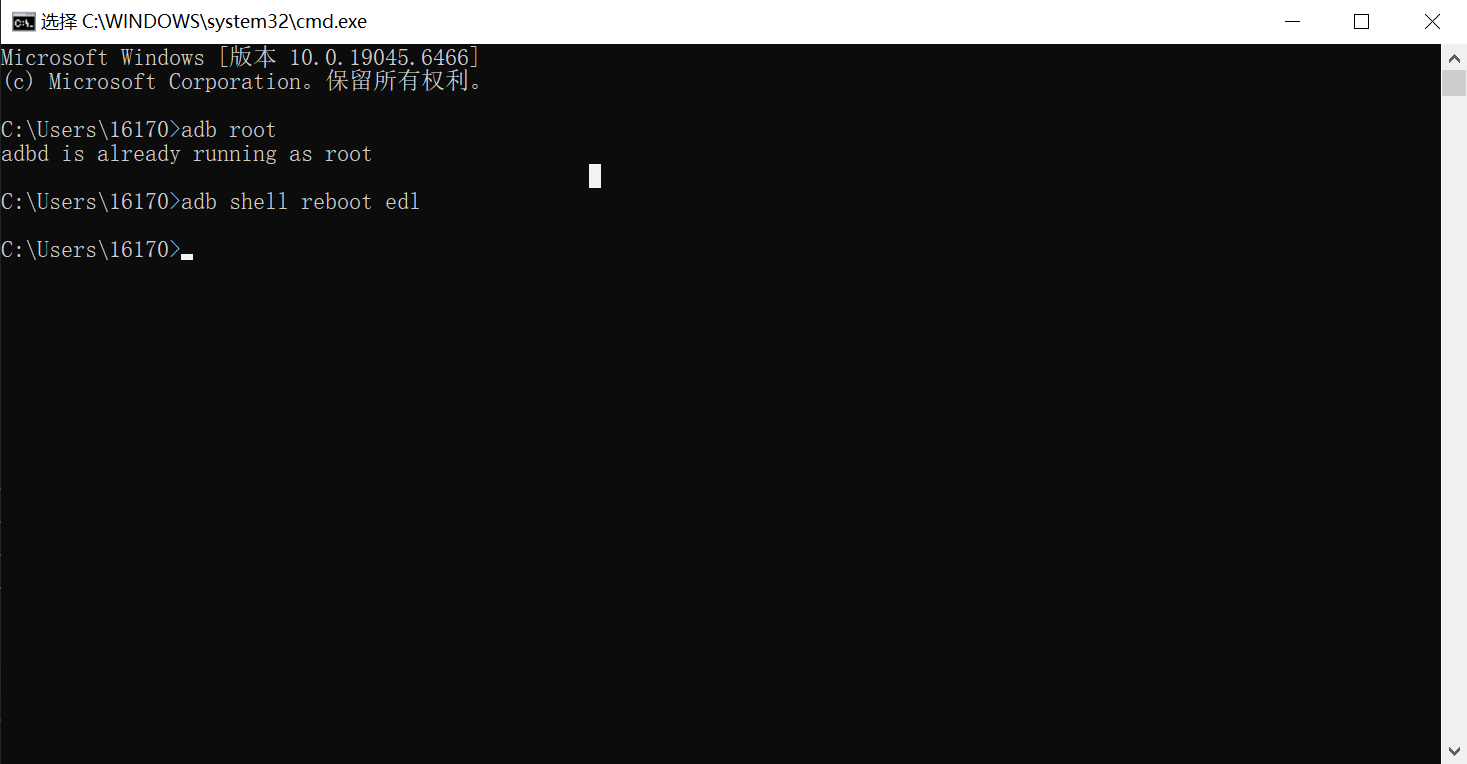
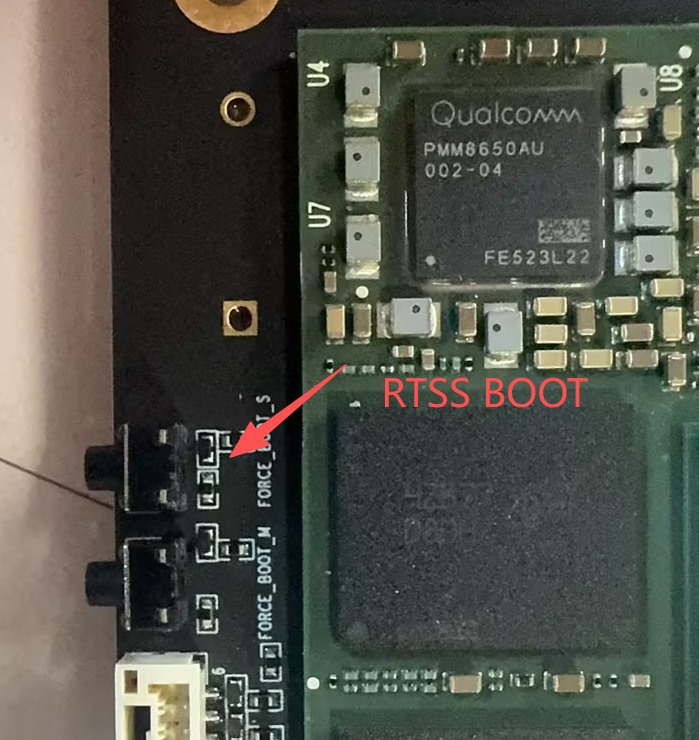
Method 2: Enter by button (system cannot boot)
- Disconnect the DC power supply from the device so that it is powered off.
- Press and hold the
RTSS BOOTbutton (corresponding signalFORCE_BOOT_S), then press the power button to power on; the device enters EDL mode, after which you can release the button.
For the button position and the operation sequence, see Buttons; for a description of the mode, see EDL Forced Download Mode.
Flashing with QFIL
Configuring the Configuration Options
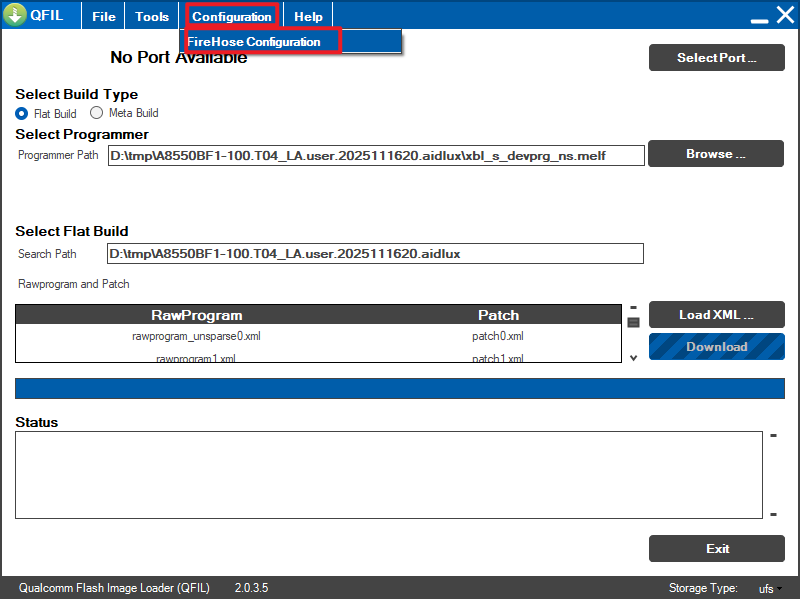
- Open
QFILand click theConfiguration-FireHose Configurationoption at the top.
- In the
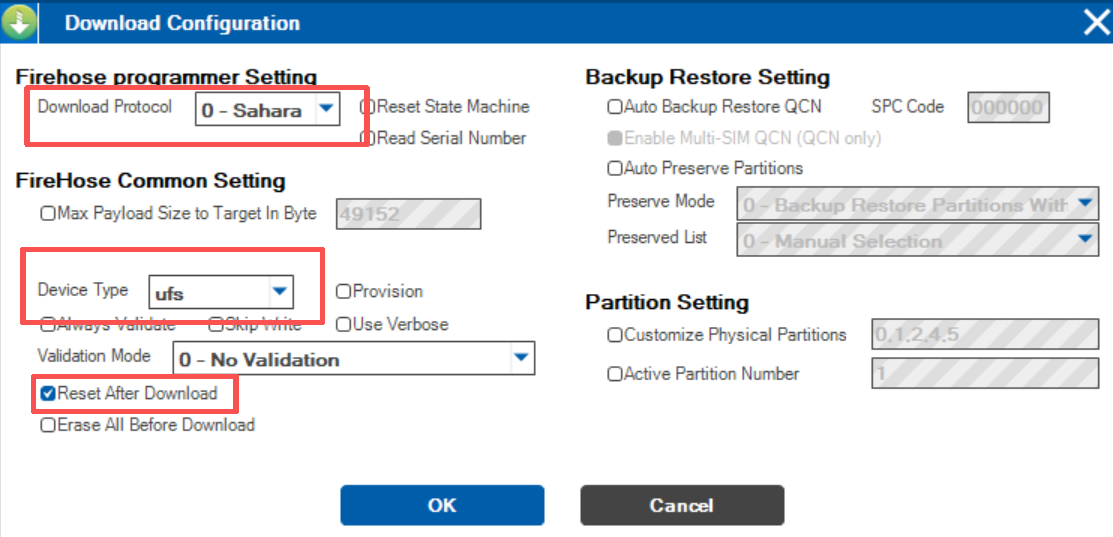
Download Configurationwindow that appears, make the following settings:
| Option | Value |
|---|---|
| Download Protocol | 0-Sahara |
| Device Type | ufs |
| Reset After Download | Checked |
Leave the other options at their defaults and click OK to save.
Selecting the Flash Port
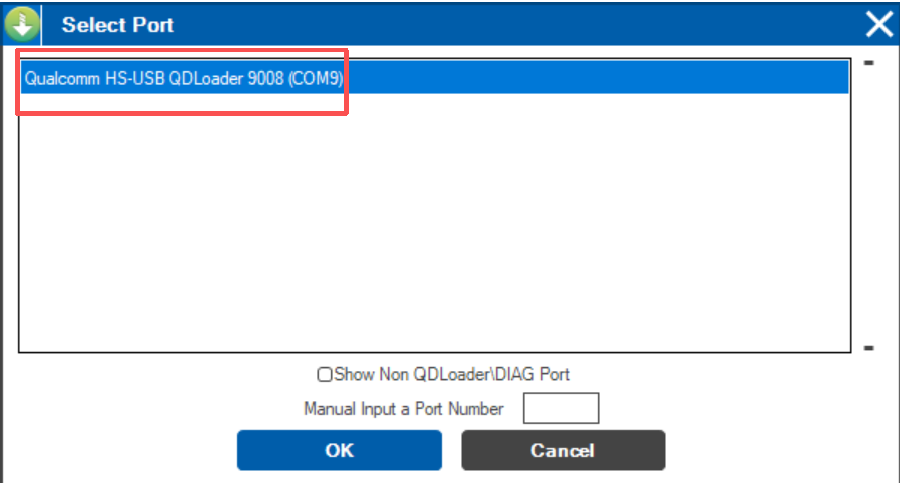
Click
Select Port; in the port list that appears you should seeQualcomm HS-USB QDLoader 9008 (COMx). Select it and clickOK.If the
9008port does not appear, power-cycle the device, perform Switching to Flash Mode again, and wait for the port to appear.
Selecting the Build Type
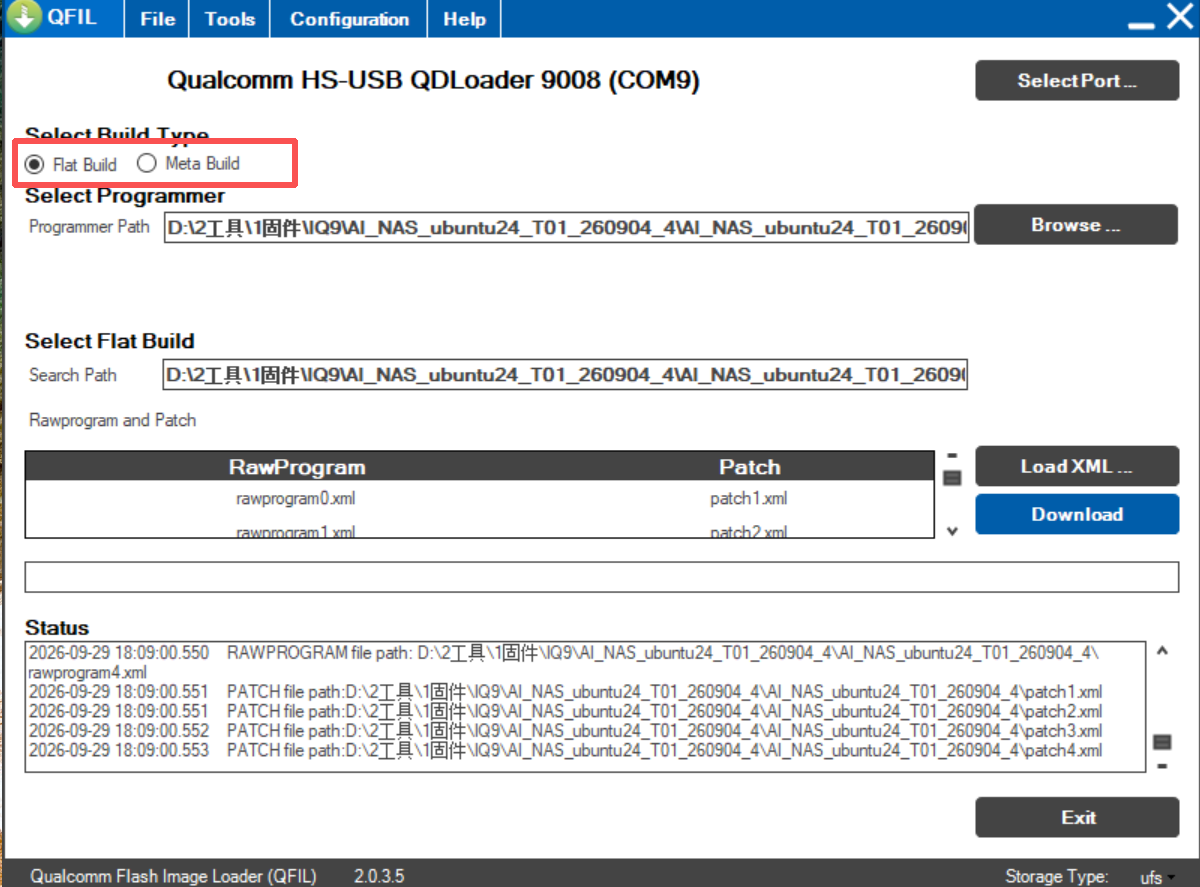
- Locate
Select Build Typeand selectFlat Build.
Selecting the Flash Files
Extract the ROM package of the IQ9N system image.
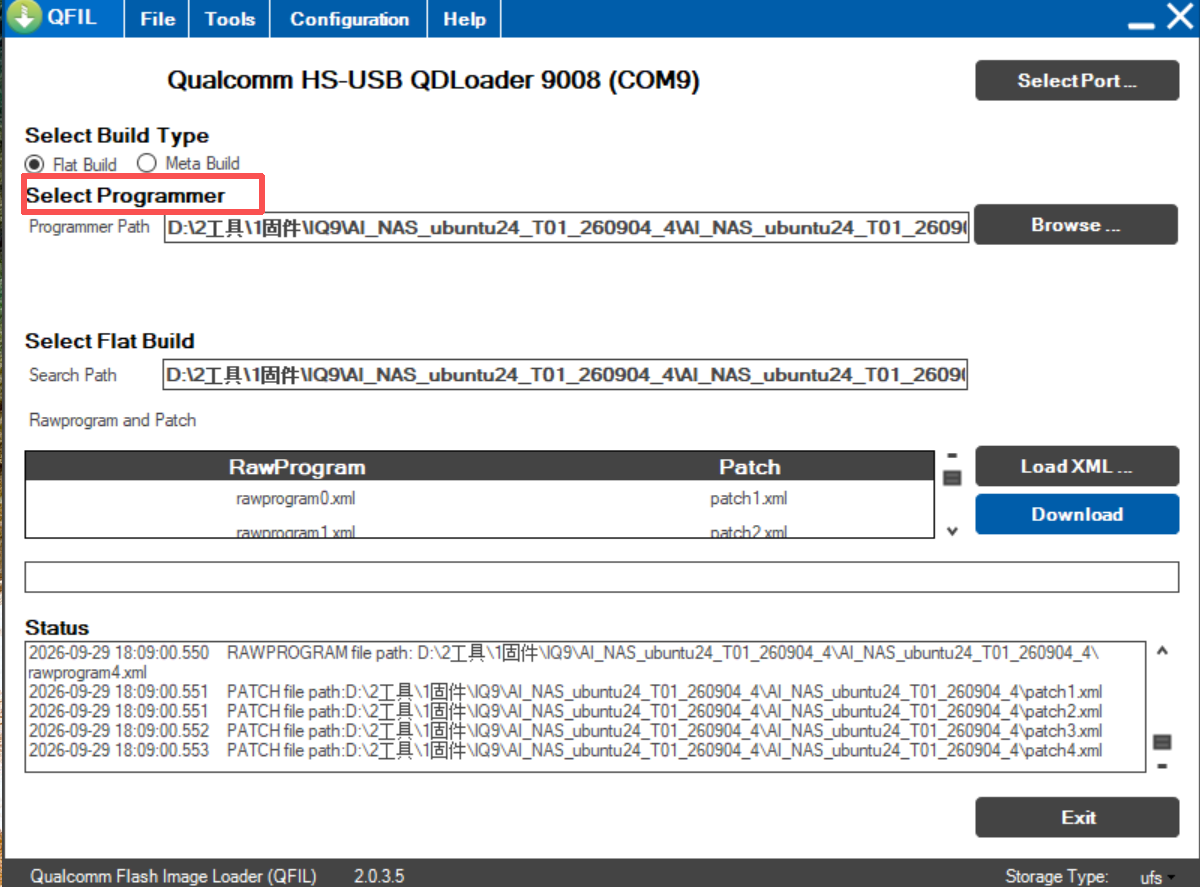
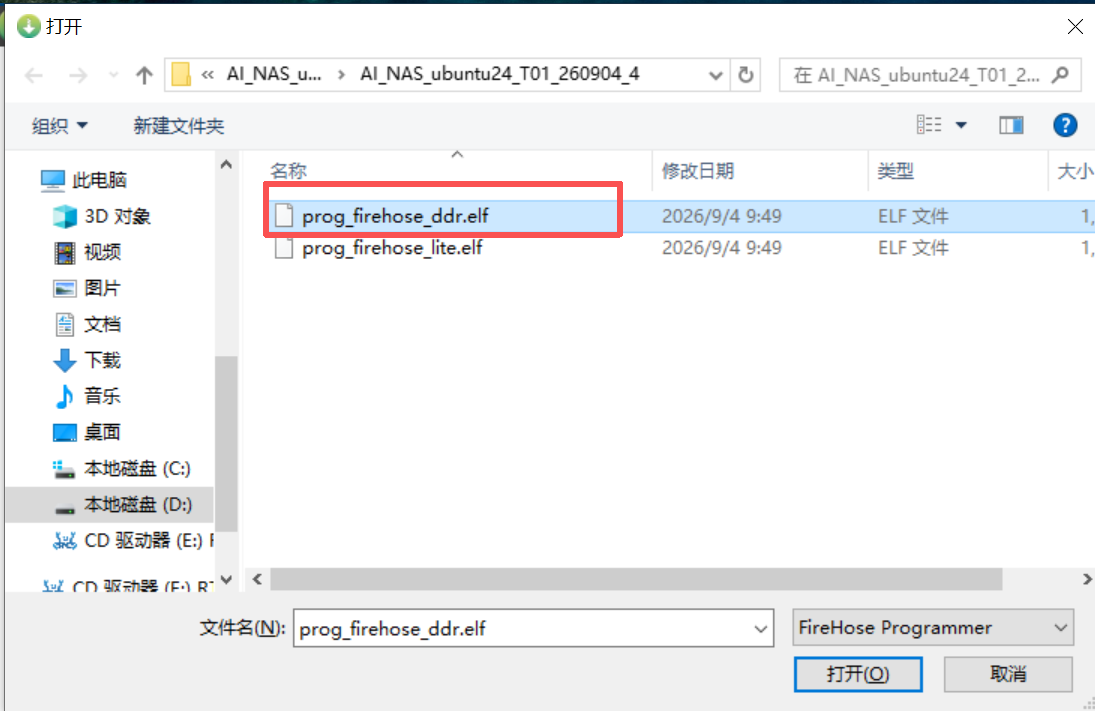
Under
Select Programmer, clickBrowse...afterProgrammer Path. The file dialog is already set to theFireHose Programmertype by default, so simply selectprog_firehose_ddr.elfinside the ROM package and clickOpen; there is no need to change the file extension.
- After the selection,
Programmer PathandSearch Pathare filled in automatically with the path of the selected ROM package.
Selecting the Flash XML Files
Under
Select Flat Build, clickLoad XML....In the window that appears, select all XML files and open them.
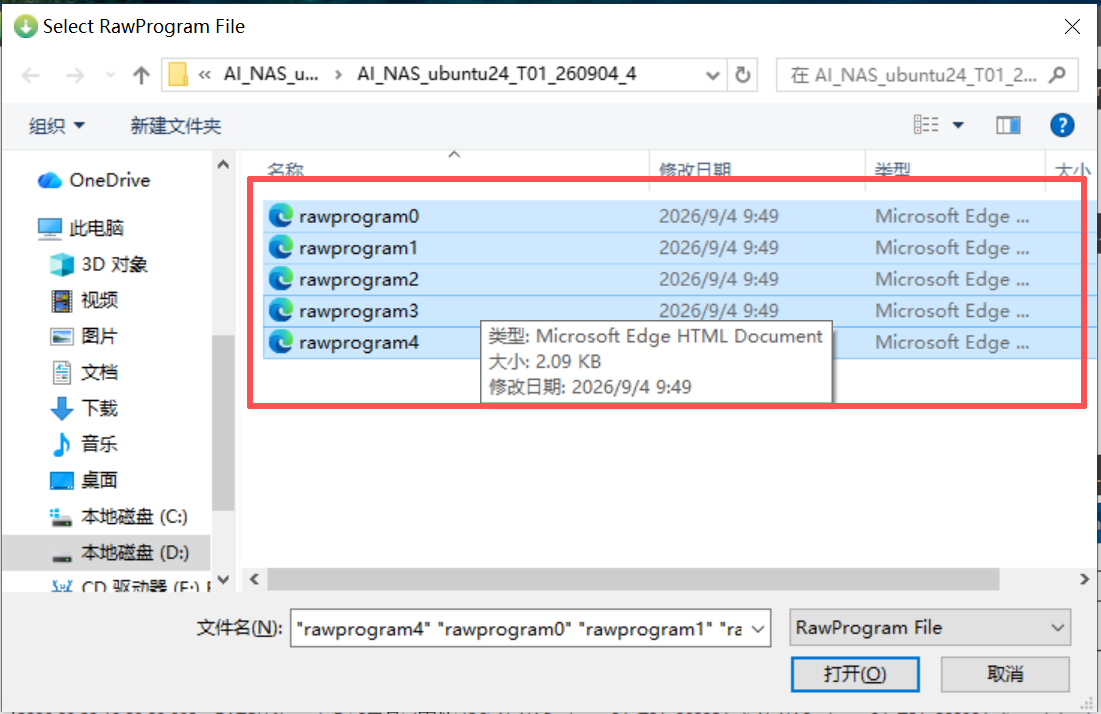
- Another window pops up automatically; again select all XML files and open them.
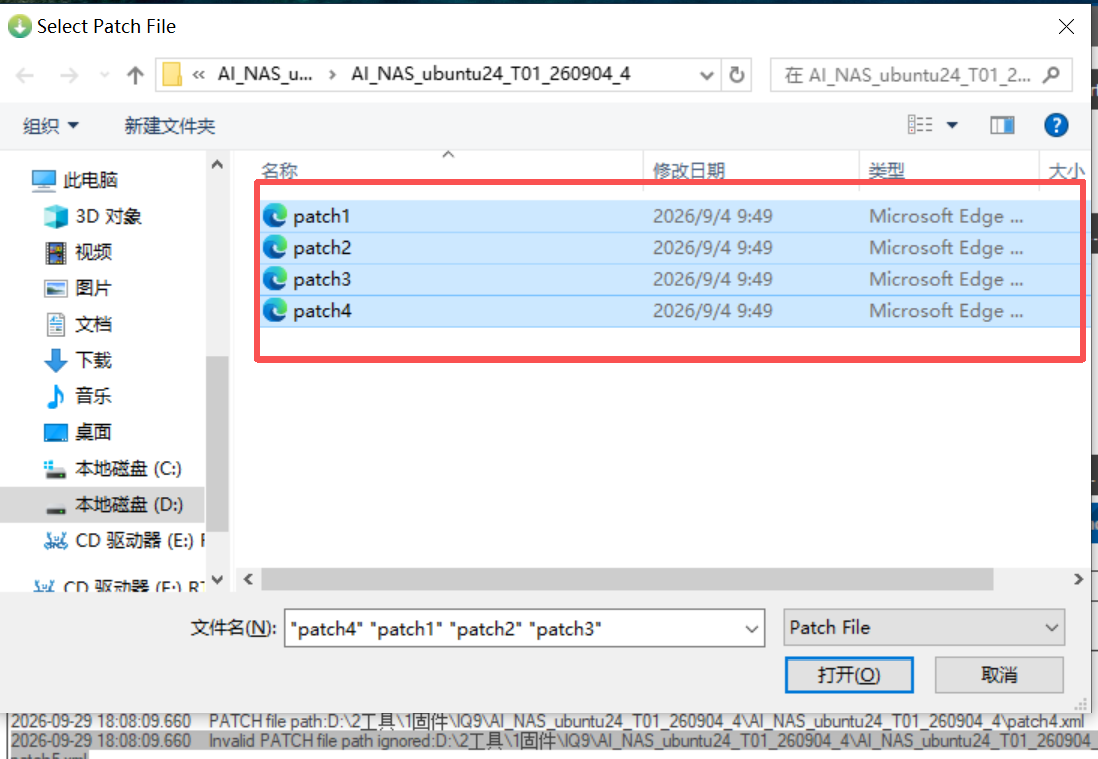
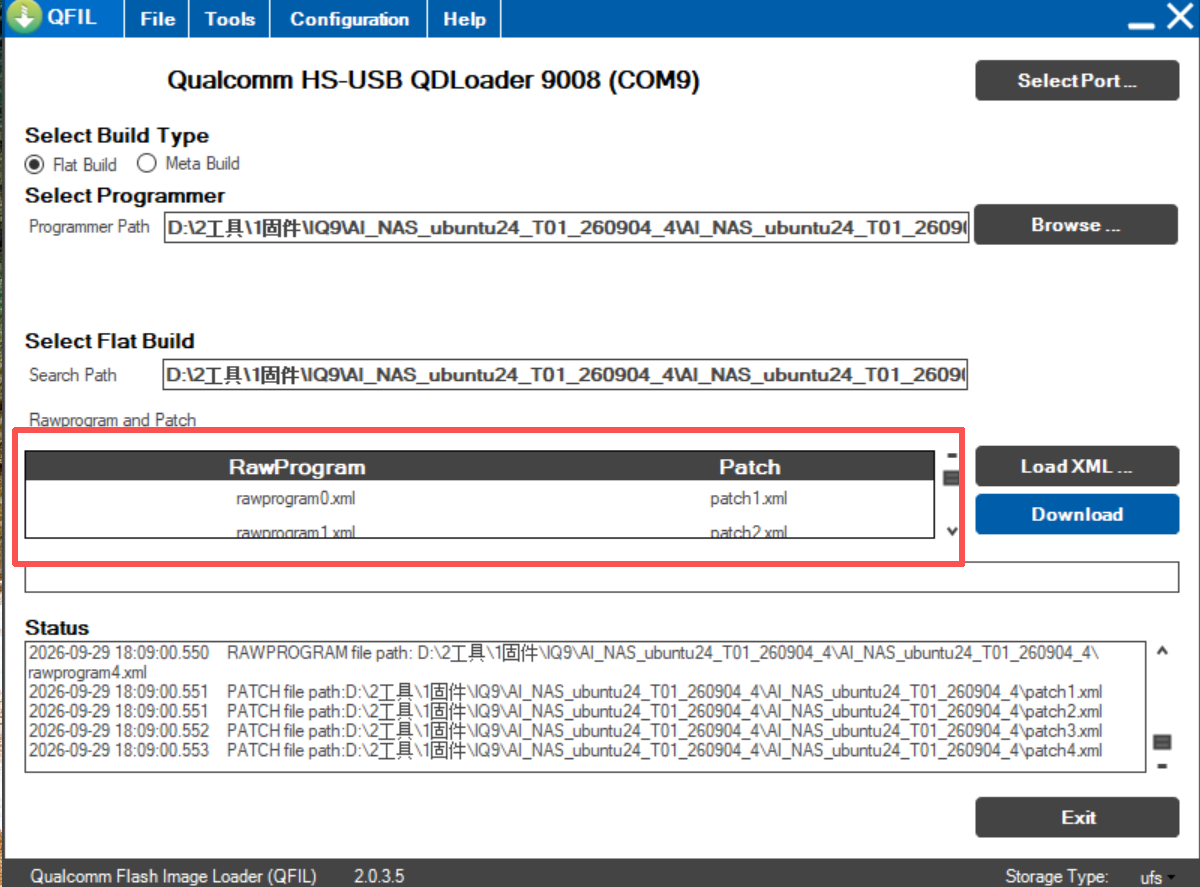
- Once all XML files are loaded, the
RawProgramandPatchlists show the selected files.
Tip
File names inside ROM packages may differ slightly between versions; refer to the files actually extracted.
Starting the Flash
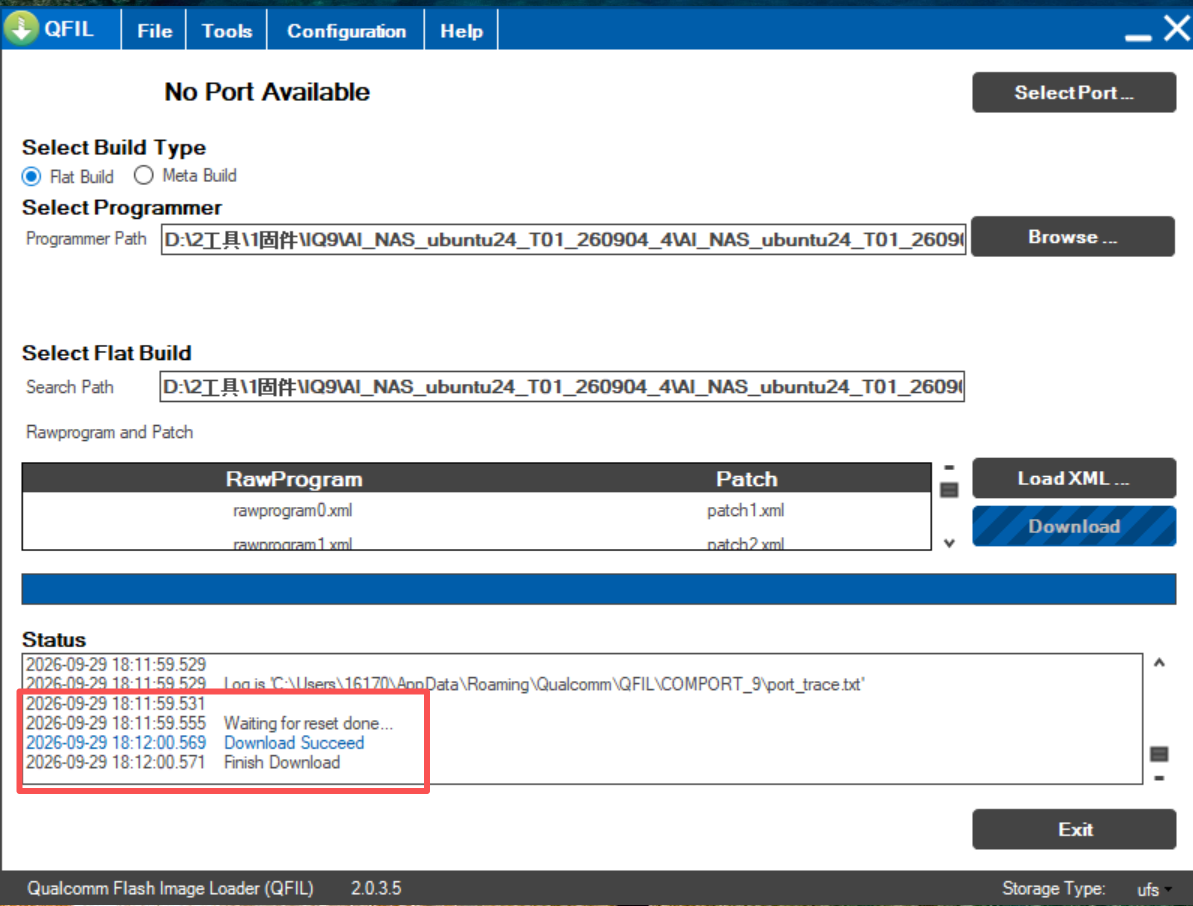
- Once all the options above are configured, click
Downloadto start flashing.
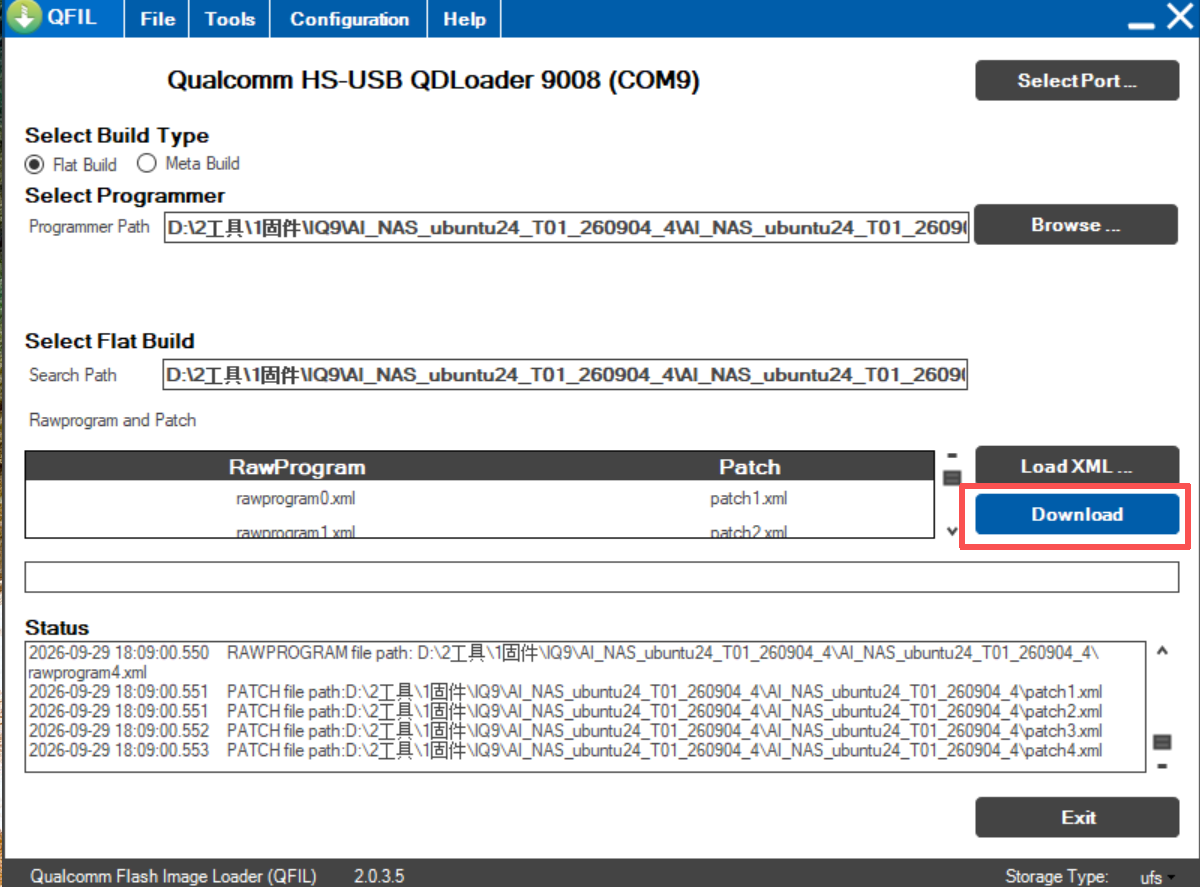
- After about 5 minutes,
Download Succeedappears, indicating that flashing is complete and the device reboots automatically. If flashing fails, contact APLUX after-sales support.
Verifying the Flash Result
After the system boots, log in through Direct Display Login or ADB and run the following command to confirm the system version:
cat /etc/os-releaseIn the output, VERSION_ID should be 24.04.
Notes
- During flashing, do not cut power, unplug cables, or operate the device, otherwise the device may fail to boot.
- Flashing erases all data on the target storage, so back it up beforehand.
- Use the flashing tool and USB driver versions that match the current system version to avoid compatibility issues.