SVC (SmartVision Configurator)
Introduction
SmartVision Configurator (hereinafter "SVC") is Aplux's self-developed camera configuration platform, consisting of a QT interaction module and a camera control module. The platform is easy to use and supports direct camera connection for multi-camera image debugging, parameter import/export, and real-time configuration.
Runtime Environment
The platform is integrated into the camera.
💡Tip
Running the platform requires a direct HDMI connection to the camera, then click the desktop icon to launch.

Main Interface
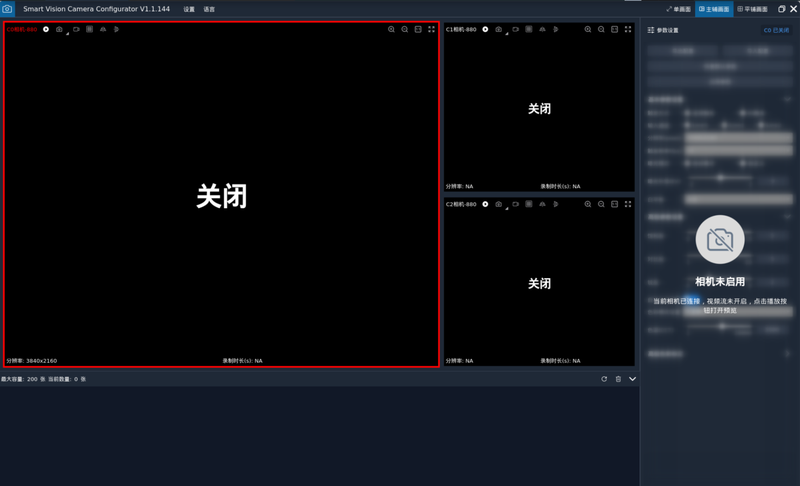
SVC uses a 4-area layout:
Menu Bar: Menu configuration options for platform-related settings
Camera Window: Camera image preview window with capture and recording functions
Snapshot Panel: Snapshot recording window displaying camera history snapshots
Parameter Panel: Parameter settings window for camera parameter configuration
Menu Bar
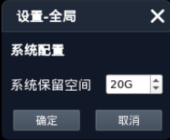
Global Settings
- System Reserved Space: unit GB
💡Tip
If the current remaining disk space is insufficient, video recording will not be allowed.
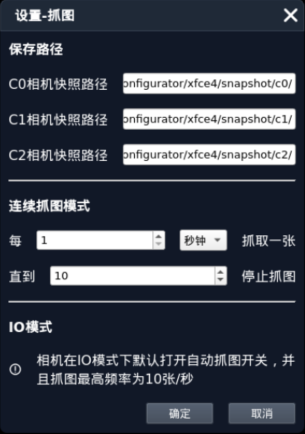
Snapshot Settings
- Save Path: Snapshot image save paths for the three cameras (non-modifiable)
- Continuous Capture: Configuration for capture interval and capture count
💡Tip
Enabling continuous capture will delete the current camera's historical snapshots. Please save them first.
In IO mode, auto-capture is enabled by default, with a maximum capture rate of 10 frames per second.
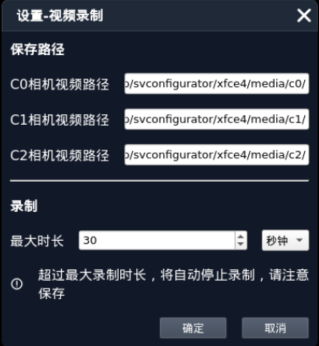
Recording Settings
- Save Path: Recording video save paths for the three cameras (non-modifiable)
- Max Duration: Configuration for the maximum recording duration per camera
💡Tip
Recording will automatically stop when the max recording duration is exceeded. Please save your recordings.
Language Switching
- Chinese: Switch the overall interface language to Chinese
- English: Switch the overall interface language to English

English interface shown below:
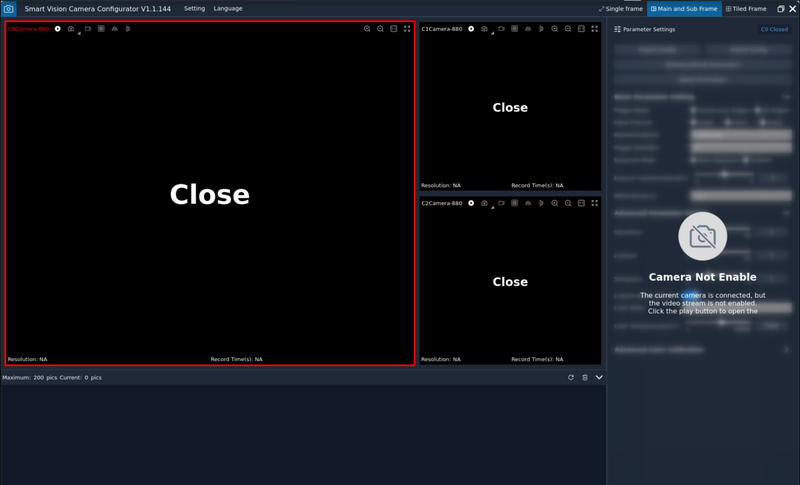
Toolbar
Camera Layout Switching

| Function | Detailed Description |
|---|---|
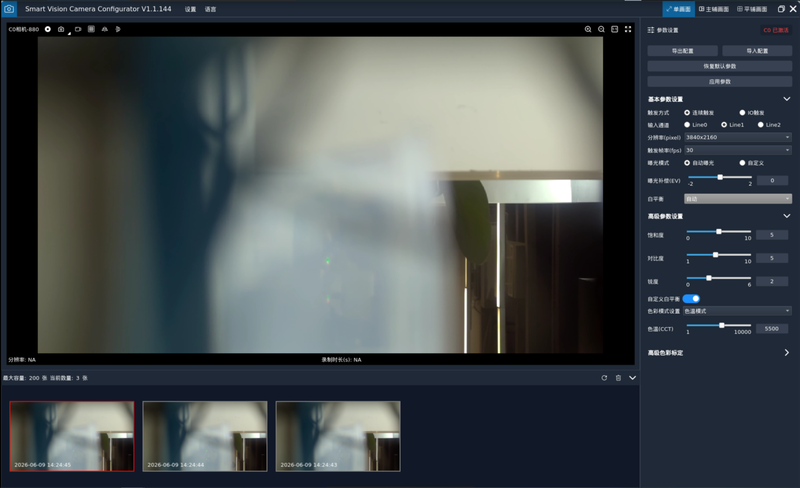
| Single View | Display only a single camera view |
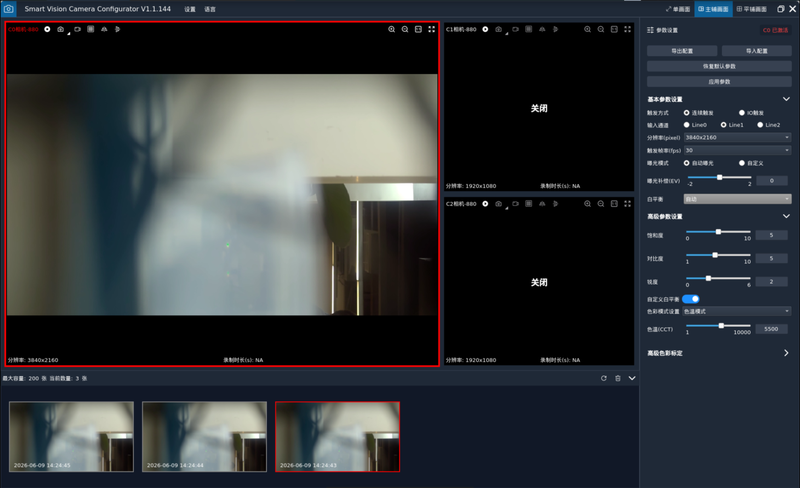
| Primary/Secondary View | The first camera occupies the larger left portion, with the remaining two cameras equally sharing the right area |
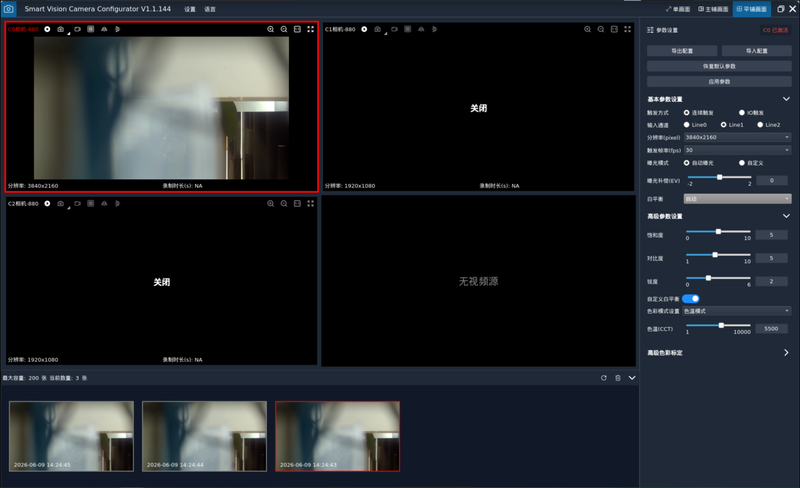
| Tiled View | All cameras equally divide the entire window into quadrants |
💡Tip
Blank areas in the layout with no camera are filled with a No Video Source placeholder window.
Single View
Primary/Secondary View
Tiled View
Camera Window
Camera Control Toolbar
| Icon | Function | Detailed Description | Display State |
|---|---|---|---|
| \ | Camera Info | Camera ID - Camera Version (shows NA if version not recognized) | \ |
 | Play Button | Play camera feed | Shown when camera is stopped |
 | Stop Button | Stop camera feed | Shown when camera is playing |
 | IO Auto Capture Button | Auto capture toggle in IO mode | Shown when IO is triggered |
 | Single Capture Button | Capture current camera frame and save | Hidden when IO is triggered |
 | Capture Drawer Button | Show/hide continuous capture button | Hidden when IO is triggered |
 | Continuous Capture Button | Start/stop camera continuous capture | Hidden when IO is triggered |
 | Record Button | Press to start video recording, press again to stop | Hidden when IO is triggered |
 | Grid Button | Show/hide grid lines | \ |
 | Horizontal Flip Button | Flip camera image horizontally | \ |
 | Vertical Flip Button | Flip camera image vertically | \ |
 | Simulate IO Input Button | Automatically select configured input channel to send IO signal | Shown when IO is triggered |
 | Zoom In Button | Zoom in camera image | \ |
 | Zoom Out Button | Zoom out camera image | \ |
 | Reset Button | Restore original scale after zooming | \ |
 | Fullscreen Button | Display the selected camera window in fullscreen | \ |
💡Tip
All camera control toolbar buttons except Play/Stop are available while the camera is playing and disabled when stopped.

Camera Status Bar
| Function | Detailed Description |
|---|---|
| Camera Status Info | Displays current camera resolution |
| Recording Duration | Displays the current elapsed recording time (unit: seconds) |
Camera Live View
💡Tip
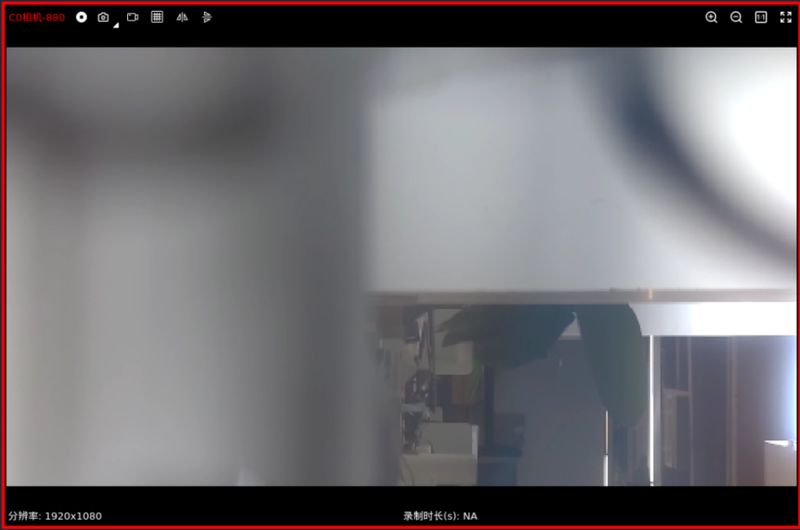
Clicking on different camera views indicates the selected camera with an outer red border.
Interface shown below:
(1) Snapshot
Click the Single Capture Button to capture the current camera frame and save to the path specified in Snapshot Settings.
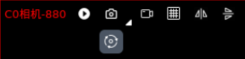
Click the Capture Drawer Button to display the Continuous Capture Button as a dropdown.
Click the Continuous Capture Button to start/stop camera continuous capture.
Interface shown below:
(2) Video Recording
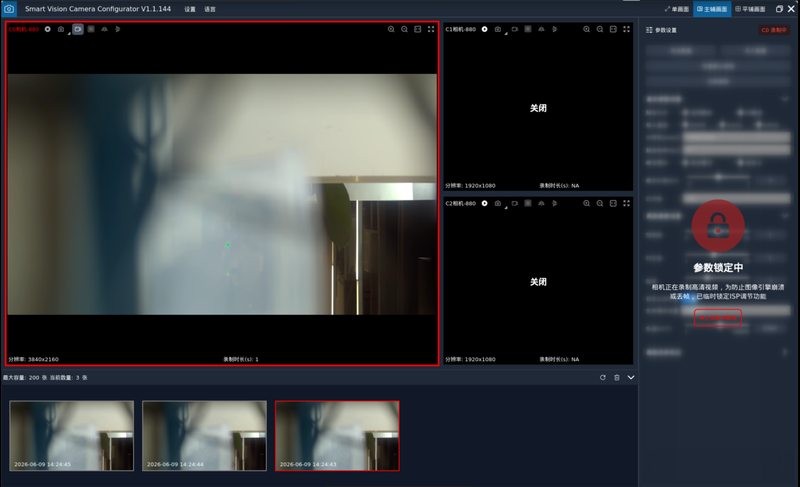
Click the Record Button to start/stop video recording. Recorded videos will be saved to the path specified in Recording Settings.
After starting video recording, the camera bottom status bar will display the current elapsed recording time (unit: seconds).
Interface shown below:

💡Tip
After starting recording, the current camera's mouse control functions, other toolbar buttons, and parameter settings panel will be disabled until recording ends.
(3) IO Trigger
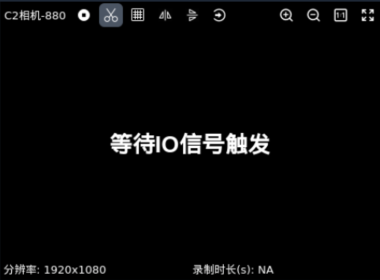
In IO trigger mode, the view will continuously wait for IO signal input. The camera view is only displayed when an IO signal is received.
The toolbar will show the hidden IO Auto Capture Button and Simulate IO Input Button, while hiding capture and recording-related buttons.
Interface shown below:
(4) Grid Lines
Displays a 10x10 grid overlay on the corresponding camera view.
Interface shown below:
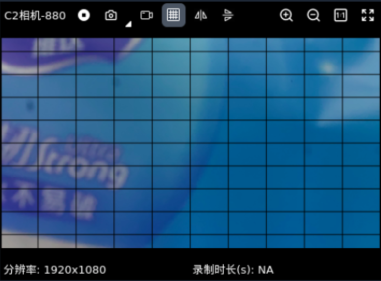
(5) Mirror Flip
Horizontal Mirror Button and Vertical Mirror Button can both be applied simultaneously to the image.
Interface shown below:
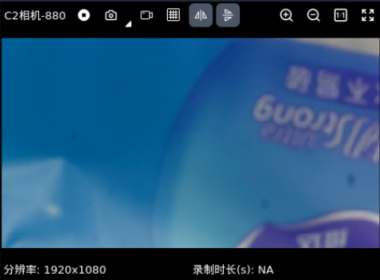
(6) Image Pan and Zoom
| Function | Detailed Description |
|---|---|
| Left-Click Drag | Pan image |
| Mouse Scroll Wheel | Zoom in/out (same effect as Zoom In/Out buttons) |
| Right-Click | Restore image to default size (same effect as Reset button) |
Interface shown below:
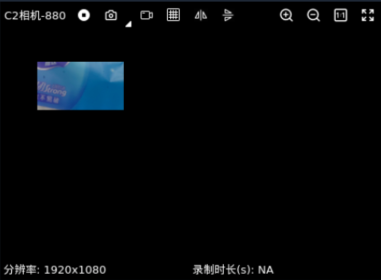
(7) Fullscreen Display
Hides the right toolbar and other camera windows, filling the entire interface with the corresponding camera window.
Interface shown below:
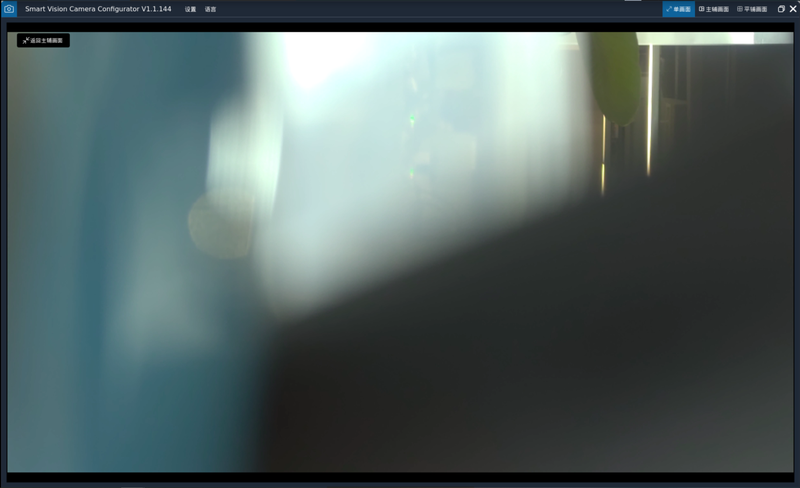
Click the Back button at the top left to exit fullscreen and return to the previous layout.

Snapshot Panel
The Snapshot Panel displays the history snapshots of the currently selected camera.
Clicking the corresponding camera's Capture Button adds the latest captured image to the left side of the panel.
Currently, the maximum capture count per camera is 200 images.
| Icon | Function | Detailed Description |
|---|---|---|
 | Refresh Button | Refresh the history snapshot list of the currently selected camera |
 | Delete Button | Delete the history snapshot list of the currently selected camera |
 | Drawer Button | Press to hide the snapshot panel, press again to show |

| Function | Detailed Description |
|---|---|
| Left-Click Drag | Scroll left/right |
| Mouse Scroll Wheel | Scroll left/right |
| Click Image | Highlight the corresponding image with an outer red border |
| Double-Click Image | Display the image in fullscreen; click again to restore |

Properties Panel
Parameter Settings
Parameter settings only apply to the currently selected camera. The parameter panel displays the currently selected camera's information.
| Camera State | Panel State |
|---|---|
| Stopped | Closed |
| Playing | Active |
| Recording | Recording |

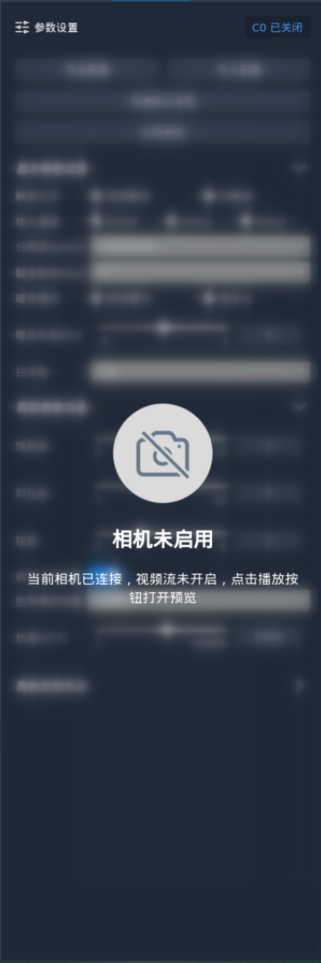
When the camera is stopped, the parameter settings panel is disabled with a mask overlay.
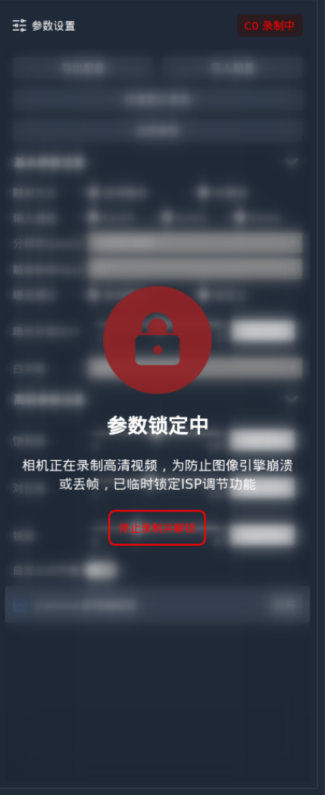
When the camera is recording, the parameter settings panel is disabled with a mask overlay.
Click the Stop Recording and Unlock button on the mask to automatically stop video recording and unlock the parameter settings panel.
| Function | Detailed Description |
|---|---|
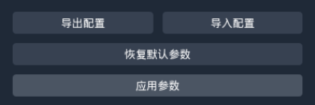
| Export Config Button | Export the selected camera's parameters as a JSON file to a specified path |
| Import Config Button | Import camera parameters from a JSON file into the platform |
| Restore Default Button | Restore the selected camera to default configuration |
| Apply Parameters Button | Apply the current parameter configuration to the selected camera |
💡Tip
Click-type toggle switches take effect immediately.
For most other functions, you need to click the Apply Parameters Button to take effect.
Basic Parameter Settings
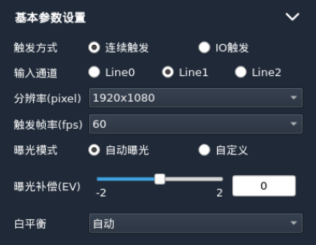
Basic parameters shown below:
| Function | Detailed Description |
|---|---|
| Trigger Mode | Continuous Trigger / IO Trigger |
| Input Channel | Channel receiving input signal in IO trigger mode |

| Function | Detailed Description |
|---|---|
| Resolution | Varies by camera |
| Trigger Frame Rate | Varies by camera |

Exposure Mode
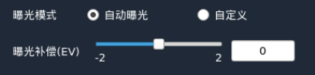
(1) Auto Exposure Mode
| Function | Detailed Description |
|---|---|
| Exposure Compensation (EV) | Range: -2 ~ 2 (varies by camera) |
(2) Custom Exposure Mode
| Function | Detailed Description |
|---|---|
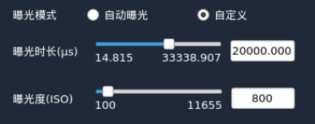
| Exposure Time (μs) | Range: 14.815 ~ 3338.907 (varies by camera) |
| ISO | Range: 100 ~ 3200 (varies by camera) |
| Function | Detailed Description |
|---|---|
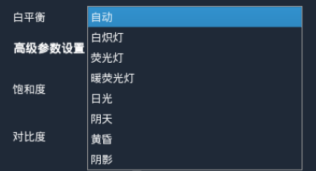
| White Balance | Auto / Incandescent / Fluorescent / Warm Fluorescent / Daylight / Cloudy / Dusk / Shade |
Advanced Parameter Settings
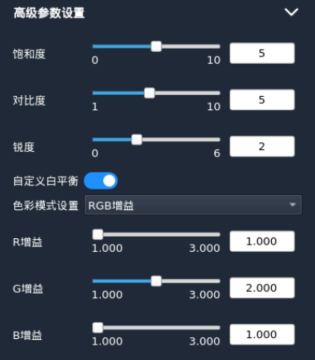
Advanced parameters shown below:
| Function | Detailed Description |
|---|---|
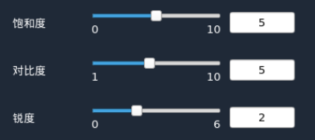
| Saturation | Range: 0 ~ 10 (varies by camera) |
| Contrast | Range: 1 ~ 10 (varies by camera) |
| Sharpness | Range: 0 ~ 6 (varies by camera) |
Custom White Balance
💡Tip
The Custom White Balance function in Advanced Parameters conflicts with White Balance in Basic Parameters.
Enabling Custom White Balance will automatically disable the White Balance dropdown in Basic Parameters.
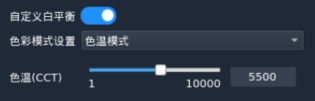
Color Mode Settings
| Function | Detailed Description |
|---|---|
| Color Temperature (CCT) | Range: 1 ~ 10000 (varies by camera) |
| Function | Detailed Description |
|---|---|
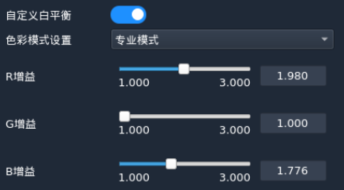
| R Gain | Range: 1.000 ~ 3.000 (varies by camera) |
| G Gain | Range: 1.000 ~ 3.000 (varies by camera) |
| B Gain | Range: 1.000 ~ 3.000 (varies by camera) |
| Function | Detailed Description |
|---|---|
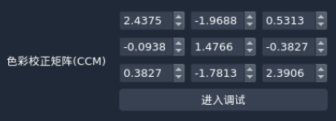
| CCM Color Matrix | Range: -5.0000 ~ 5.00000 |
CCM Color Matrix Calibration
Click the Enter Calibration button next to CCM Color Matrix in the parameter panel to switch to the CCM Color Matrix Calibration interface.
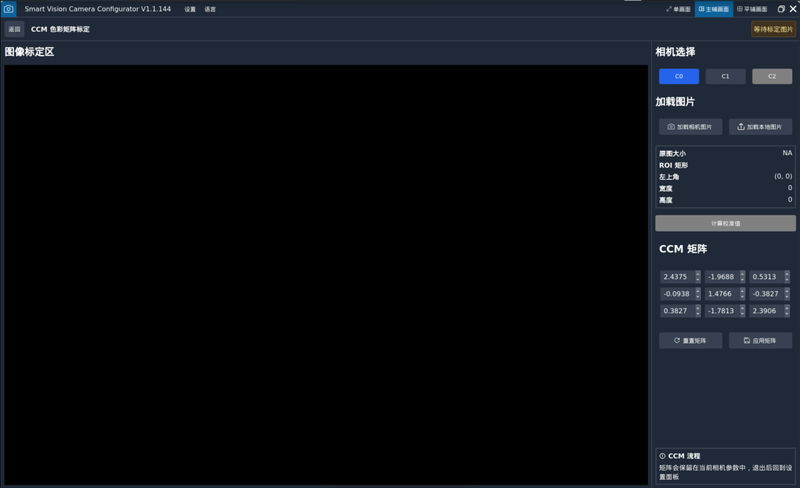
(1) Camera Selection
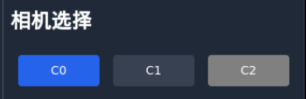
Switch the currently selected camera. The calibration camera will switch to the currently selected camera.
💡Tip
Only cameras that are playing can be switched. Non-switchable camera buttons have a gray background.
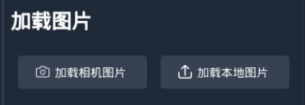
(2) Load Image
| Function | Detailed Description |
|---|---|
| Load Camera Image | Capture a single image from the selected camera to the image calibration area |
| Load Local Image | Load a single image from local storage to the image calibration area |
(3) Image Calibration Area
| Function | Detailed Description |
|---|---|
| Drag outside the rectangle | Draw a blue rectangle on the calibration area image |
| Drag inside the rectangle | Redraw the blue rectangle on the calibration area image |
| Drag rectangle boundary points | Adjust rectangle size via 8 boundary points |
| Right-click | Delete the drawn rectangle |
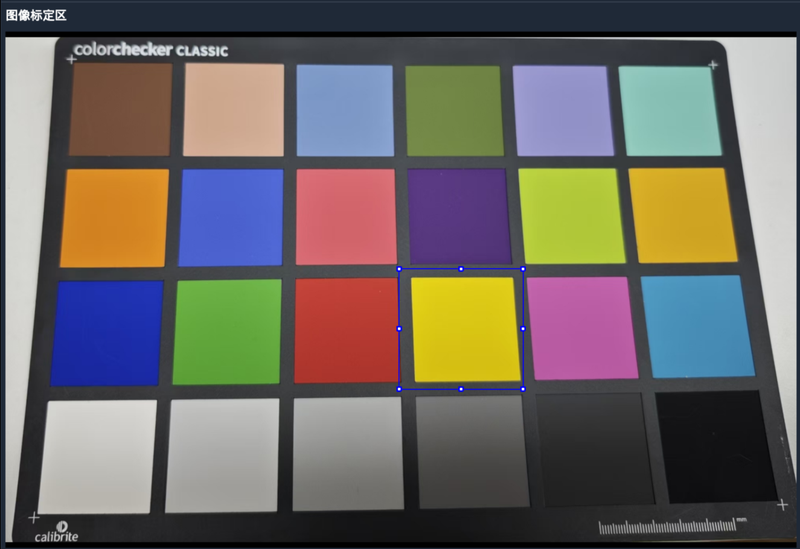
The right panel displays the current image size and current rectangle coordinate information.
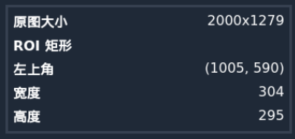
(4) CCM Matrix
Displays the current camera's 3x3 CCM color matrix.
Range: -5.0000 ~ 5.00000
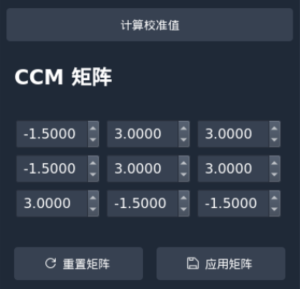
| Function | Detailed Description |
|---|---|
| Reset Matrix Button | Reload the camera's current CCM color matrix parameters |
| Apply Matrix Button | Apply the current CCM color matrix parameters to the camera |
| Calculate Calibration Button | Calculate CCM color matrix calibration values based on the image and rectangle coordinates |
Advanced Color Calibration
Gamma Curve Editor
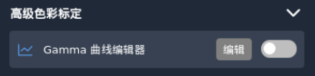
Click the Toggle switch to enable/disable the Gamma function in real time.
Click the Edit button to enter fullscreen for the currently selected camera and pop up the Gamma Curve Editor floating window.
Mouse over the title bar area to left-click drag the entire floating window.
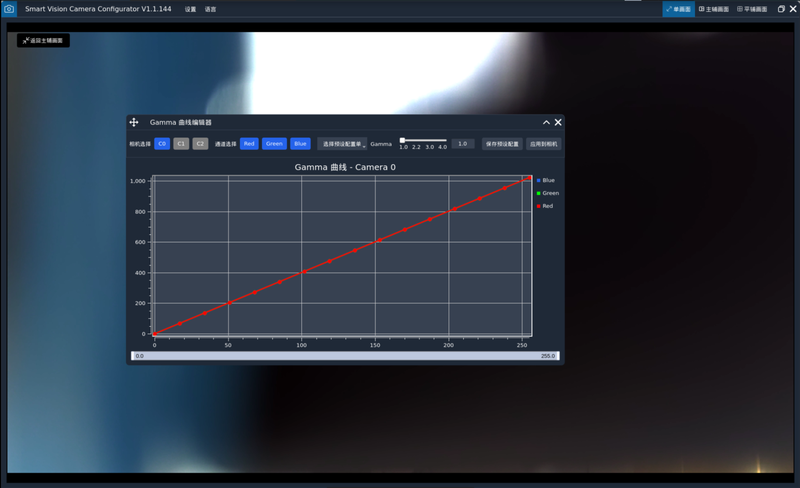
| Icon | Function | Detailed Description |
|---|---|---|
| Drawer Button | Press to hide the snapshot panel, press again to show |
 | Close Button | Close the floating window |

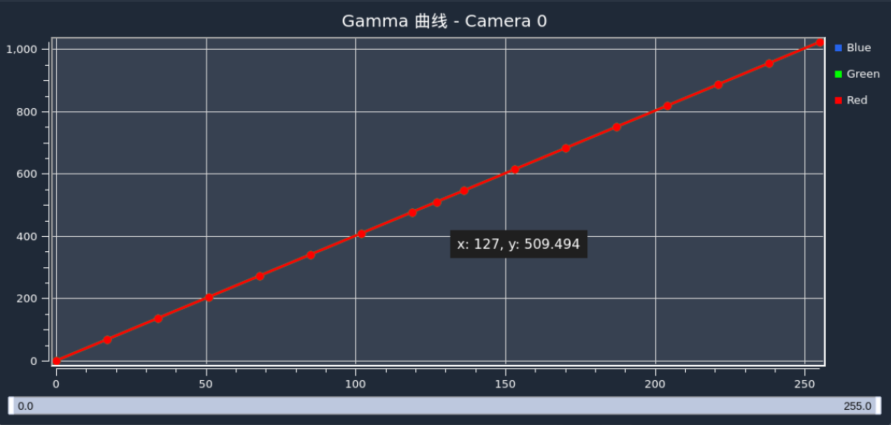
(1) Curve Chart
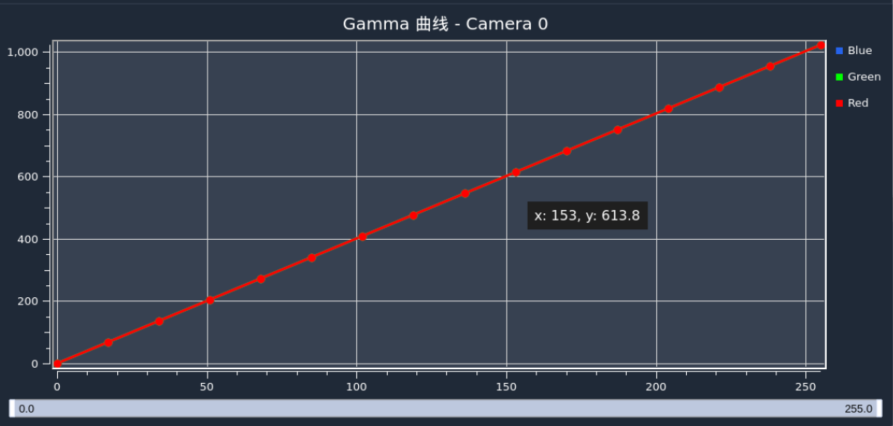
The Gamma curve includes "Red", "Green", and "Blue" curves by default.
Each curve contains 256 points, with only 16 highlighted by default.
X-axis range: 0 - 255
Y-axis range: 0 - 1023
Hovering over highlighted points on the curve displays the current point's coordinates.
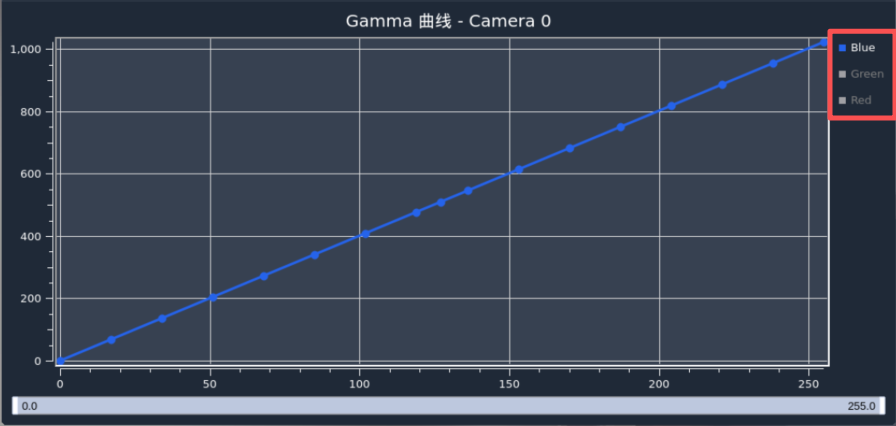
Click the curve legend on the right to toggle the visibility of the corresponding curve.
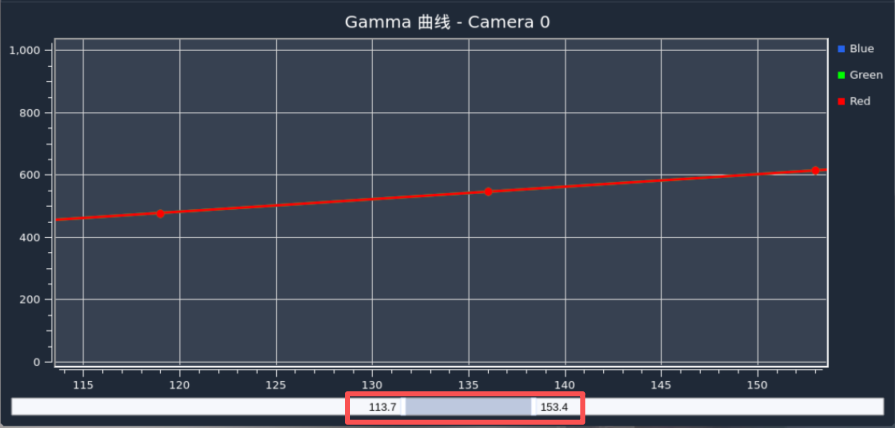
Bottom Slider
Slider range = chart X-axis view range
| Function | Detailed Description |
|---|---|
| Drag slider | Move X-axis view |
| Mouse scroll wheel | Move X-axis view |
| Right-click | Restore X-axis default range and view (0 - 255) |
| Drag slider left/right edges | Modify chart X-axis range |
| Function | Detailed Description |
|---|---|
| Drag highlighted point | Modify highlighted point Y-axis value |
| Double-click curve | Highlight the point at that position on the curve |
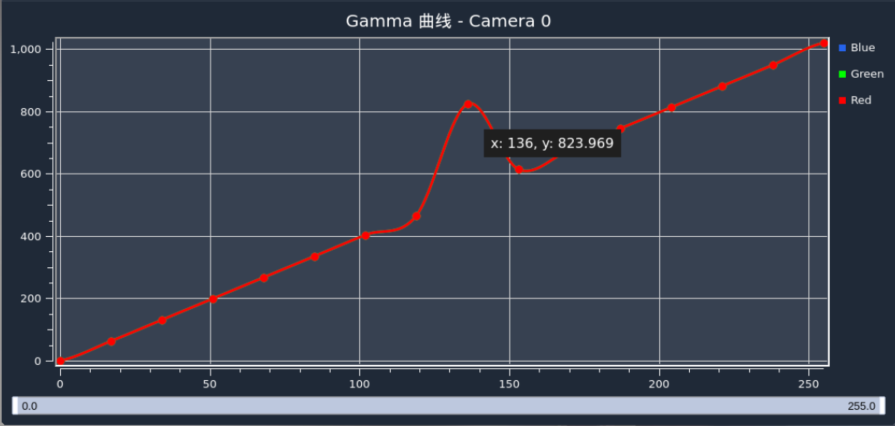
(2) Toolbar
Camera Selection
Switch to the Gamma curve data of the specified camera.
💡Tip
Only cameras that are playing can be switched. Non-switchable camera buttons have a gray background.

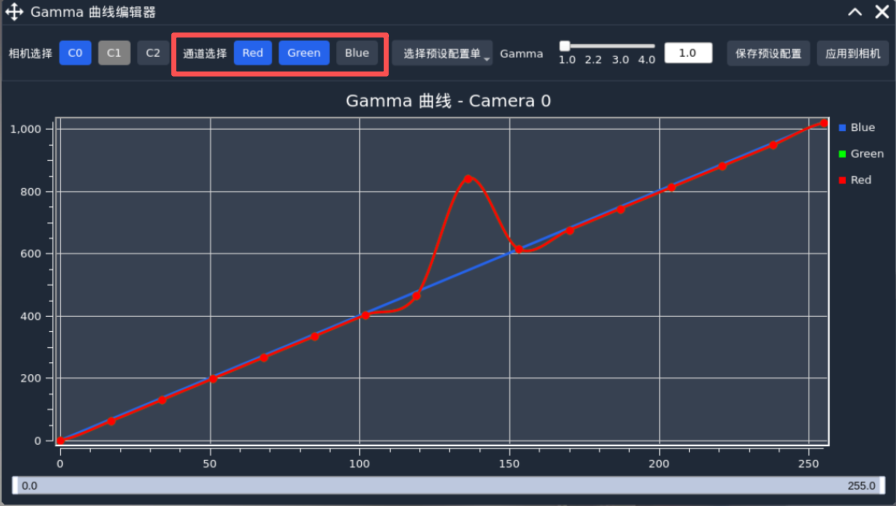
Channel Selection
Select which curves to control simultaneously.
As shown below, pressing the "Red" and "Green" channel buttons while releasing the "Blue" channel button:
Moving a highlighted point on the curve will move both selected curves simultaneously, while the "Blue" curve stays in place.
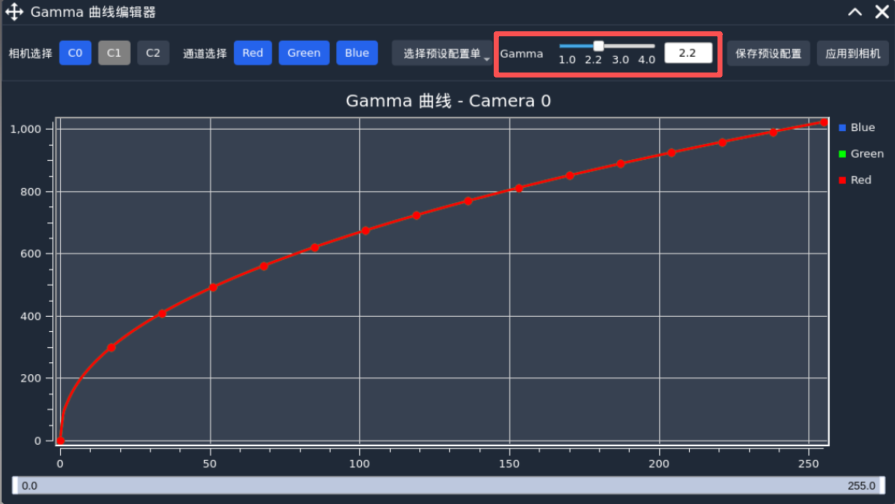
Gamma Preset Slider
Select a preset Gamma value curve.
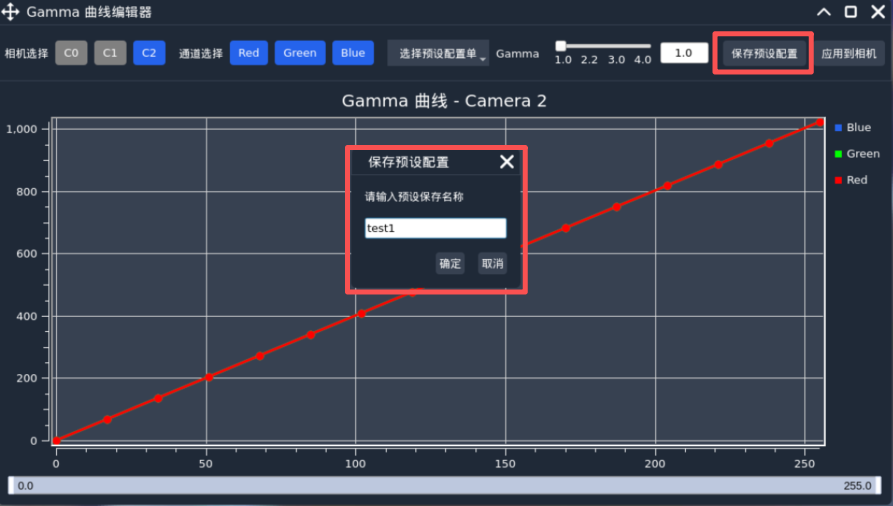
Save Preset Configuration
Click the button to bring up an input field. Enter a name for the preset configuration to save the current curve data.
Select Preset Profile
Click the button to bring up the My Presets menu, showing previously saved preset configurations.
| Icon | Function | Detailed Description |
|---|---|---|
| \ | Preset Name | Apply the selected preset to the chart |
| Delete Button | Delete the selected preset |

Apply to Camera
Apply the current curve data to the camera.
