Ubuntu System Installation
Notice
Flashing will format the system. Please back up your data in advance.
Flashing Tool Installation
Developers need to pre-install the necessary software on a local Windows computer before using the Rhino Pi. The software is as follows:
- USB driver: USB_Driver_qud.win.1.1_installer_10061.1.zip
- System flashing tool: QPST_2.7.496.zip
- ADB tool: platform-tools.zip
Software download link: Software Tool Installation Package Download Link
USB Driver Installation
Extract the
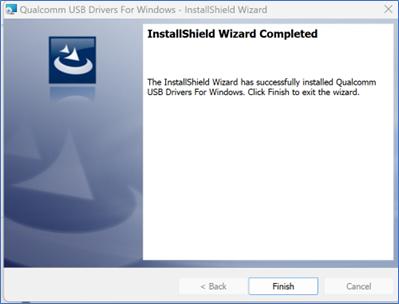
USB_Driver_qud.win.1.1_installer_10061.1.zipfile.After extraction, double-click the
setup.exeprogram and wait for theQualcomm USB Driversinstallation interface to appear. Follow the prompts and clicknextto complete the installation.
System Flashing Tool Installation
Extract the
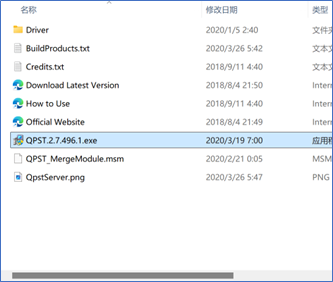
QPST_2.7.496.zipfile to the current folder.Navigate to the extracted
QPST_2.7.496directory and double-click theQPST.2.7.496.1.exeprogram to start the installation.
Follow the prompts and click
nextcontinuously to complete the installation.Default installation path after completion:
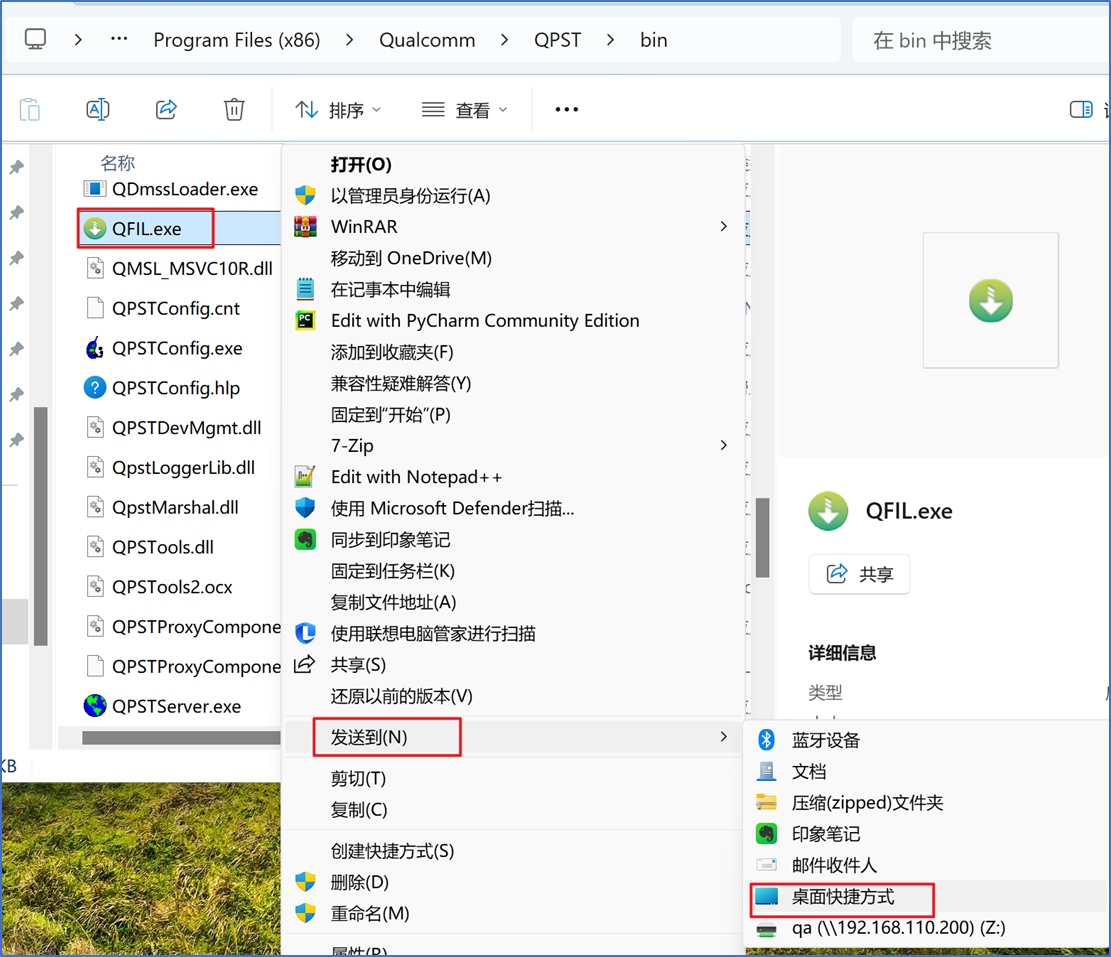
C:\Program Files (x86)\Qualcomm\QPST\bin.You can navigate to this directory and send the
QFIL.exeprogram to the desktop.
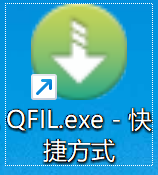
- The desktop icon is as follows.
ADB Tool Installation
- Unzip
- Extract the
platform-tools.zipfile to the D drive.
- Configure ADB Environment Variables
- Copy the path of the extracted
platform-toolsfolder.
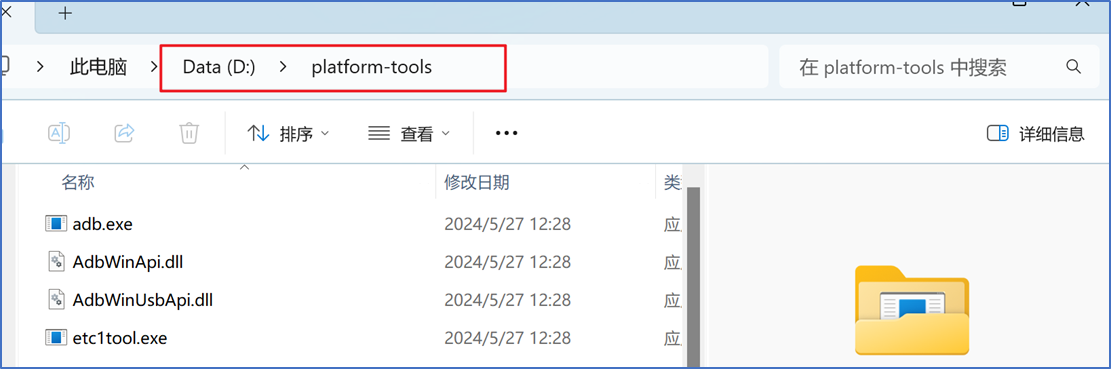
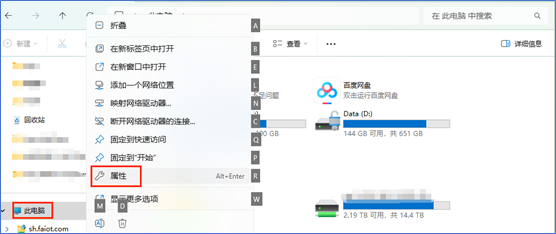
- Right-click "This PC" and select "Properties".
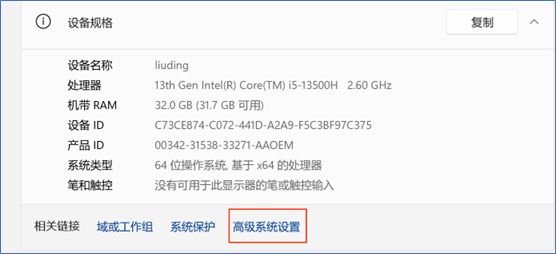
- In the pop-up settings window, click "Advanced system settings".
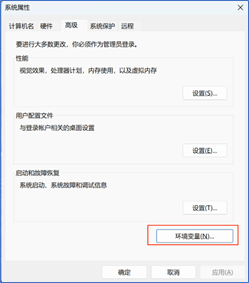
- In the Advanced tab of the pop-up System Properties window, click "Environment Variables".
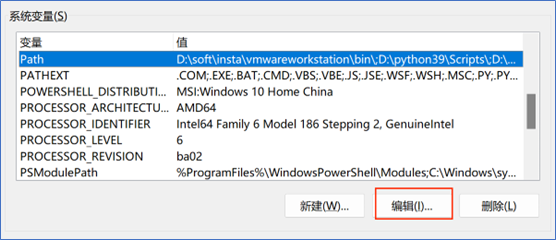
- In the pop-up Environment Variables window, select the Path variable in the "System variables" section and click "Edit" below.
- In the pop-up Edit Environment Variable window, click "New" and add the previously copied platform-tools path.
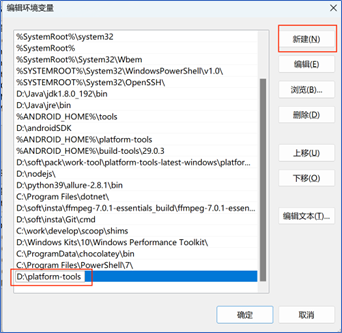
- Click "OK" in sequence to save the variable settings and exit.
- Verify if the ADB Environment Configuration is Available
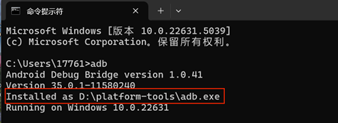
- Open the
cmdwindow and enteradb. No error is reported.
Ubuntu System Installation
Switch to Flashing Mode
After the device boots, use a USB TYPE-A to TYPE-C cable to connect the computer and the device. Connect the TYPE-A end to the computer USB port and the TYPE-C end to the device.
After connecting, on the Windows computer, press WIN+R and enter
cmdin the opened window. Runadb devicesin the window, which will list the connected devices. If nothing appears, wait a while longer, or unplug and replug the Type-C cable and run the command again.
adb devices
- Switch to flashing mode by running
adb shell reboot edl.
adb shell reboot edl
Configure the Configuration Items of QFIL
- Open QFIL and click Configuration - FireHose Configuration at the top.
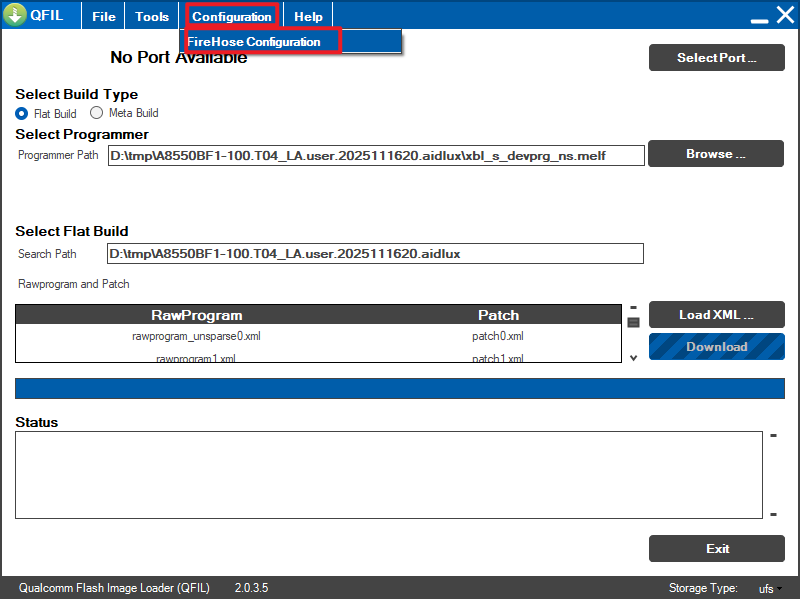
- In the popup Download Configuration window, make the following settings:
Download Protocol: select 0-Sahara
Device Type: select ufs
Check the Reset After Download option
Keep all other options consistent with the screenshot below.
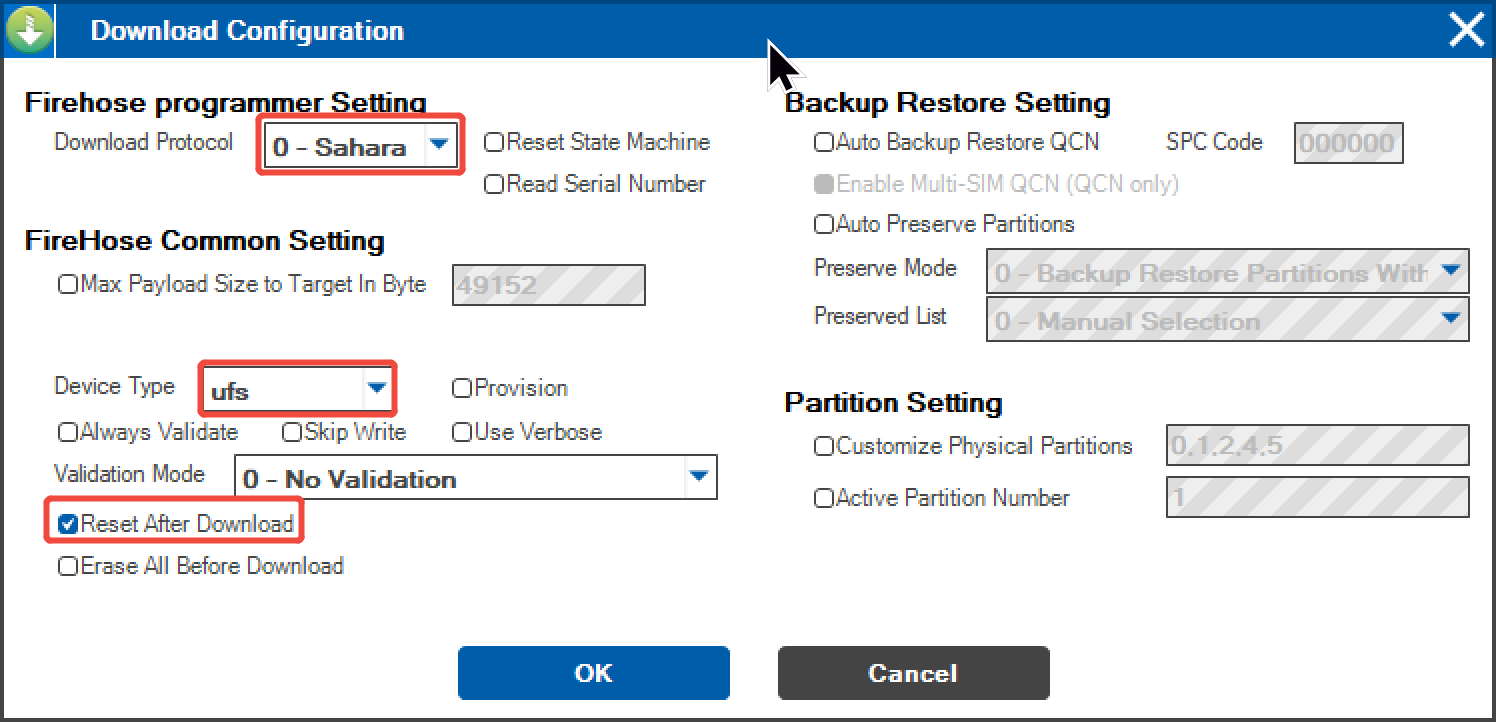
- After configuration, click OK to save.
Select the Flashing Port
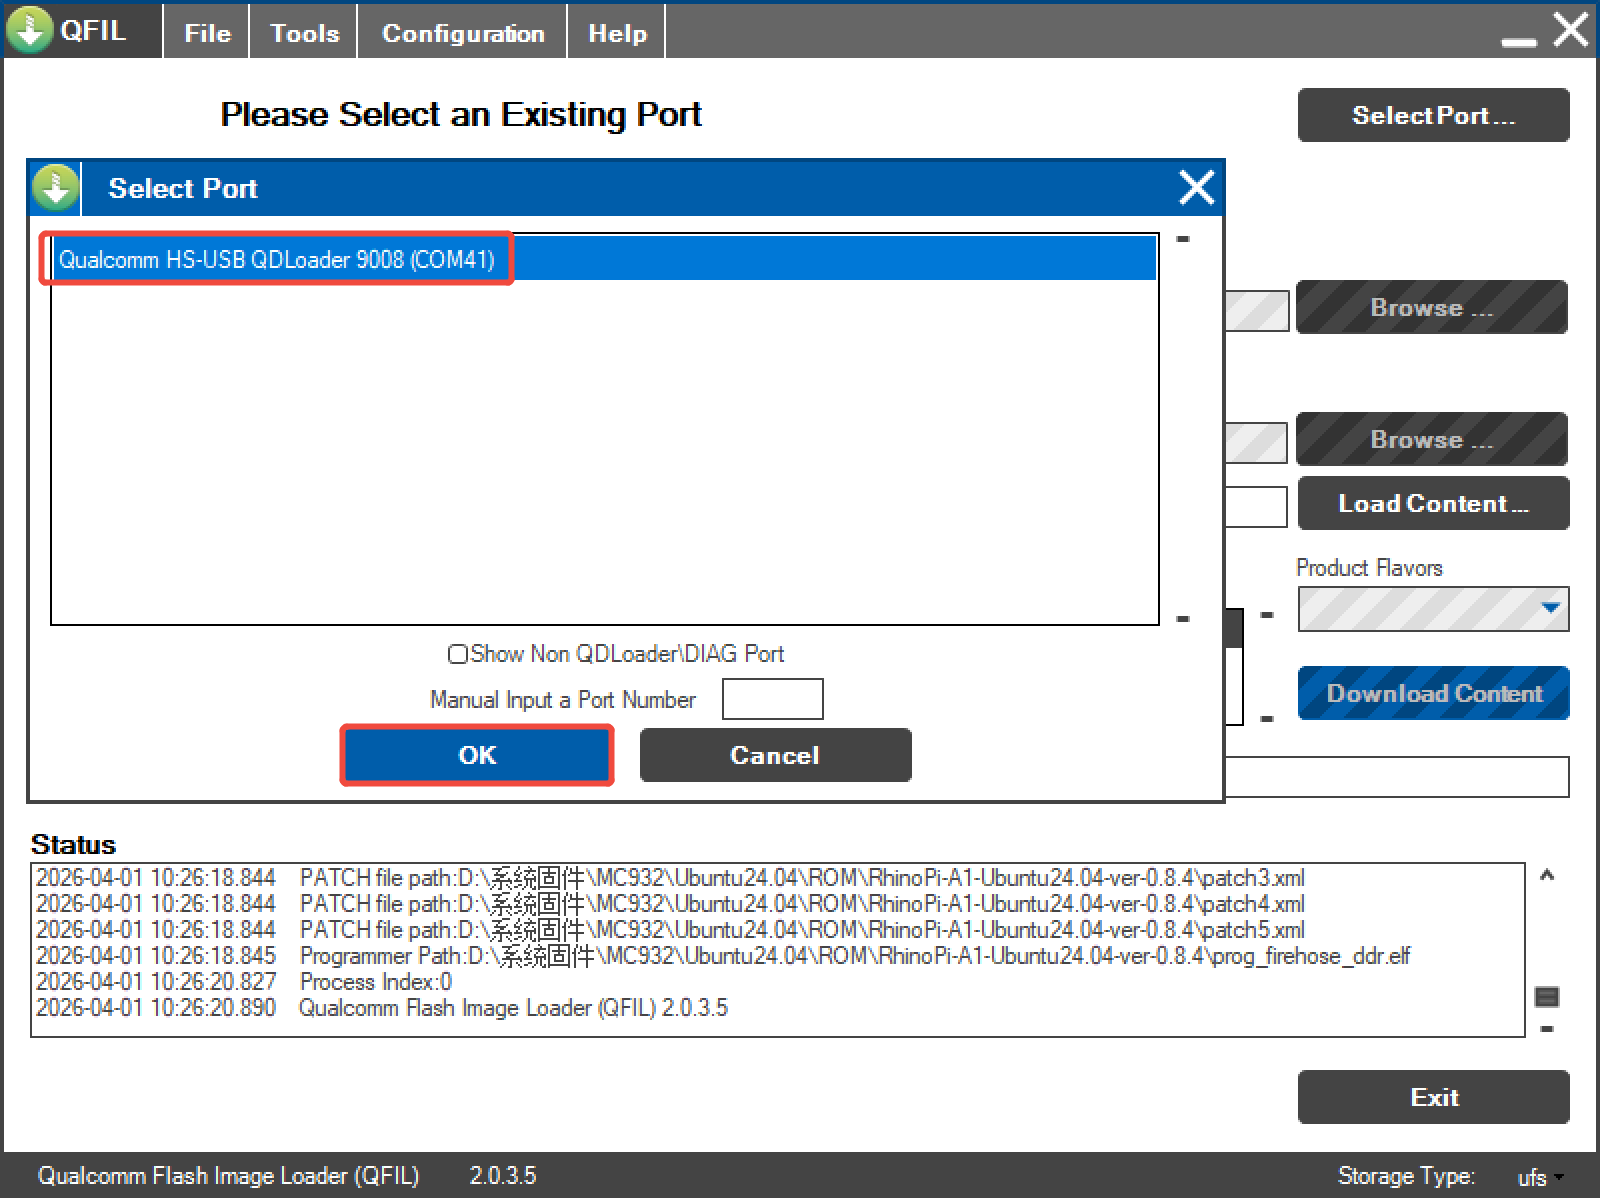
Click the
Select Portoption. In the popup window, select the9008port that appears and clickOK.After switching to flashing mode as described in Switch to Flashing Mode, the 9008 port should appear automatically in this window. If it does not appear, power off and restart, then switch again and wait for it to appear.
Select the Build Type
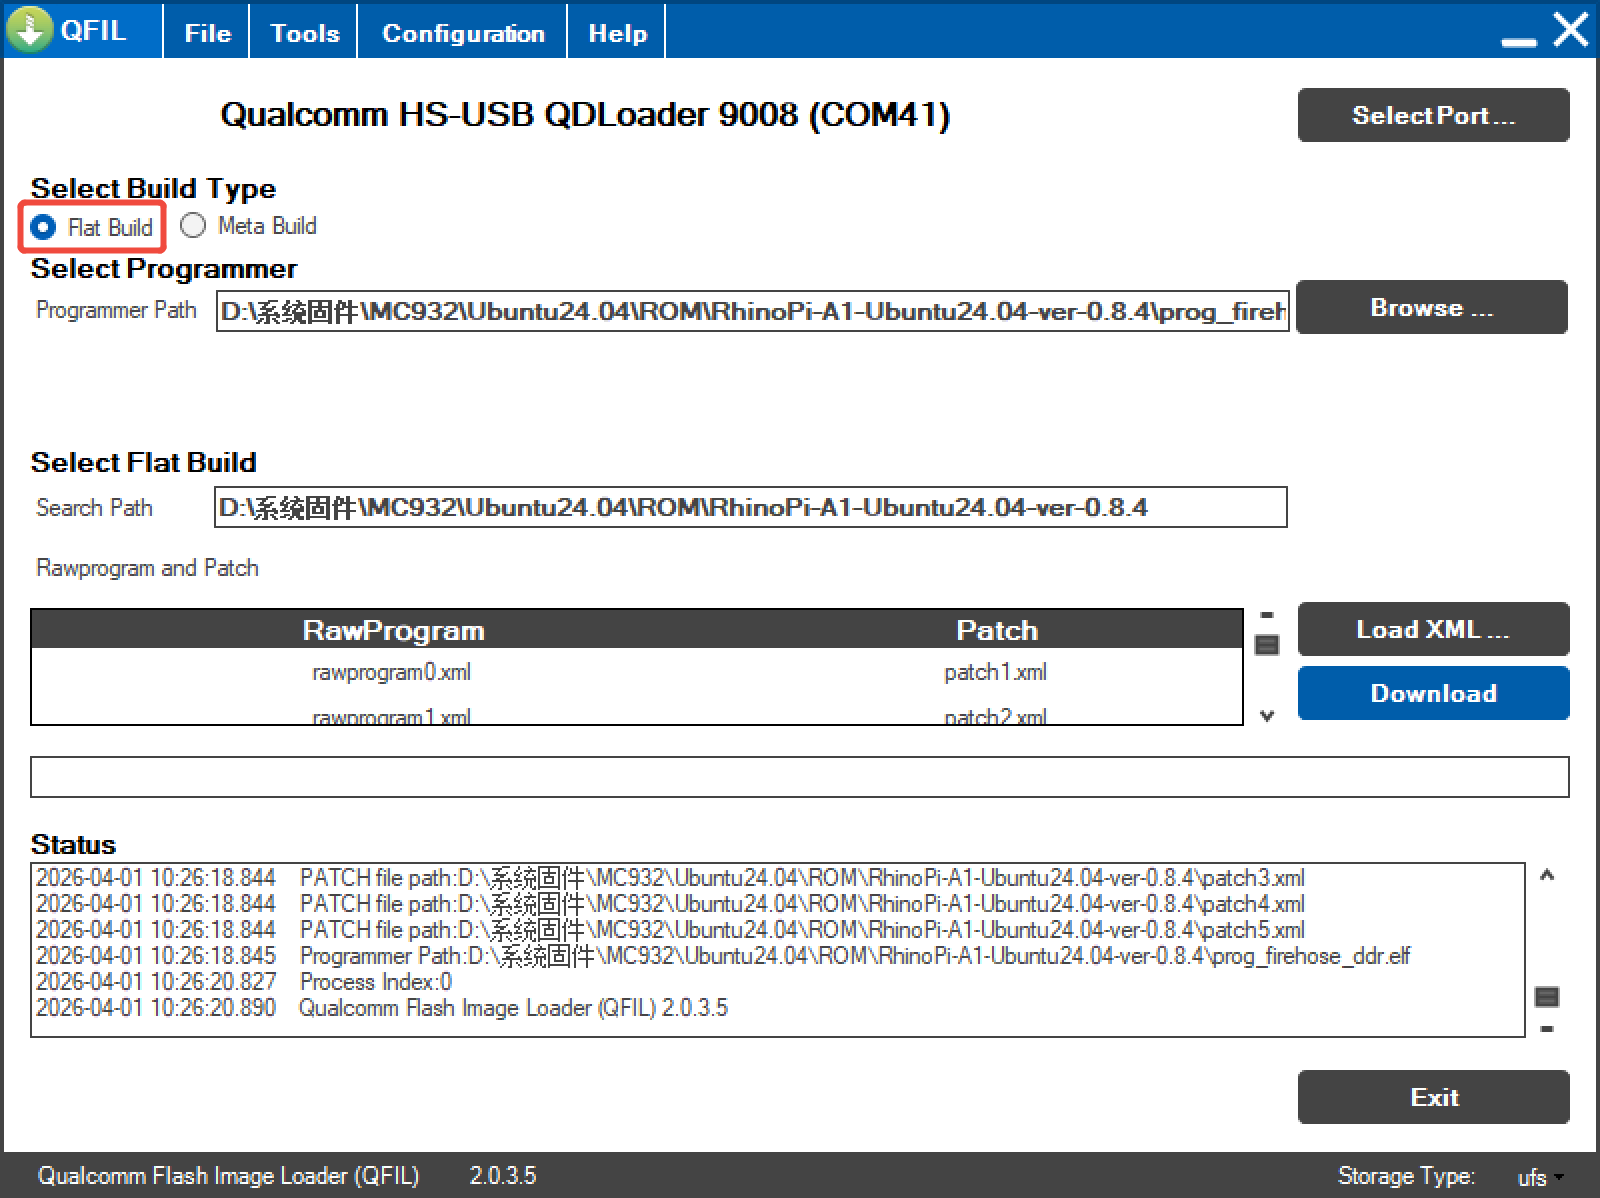
- Find the
Select Build Typeitem and selectFlat Build.
Select the Flashing File
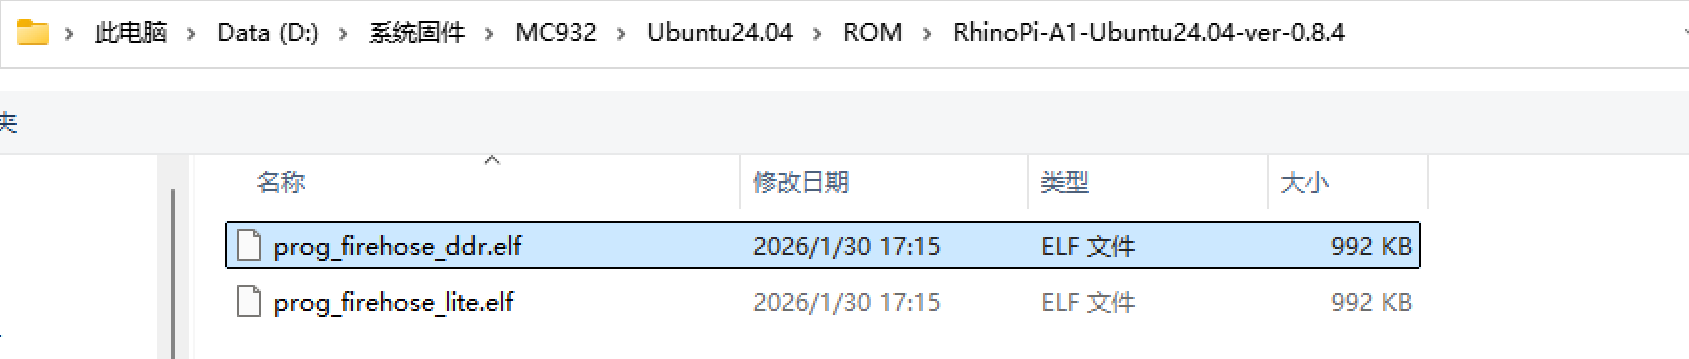
- Unzip the ROM file. Take installing version
RhinoPi-A1-Ubuntu24.04-ver-0.8.4as an example. - Find the
Select Programmeritem, clickBrowse...afterProgrammer Path, navigate to the unzip path, and select the unzipped ROM file. - Select the
prog_firehose_ddr.elffile and clickOpen.
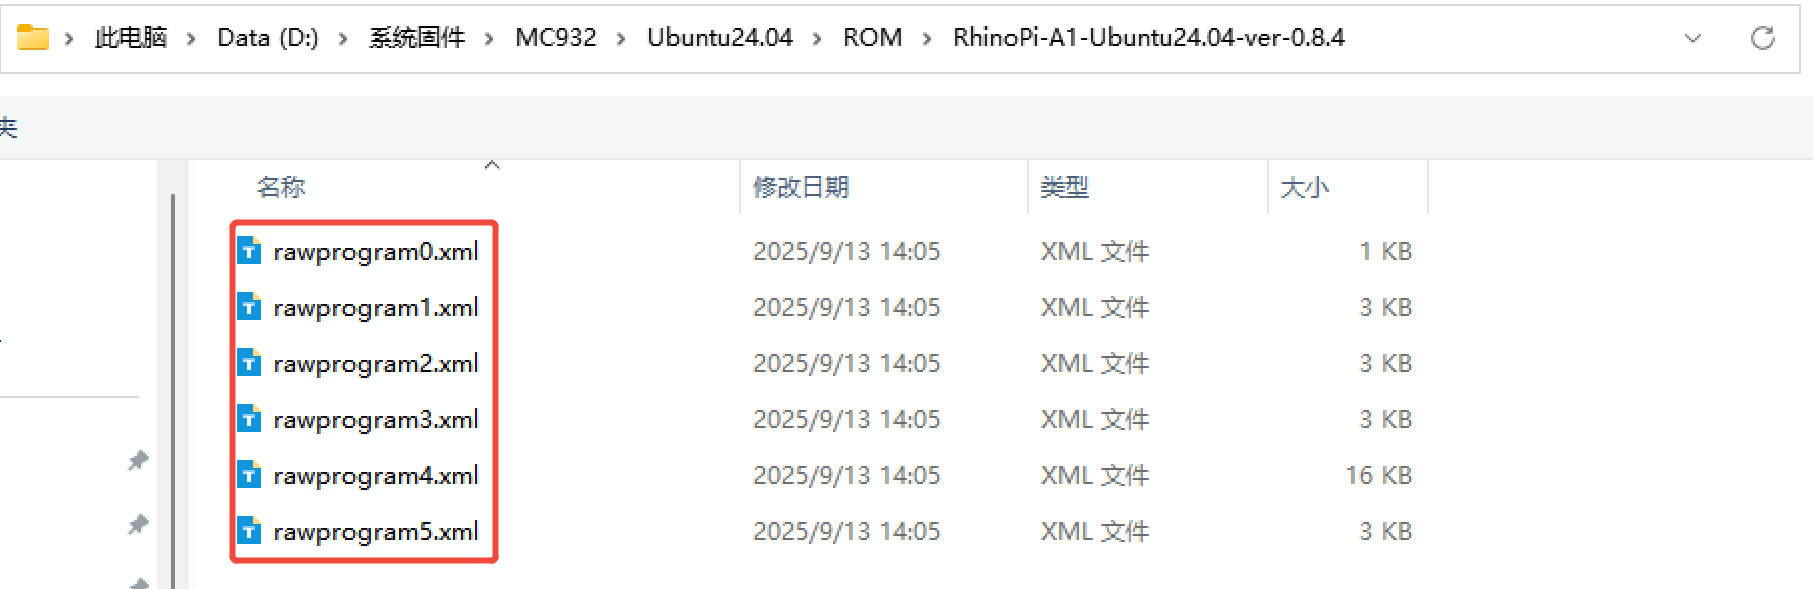
Select the Flashing XML File
- Find the
Select Flat Builditem, clickLoad XML...below it, and select the flashing XML file. - In the popup window, select all files and click
Open. - Another window will automatically pop up. Select all files and click
Open.
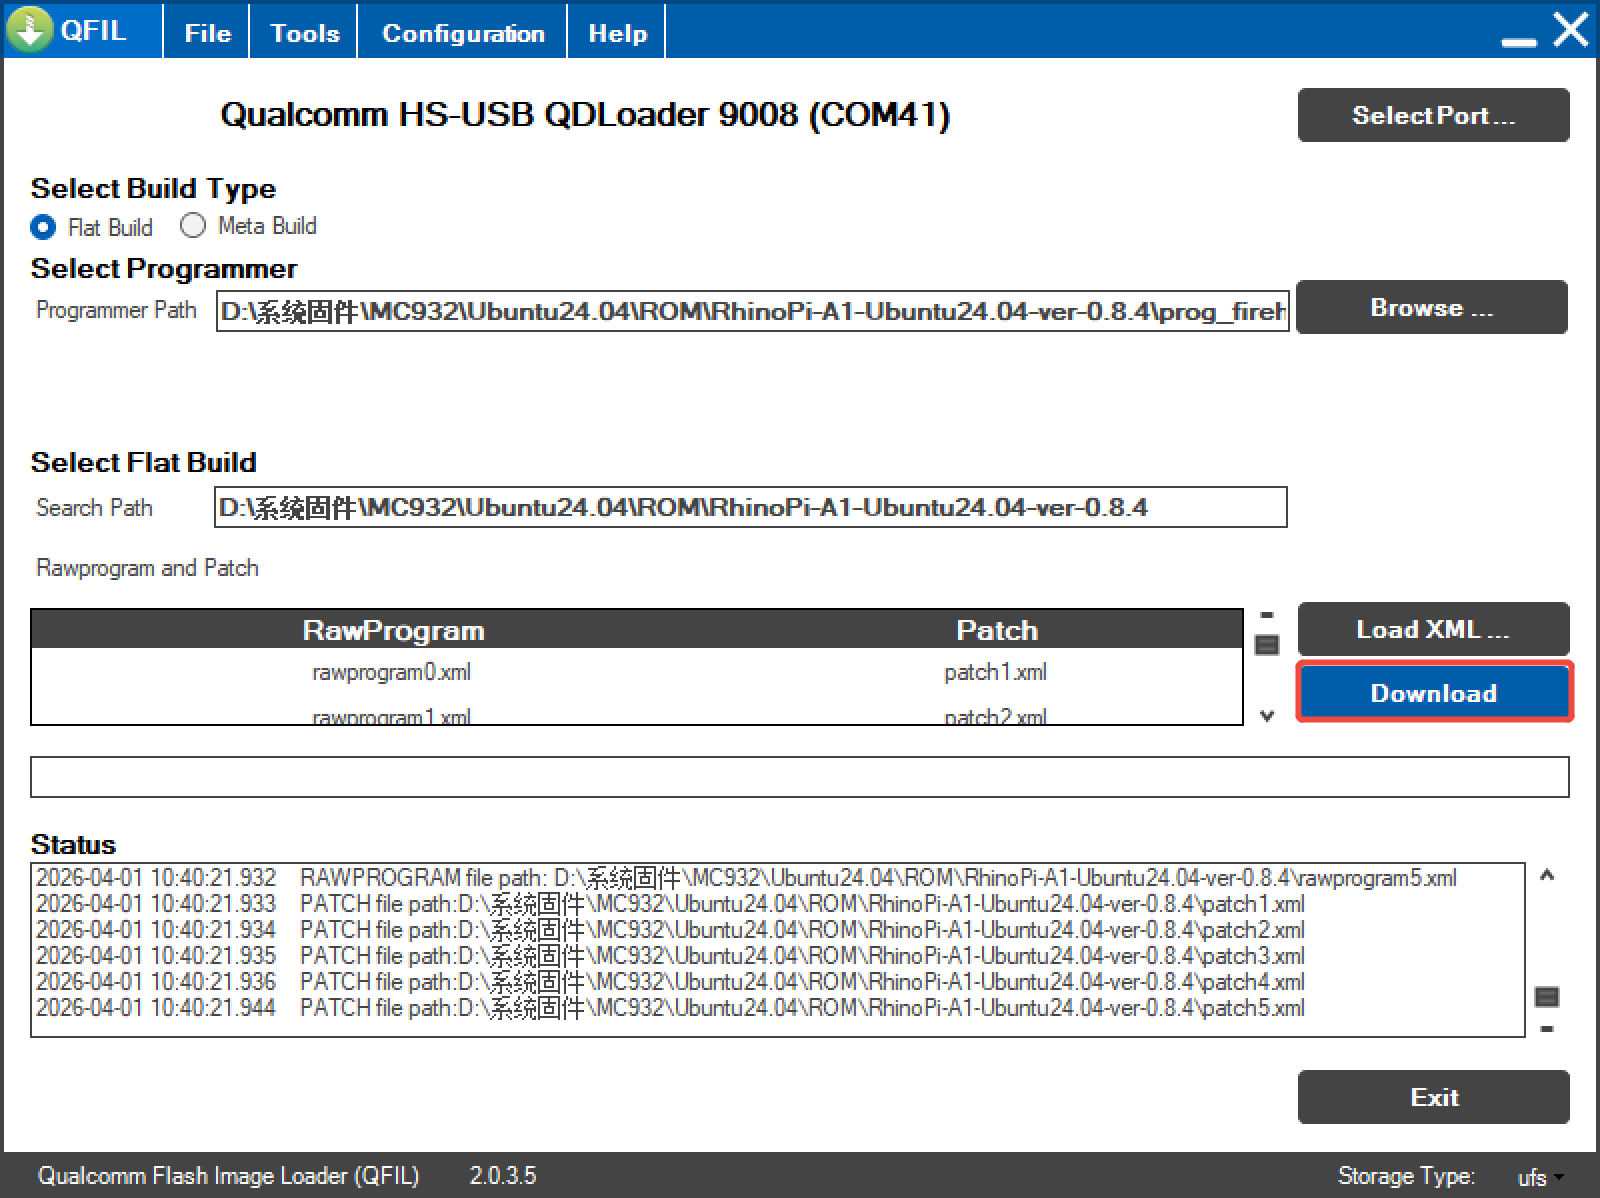
Start Flashing
- After all the above options are selected, click
Downloadto start flashing.
- After about 5 minutes,
successfulwill appear indicating that the flashing is complete. If the flashing fails, please contact Aijiaxi after-sales support.
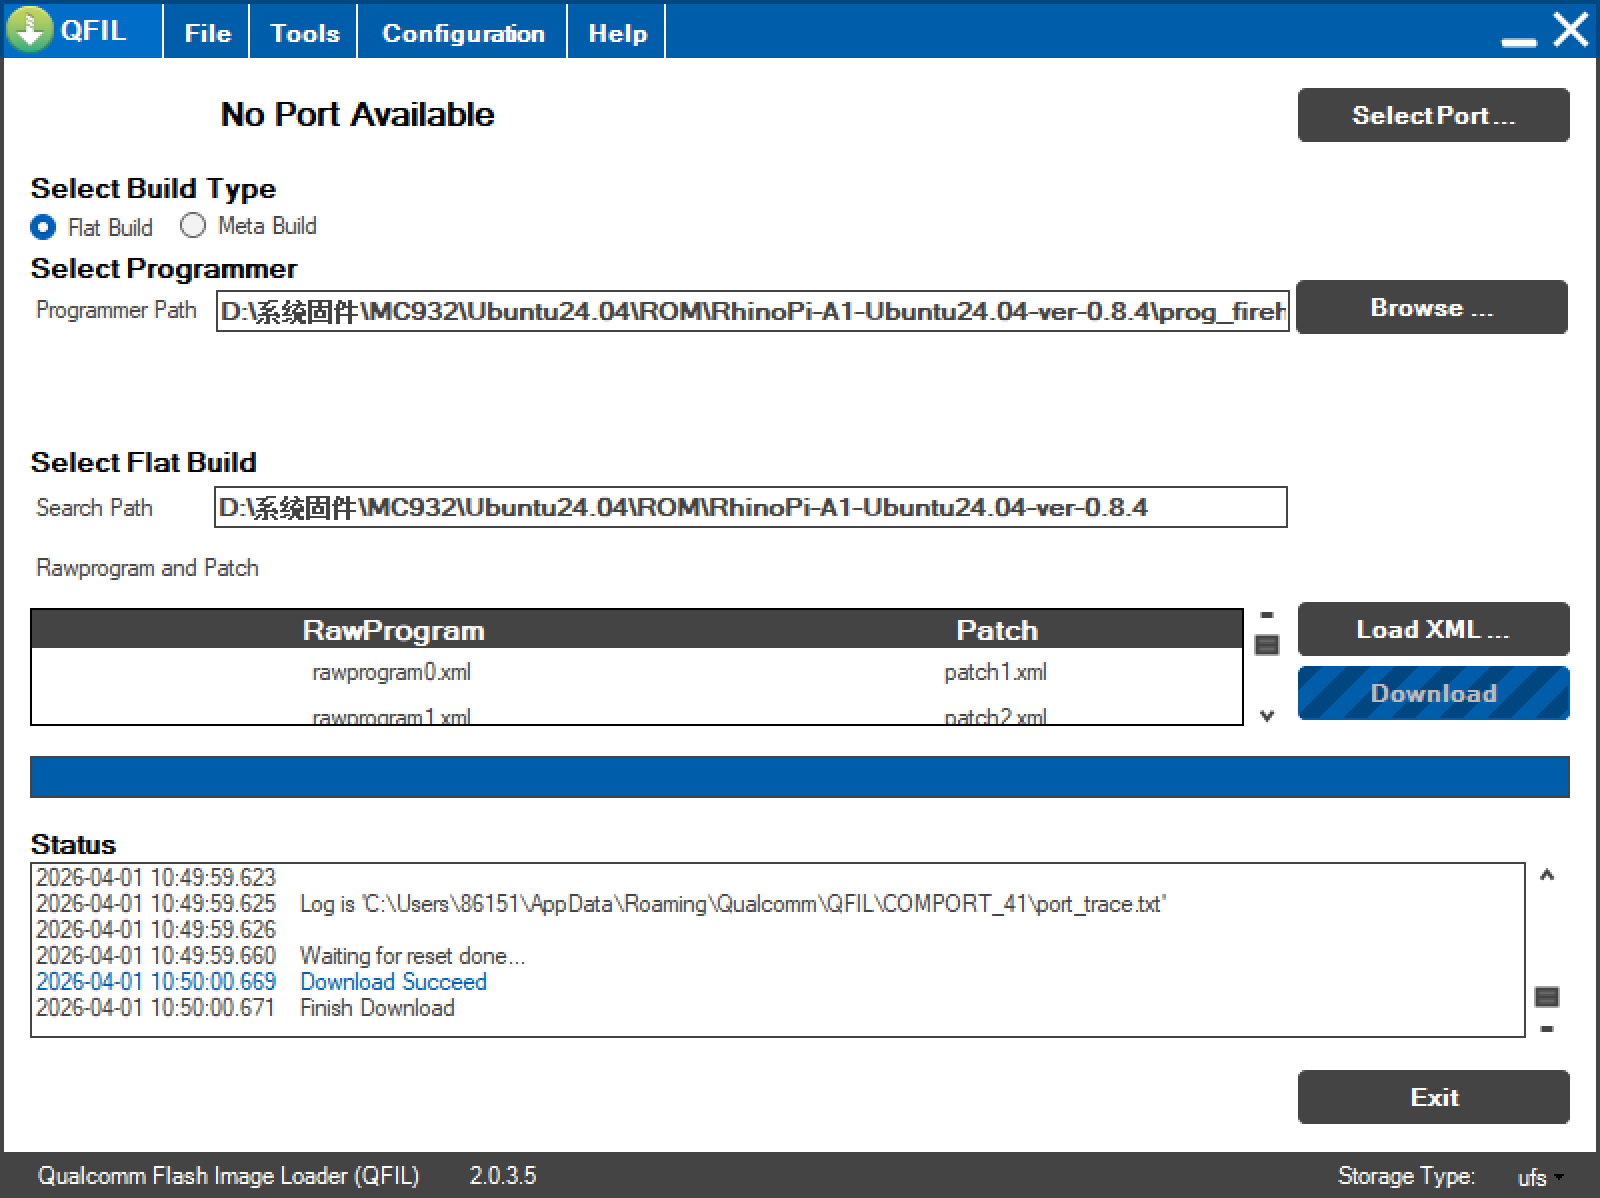
- After the flashing is complete, the system will reboot automatically.