Getting Started
Unboxing
Accessories List
| Accessory Name | Quantity | Description |
|---|---|---|
| Smart Camera Unit | 1 | Included at factory |
| Camera Mounting Bracket | 1 | Included at factory, detachable |
| Gigabit Ethernet Cable | 1 | Not included at factory |
| Network Port Adapter Cable | 1 | Included at factory |
| 12V DC Power Adapter | 1 | Not included at factory, purchase separately (recommended 12V~3A power adapter) |
Power Supply
Device Installation
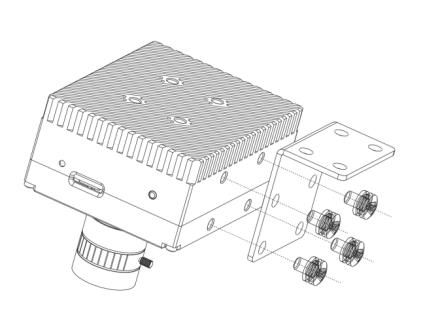
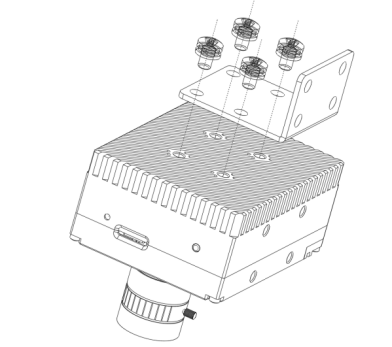
Install the device onto the mounting bracket using 4 × M4 × 8 screws, then attach the mounting bracket to other structural components using 4 × M4 × 8 screws. There are two installation methods, which can be selected based on actual requirements.
As shown in Fig - Side Installation and Fig - Back Installation:
Device Connection
After installing the device, connect it to other peripherals for the initial device configuration. The connection topology is shown below:
Method 1 (Recommended), connect the camera via Ethernet cable:
Connect the camera device and PC directly via an Ethernet cable. Set the PC's IP address to 192.168.1.254. After the camera device powers on and starts up, enter the URL: http://192.168.1.123:58200/ in the PC browser to access the camera management system. The default username is sve and the default password is sve.
※ The camera's factory default IP is 192.168.1.123
※ PCs running Windows, macOS, or Ubuntu are all supported
Method 2, operate the camera directly:
Power on the camera device, connect an HDMI monitor, USB keyboard, and mouse. Once the device starts up and enters the AidLux desktop system, you will see the following interface: 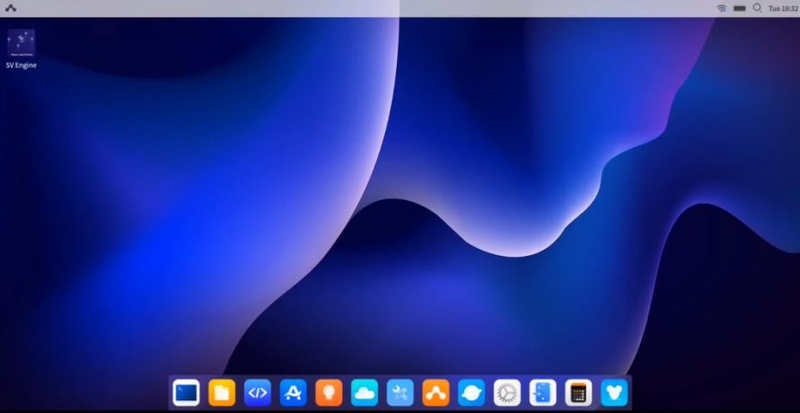
Click the 【SV Engine】 shortcut on the desktop, enter the username sve and password sve to log into the camera management interface.
Flashing
TBD.
Configuration
Initial Login
Steps
After connecting the smart camera to power, the device starts automatically. The power indicator turns solid red, indicating the device has started normally.
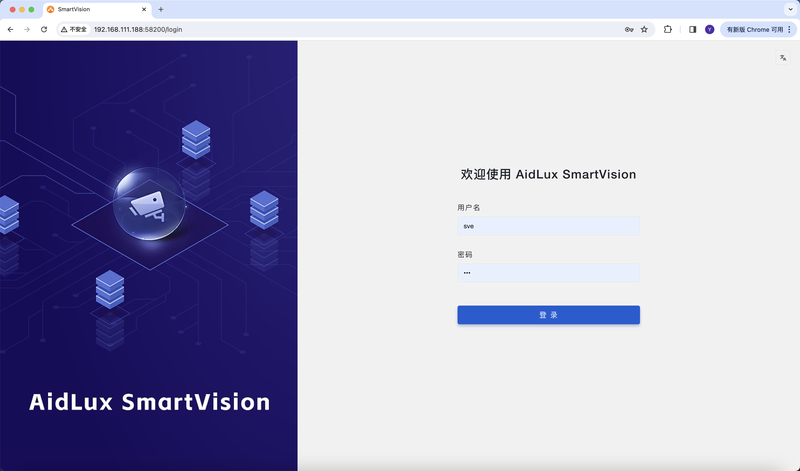
After completing device connection and power-on startup, enter the following URL in the PC browser to log into the camera management interface: http://[Camera IP]:58200/
For example: if the camera's factory default IP is 192.168.1.123, enter http://192.168.1.123:58200/ in the browser.
Enter the username and password on the web interface to log into the device management interface.
Default Username: sve Default Password: sve
Network Configuration
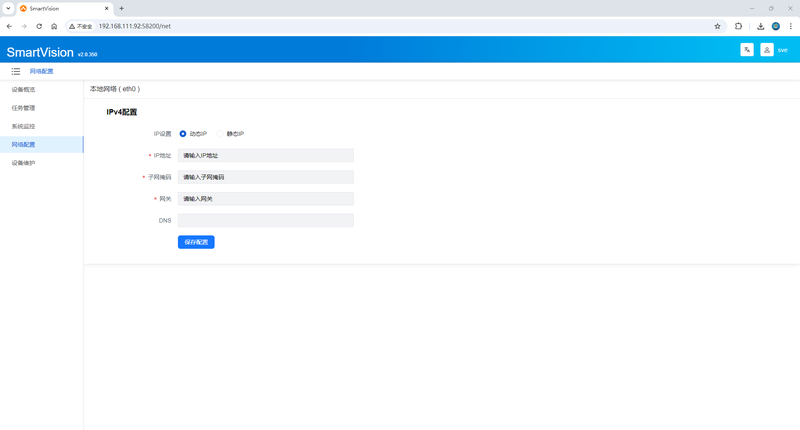
After logging into the camera, select 【Network Configuration】 from the left sidebar to configure the camera's wired network IP information.
Remote Login
TBD.
