Flashing Guide
Flashing Tool Installation
For the flashing tool installation steps, refer to the Ubuntu System Installation guide — "Installing Flashing Tools" section.
Flash Programming
System Flashing
Switch to Flashing Mode
After the device is powered on, use a USB Type-A to Type-C cable to connect the PC and the device. Type-A connects to the PC, and Type-C connects to the device.
Once connected, press
Win+Ron the Windows PC, typecmdin the pop-up window to open a terminal, and runadb devicesto list connected devices. If no device is listed, wait a moment or disconnect and reconnect the Type-C cable and try again.
adb devices
- Obtain root privileges by running
adb root
adb root- Switch to flashing mode by running
adb shell reboot edl.
adb shell reboot edl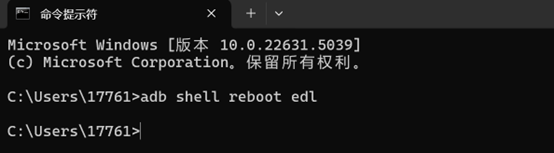
Configure QFIL Configuration Items
- Open QFIL, click
Configuration→FireHose Configurationat the top.

In the Download Configuration window, configure as follows:
Download Protocol: select "0-Sahara"
Device Type: select "ufs"
Check "Reset After Download"
Keep all other options consistent with the screenshot below.
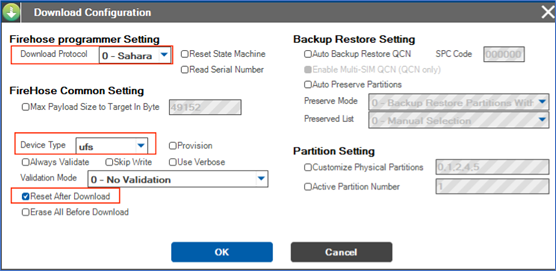
- After configuration, click
OKto save.
Select Flashing Port
- Click
Select Port, in the pop-up window select the 9008 port that appears, and clickOK.
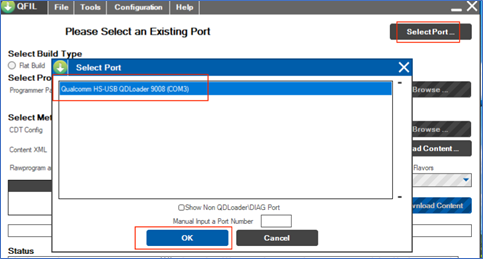
Select Build Type
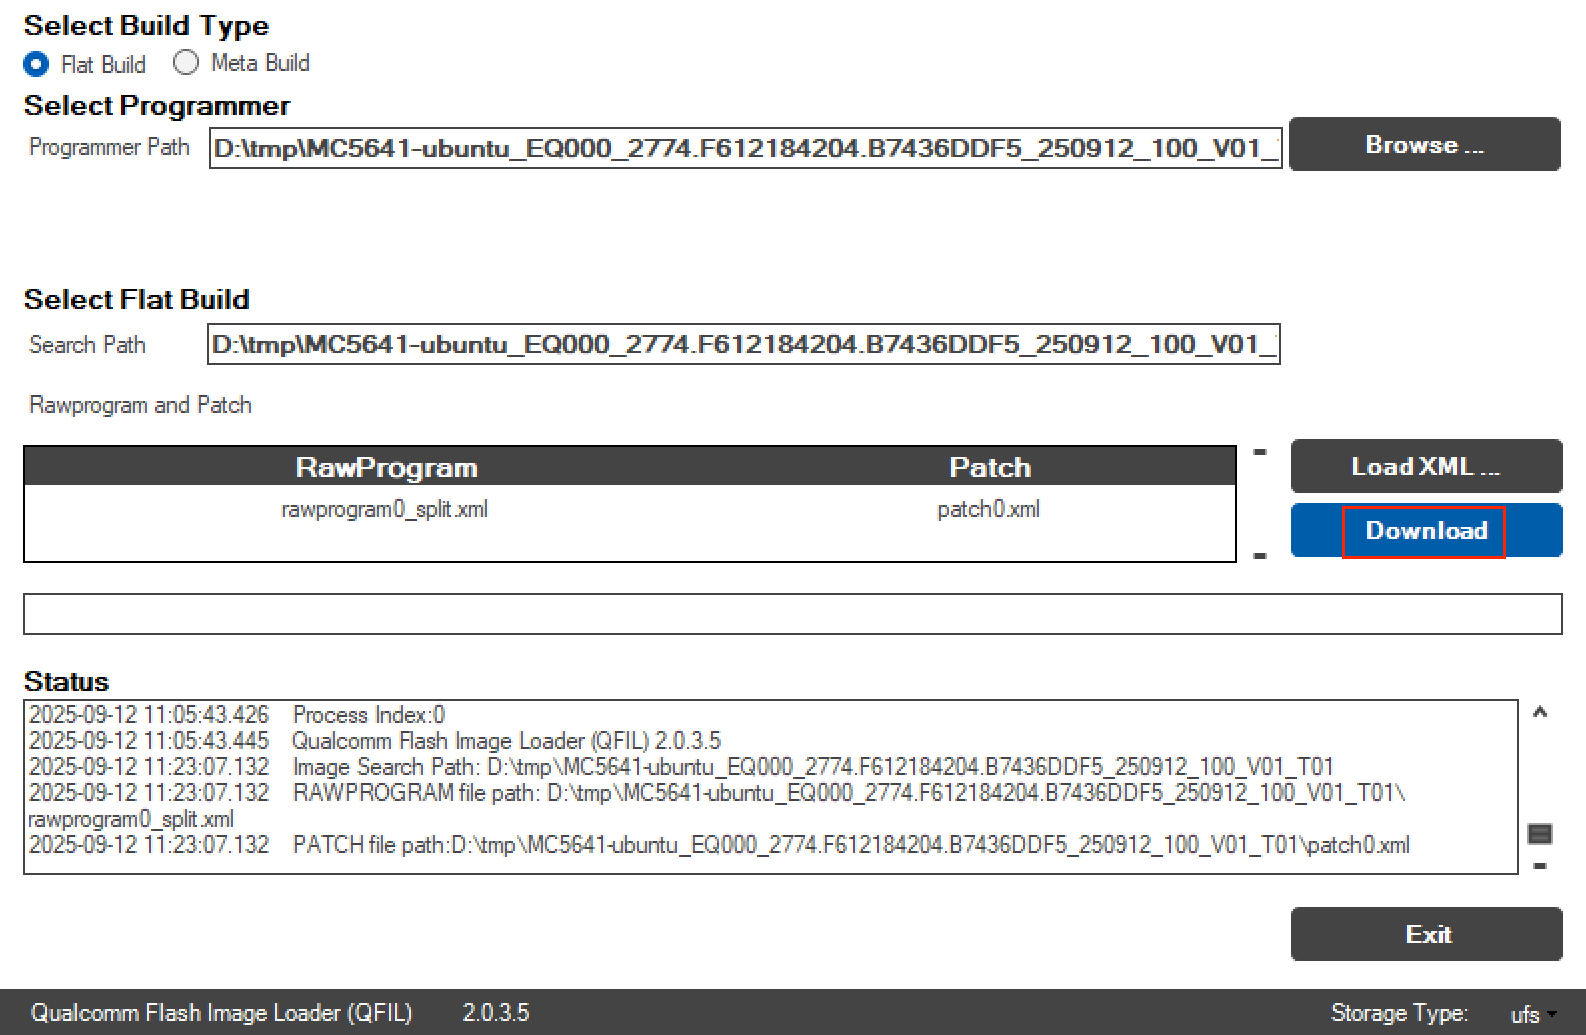
- Under "Select Build Type", choose "Flat Build".

Select Flashing Files
Extract the ROM files.
Under "Select Programmer", click
Browse...next to "Programmer Path". Navigate to the extracted path and select the extracted ROM files.After opening, click the dropdown at the bottom right and select file type
**All Files(\*.\*)**.
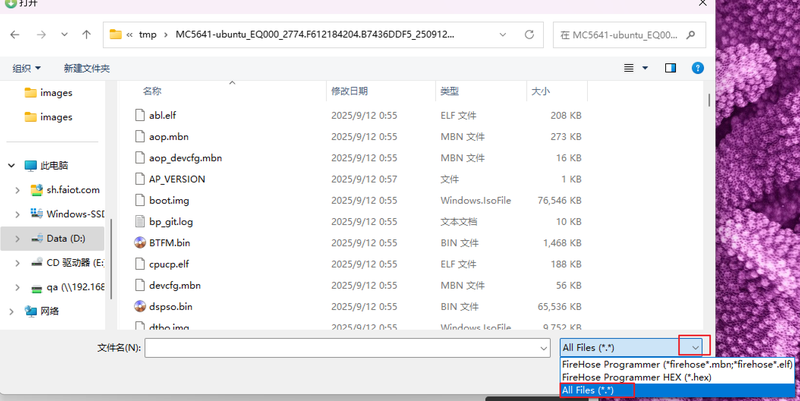
- Navigate to find the "xbl_s_devprg_ns.melf" file, select it, and click
Open.
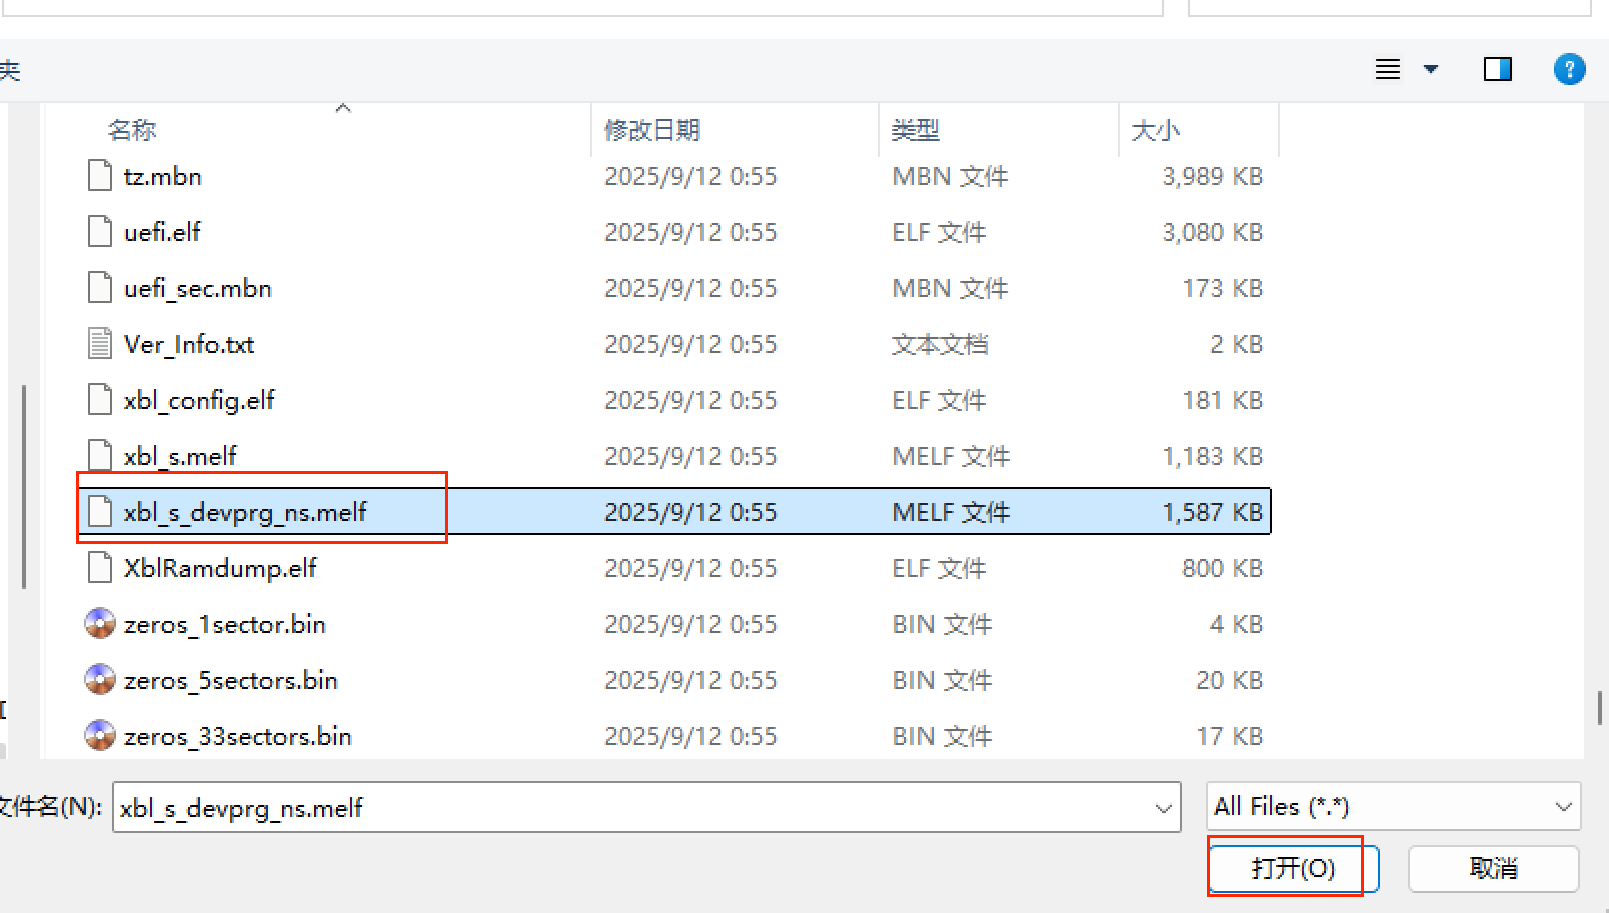
Select Flashing XML Files
- Under "Select Flat Build", click
Load XML...to select the flashing XML files.
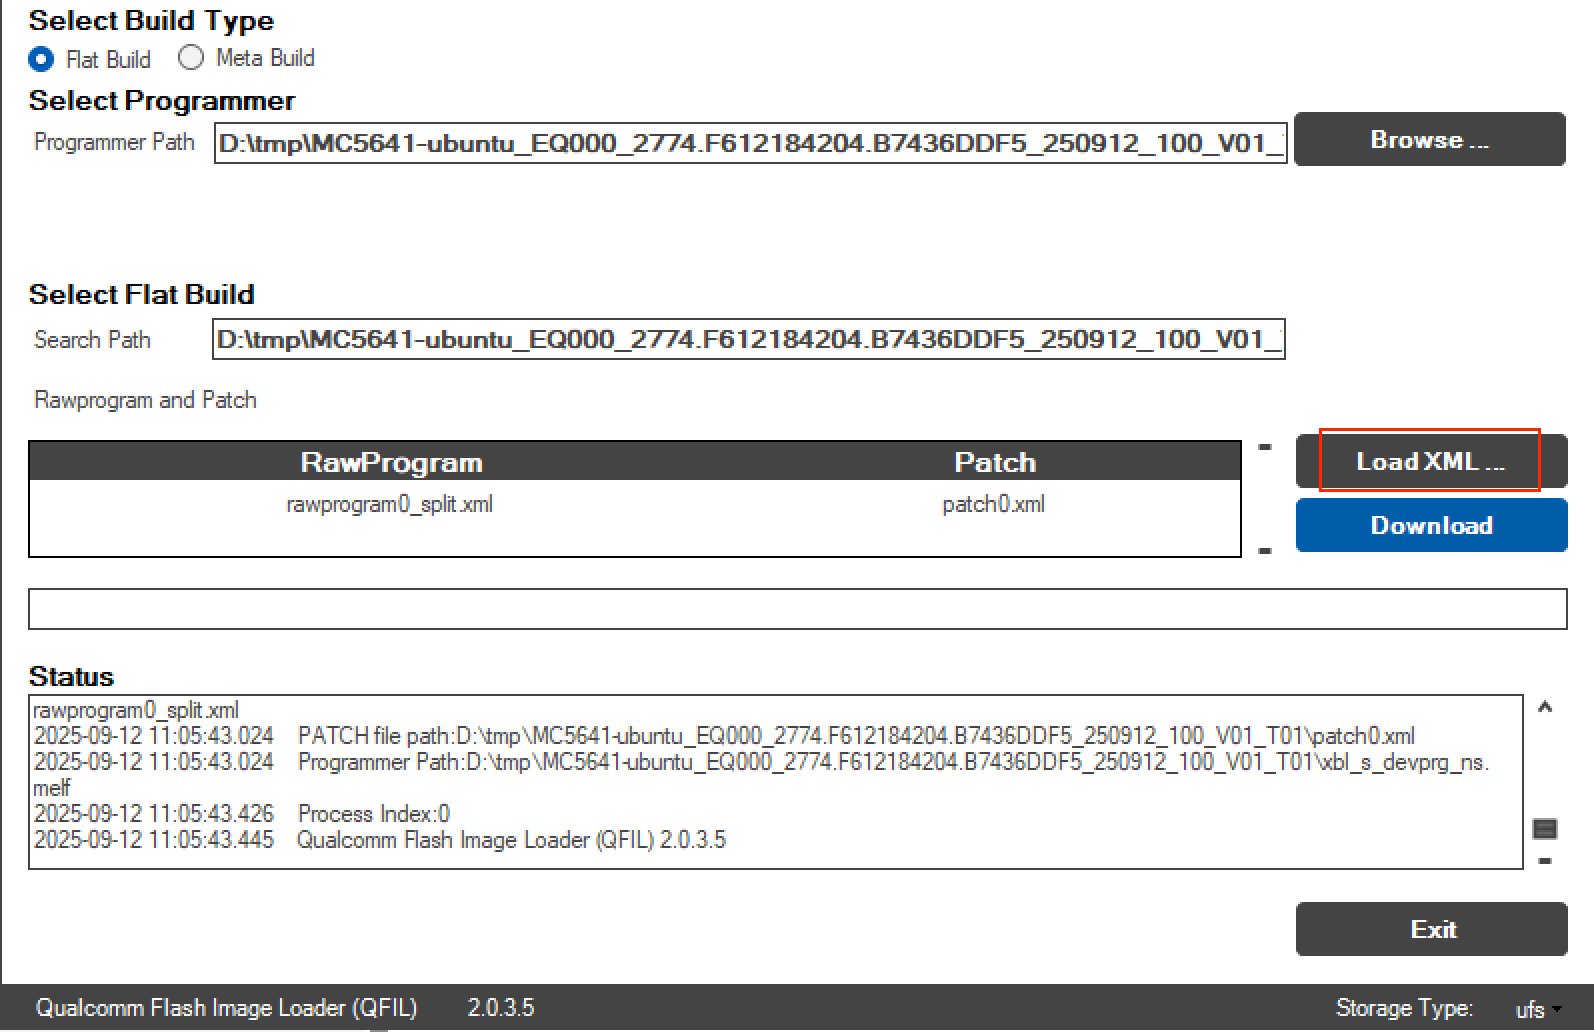
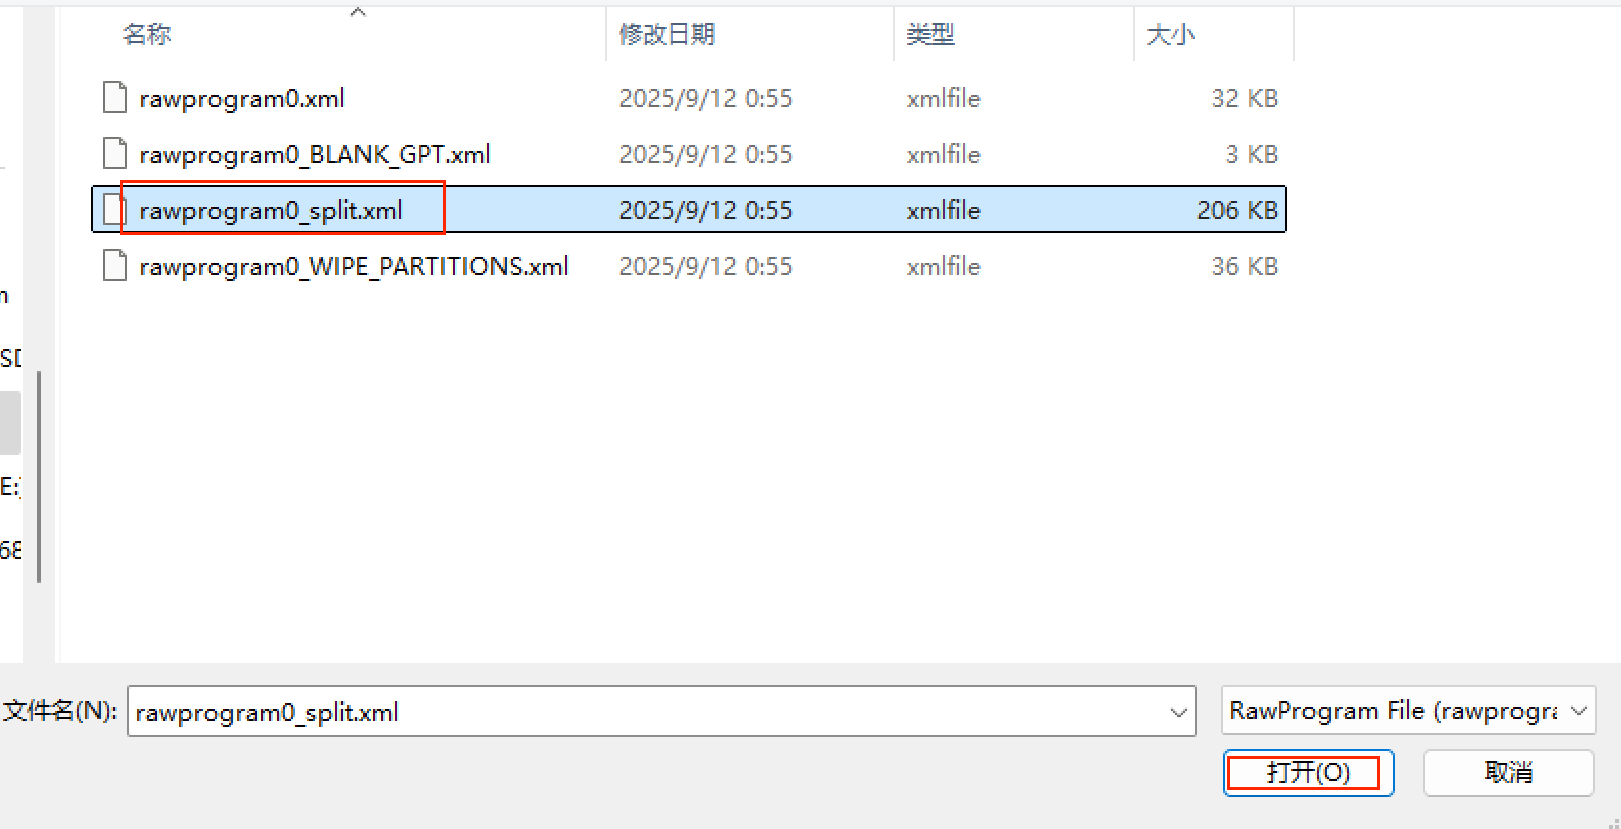
- In the pop-up window, select the "rawprogram0_split.xml" file and click
Open.
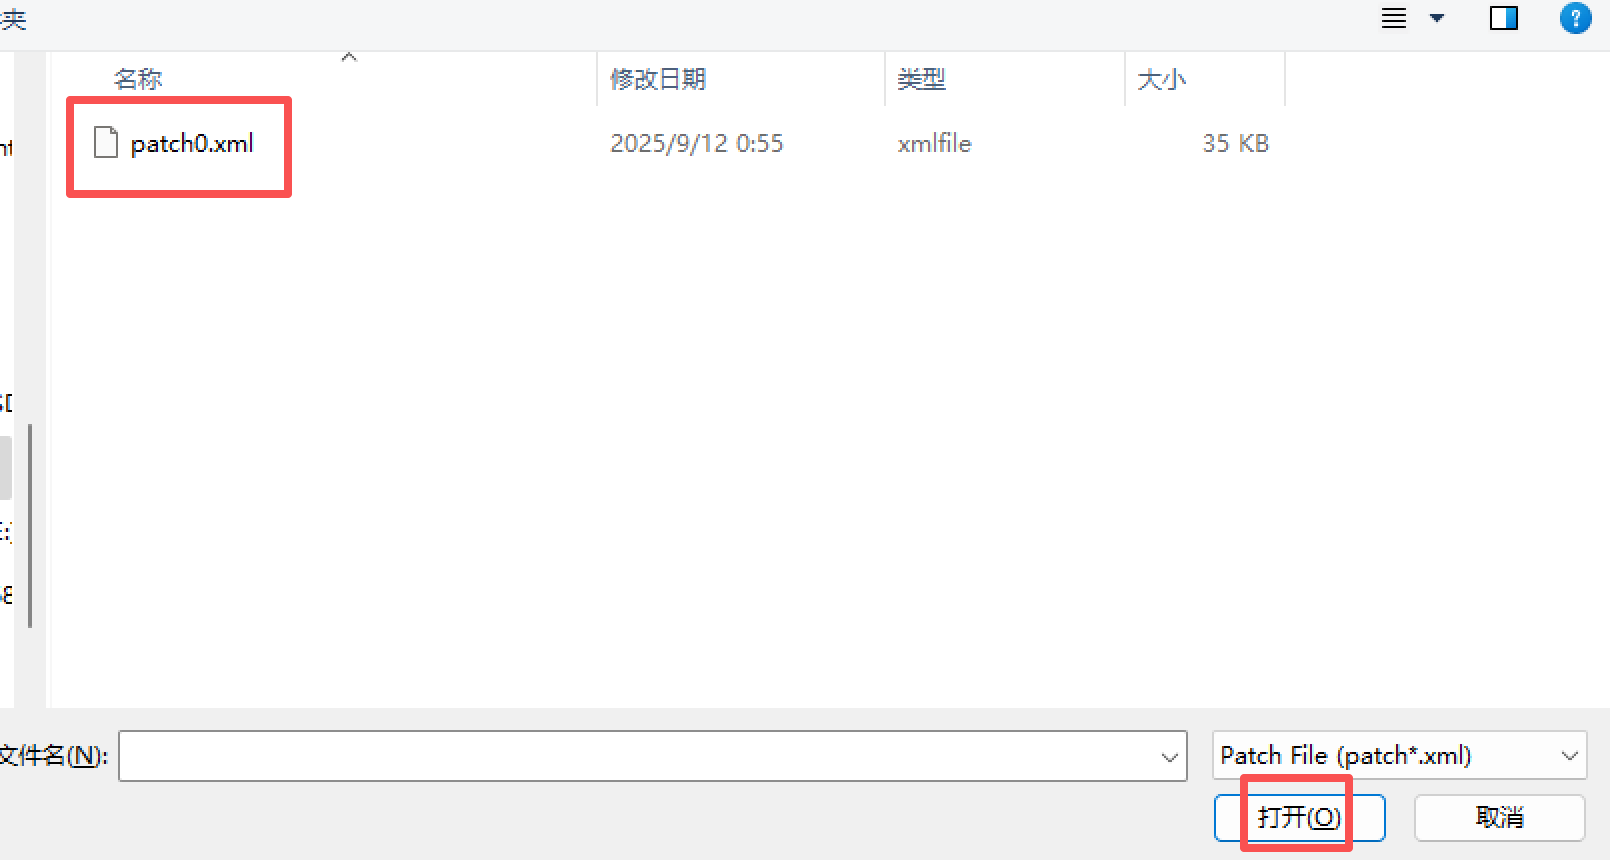
- After selecting the XML file, another window will pop up automatically. Select "patch0.xml" and click
Open.
Start Flashing
- After all options are selected, click
Downloadto start flashing and wait for completion.
Force Flashing
⚠ Warning
Only perform force flashing when flashing fails and the port is not recognized.
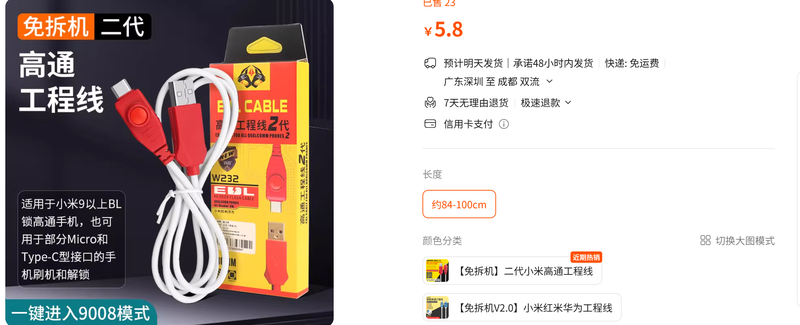
If flashing fails and the port is not recognized, you need to use the "2nd Generation Qualcomm Engineering Cable V2.0" to assist in forcing the device into flashing mode. This cable can be purchased by searching "二代高通工程线V2.0" on Taobao.
Follow these steps to enter force flashing mode:
- Disconnect power from the 2nd Generation Smart Camera.
- Connect the Type-A end of the Qualcomm engineering cable to the PC.
- Press and hold the round button on the Type-C end, then insert it into the 2nd Generation Smart Camera's Type-C port.
- Open the QFIL flashing tool on the PC and check if the 9008 port is recognized. If not, repeat the operation.
- Once recognized, release the round button, then power on the 2nd Generation Smart Camera and proceed with flashing.