Ultrasonic Sensor
DYP-A02YY-V2.0 Ultrasonic Sensor
Preparation
- Rhino Pi-A1
- DYP-A02YY-V2.0 ultrasonic sensor (output via RS485, UART output also available)
- Several other connecting cables
Hardware Connection
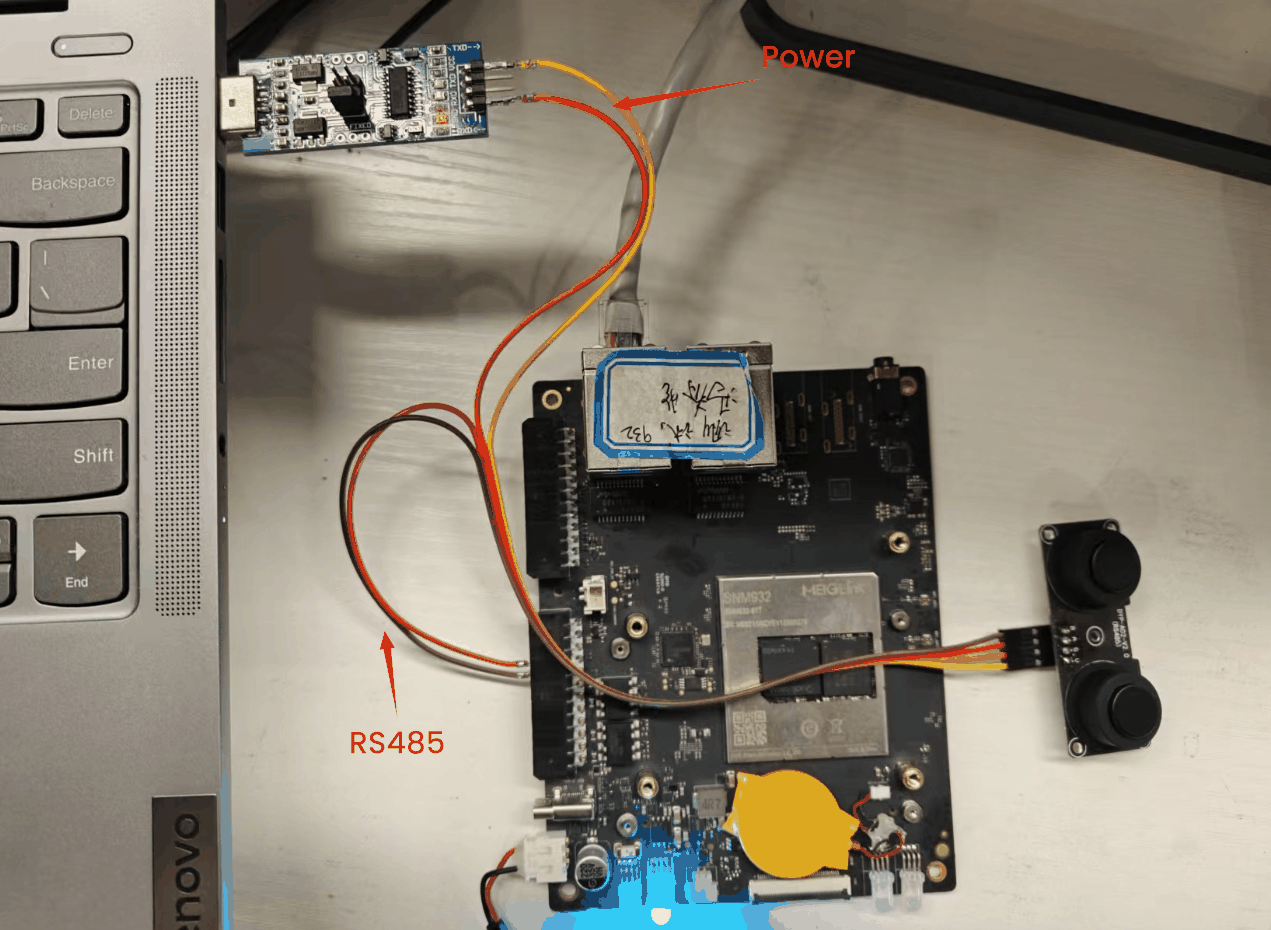
The sensor requires at least 5V power supply. However, since the 5V pin and GND pin of the Rhino Pi-A1 are still under debugging, this example supplies power to the sensor externally.
Connect the RS485A and RS485B of the ultrasonic sensor to the RS485A and RS485B of the Rhino Pi-A1 for communication.
Testing
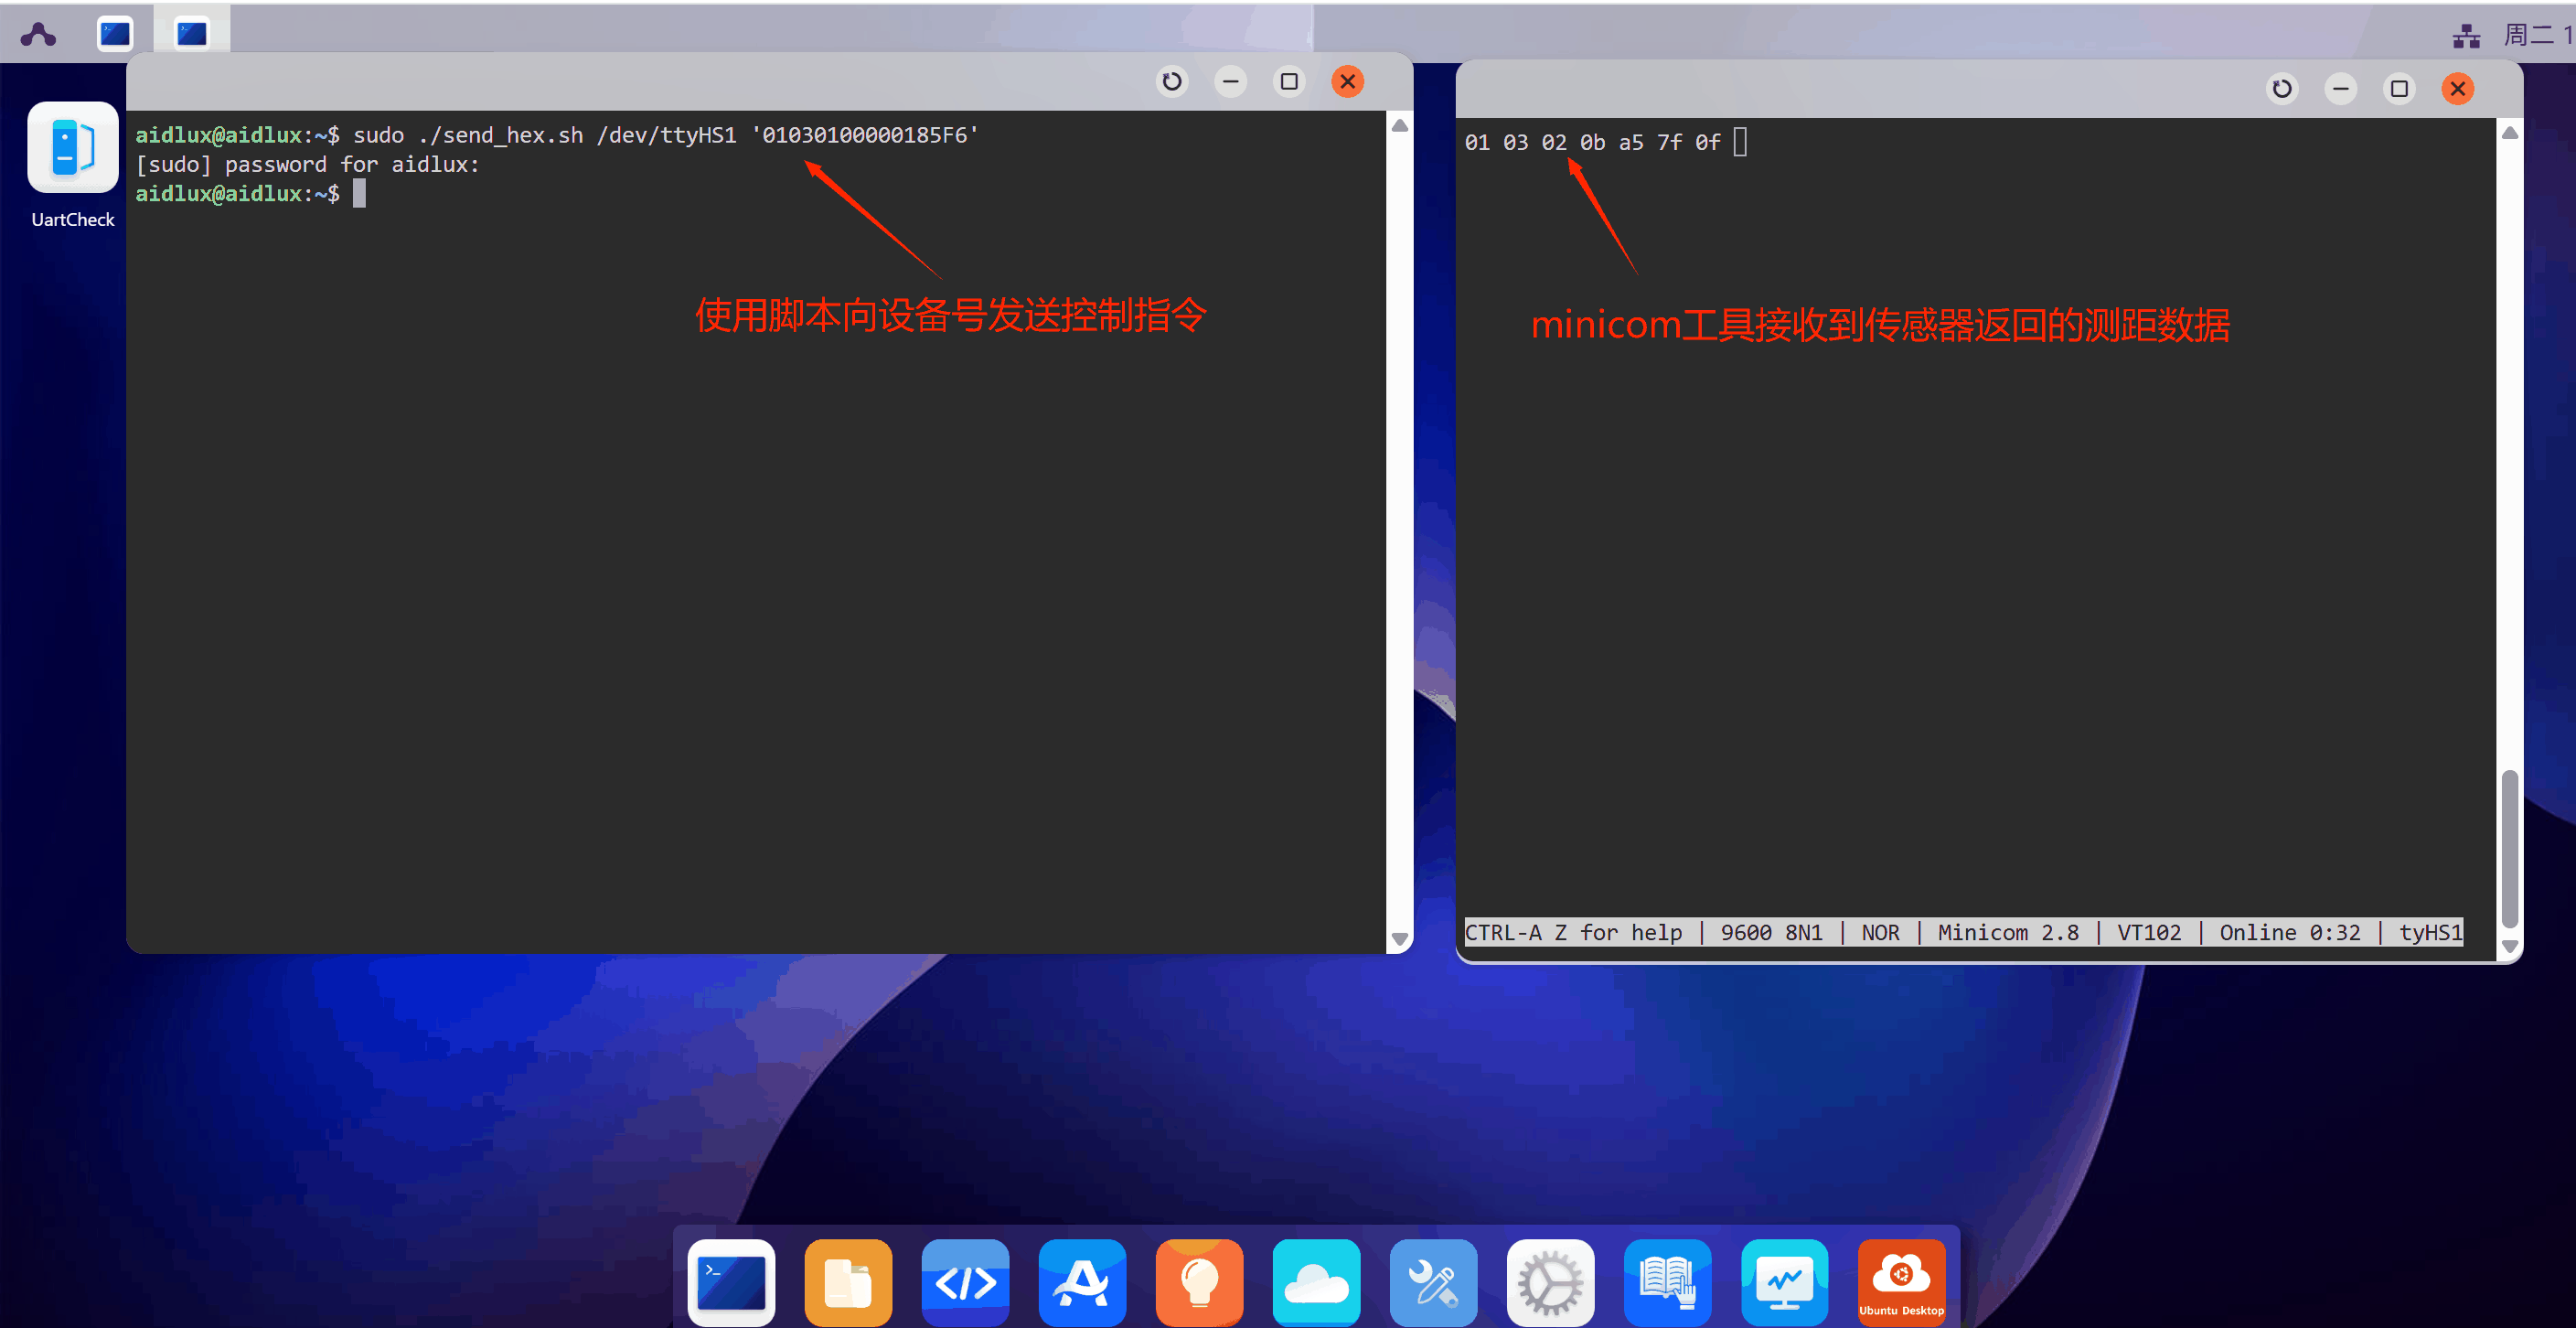
The Dianyingpu ultrasonic sensor only returns a ranging result after a ranging command is manually sent. Each time a command is sent, one result is returned.
- Since the minicom test tool cannot send hexadecimal data to control the sensor ranging, you can write a script to convert the data and send it to the serial device for control. The script is as follows:
shell
#!/bin/bash
# Check the number of arguments
if [ "$#" -ne 2 ]; then
    echo "Usage: $0 [serial device] [hex data]"
    exit 1
fi
# Serial device, e.g. /dev/ttyS2
SERIAL_PORT=$1

# Hex data, e.g. '1F2E3D4C'
HEX_DATA=$2

# Convert the hex data to a binary stream and send it to the serial device
printf "$HEX_DATA" | xxd -r -p > $SERIAL_PORT- Use the script to send the control command:
shell
./send_hex.sh /dev/ttyHS1 '01030100000185F6'/dev/ttyHS1: the RS485 device of the Rhino Pi-A101030100000185F6: reads the processed value data. There are also other commands. For details, please refer to the Dianyingpu product manual.
- Use the minicom tool in AidLux to receive data. (If not installed, install it via
sudo apt update; apt install minicom). Open minicom:
shell
sudo minicom -D /dev/ttyHS1 -b 9600 -H/dev/ttyHS1: the RS485 device of the Rhino Pi-A1-b 9600: sets the baud rate to 9600 (the default baud rate of the sensor is 9600)-H: displays hexadecimal data