AI Creator Visual Model Training Platform — Usage Examples
A complete AI Creator workflow is shown below:
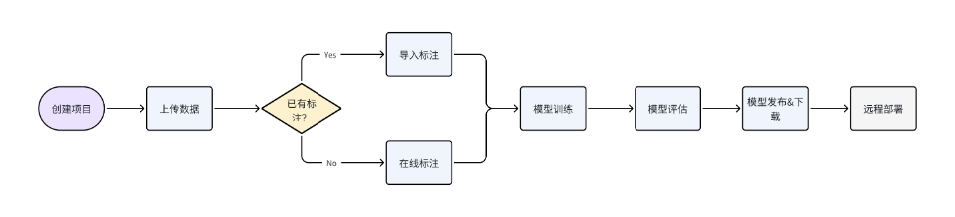
If you already have images and annotation data locally and do not need model optimization or deployment, the workflow can be simplified to:

Data Preparation
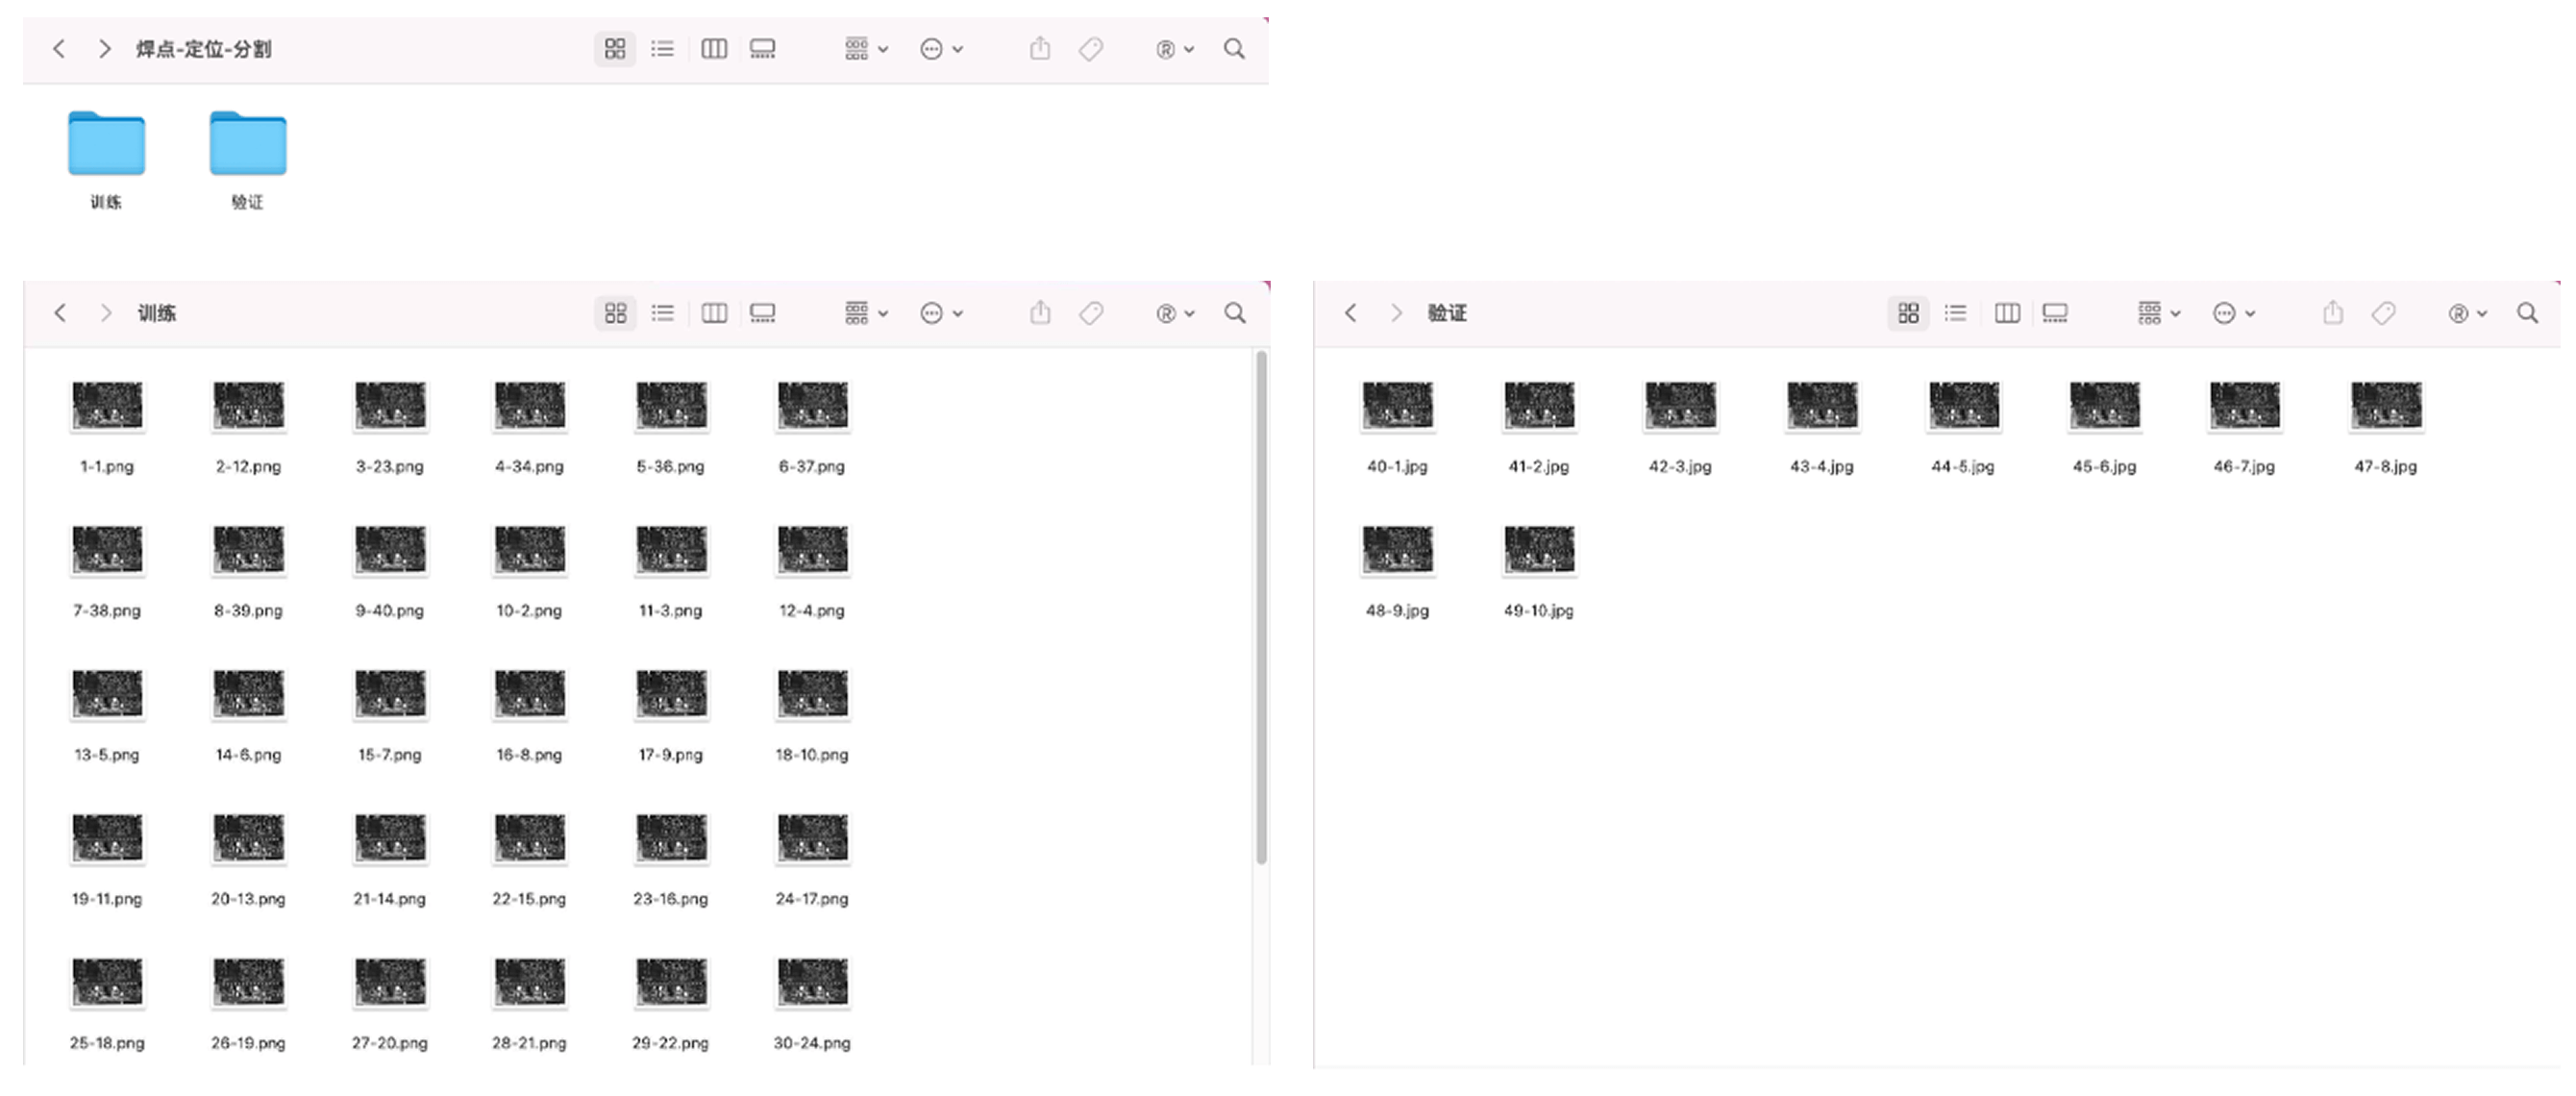
Prepare two folders locally, assigning image data for training and validation respectively. These two datasets will be uploaded and used in the subsequent workflow.
Project Creation
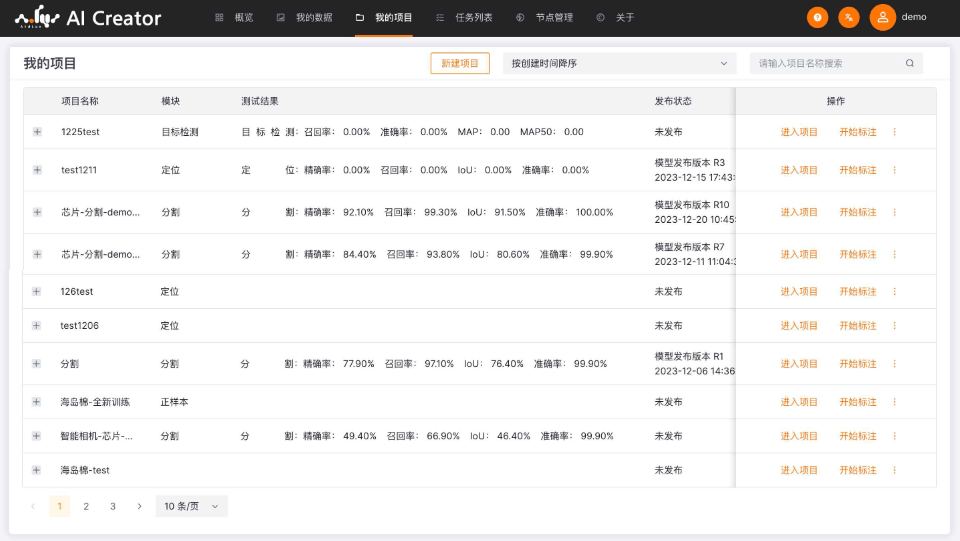
Click the "My Projects" menu in AI Creator to enter My Projects.
My Projects is mainly used to manage project annotation, model training, model evaluation, model validation, as well as model publishing and downloading.
Create a New Project
Click "New Project", enter a project name, and click "Next: Import Project Data". You will be taken directly into the project and redirected to the project image set configuration page.
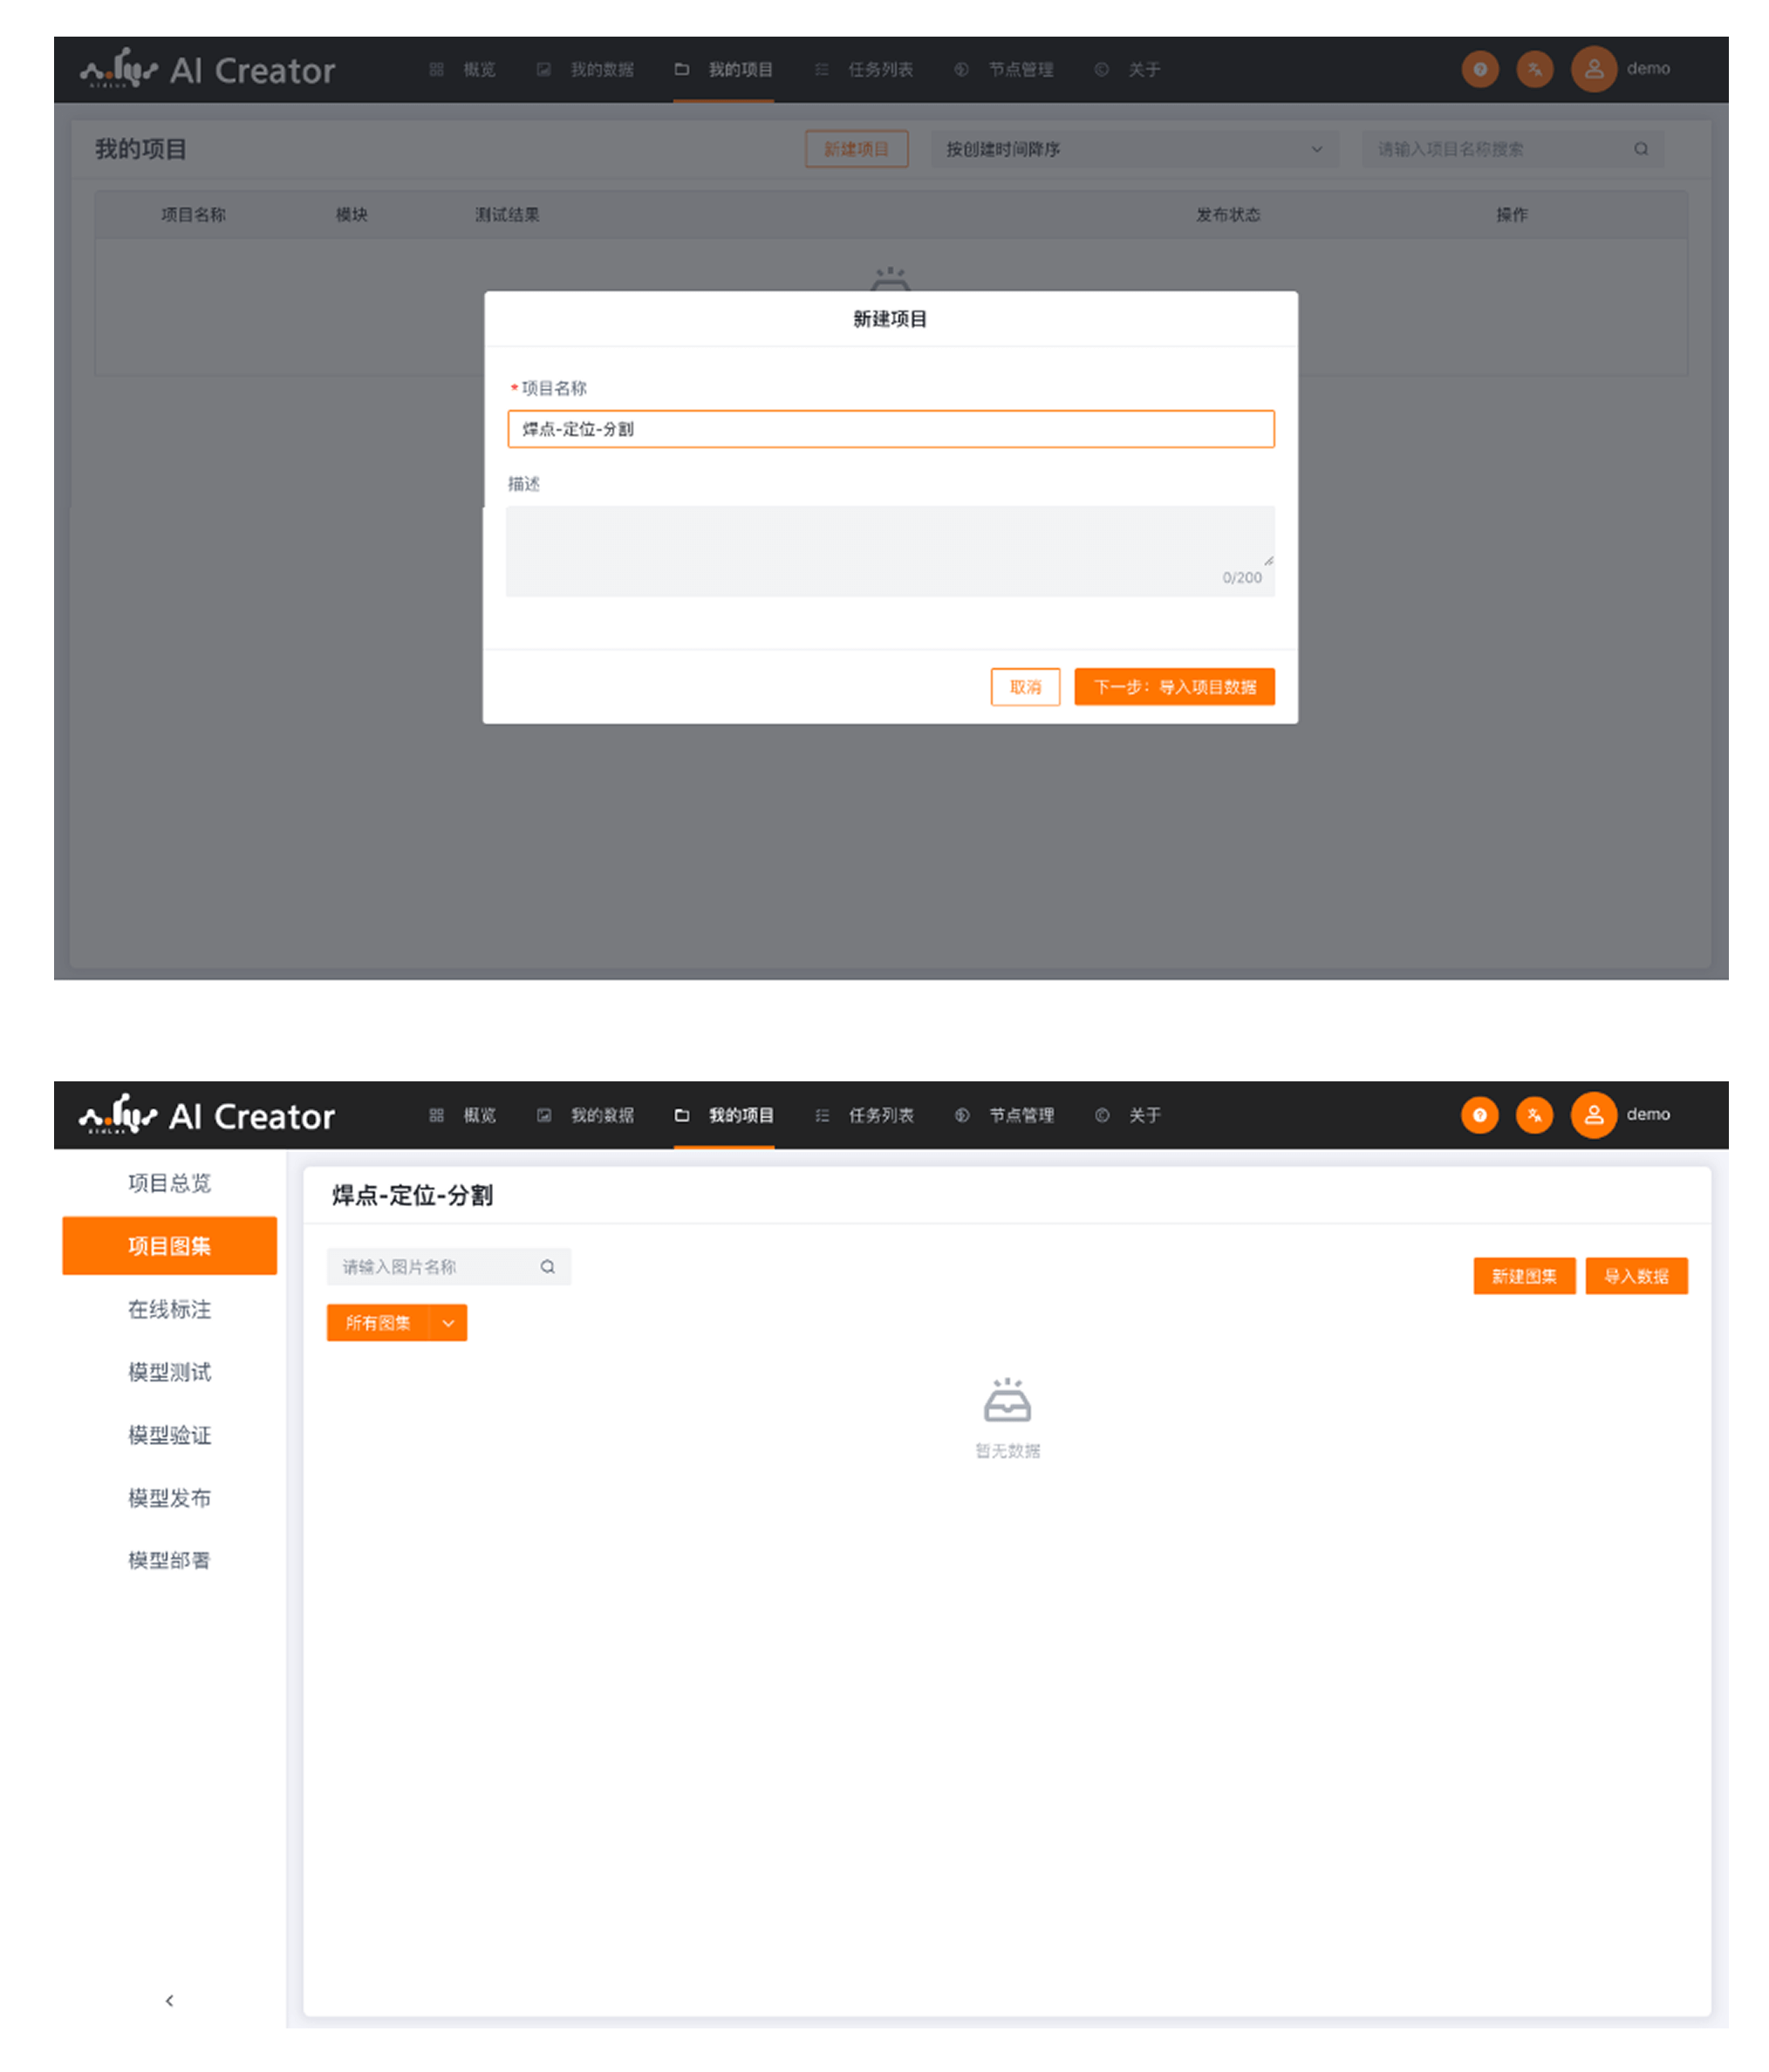
Image Set Configuration
Image management in AI Creator is divided into My Data and Project Image Sets.
My Data: a public dataset available to all projects of the current user. If multiple projects need to use the same dataset, you can upload the data once under My Data. (For uploading to the public dataset, see Upload Images to the Public Dataset.)
Project Image Sets: project datasets, i.e., the datasets used in the project, including the data generated for each module by the system. They are only available in the current project.
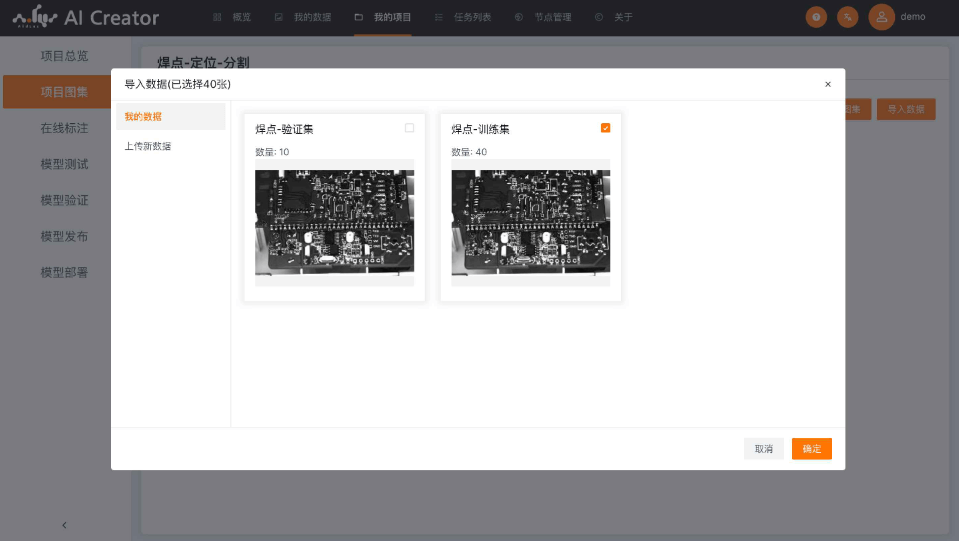
Import from My Data
If data has already been uploaded to the public dataset, it can be directly imported into the project image sets.
Click "Import Data", select the image set to import, and click Confirm to complete the import.
Create a New Image Set
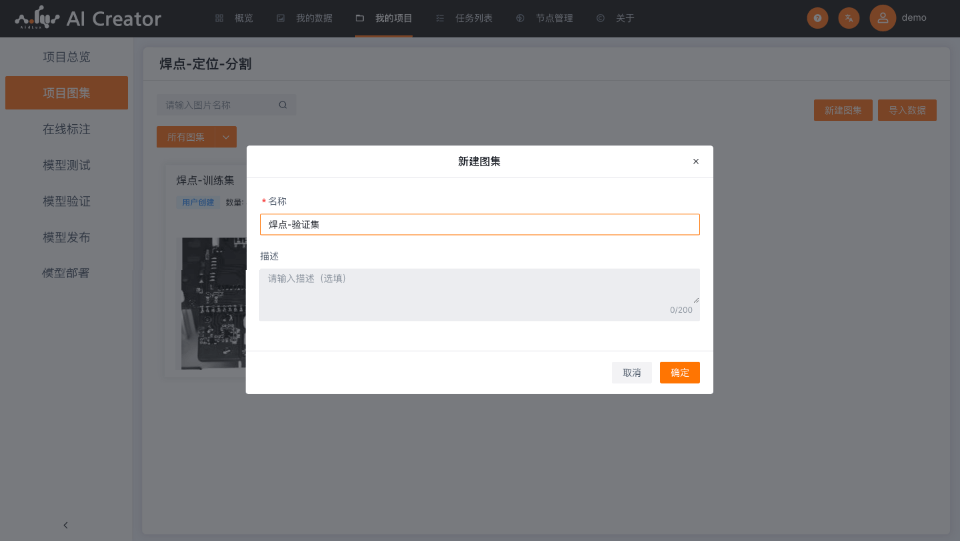
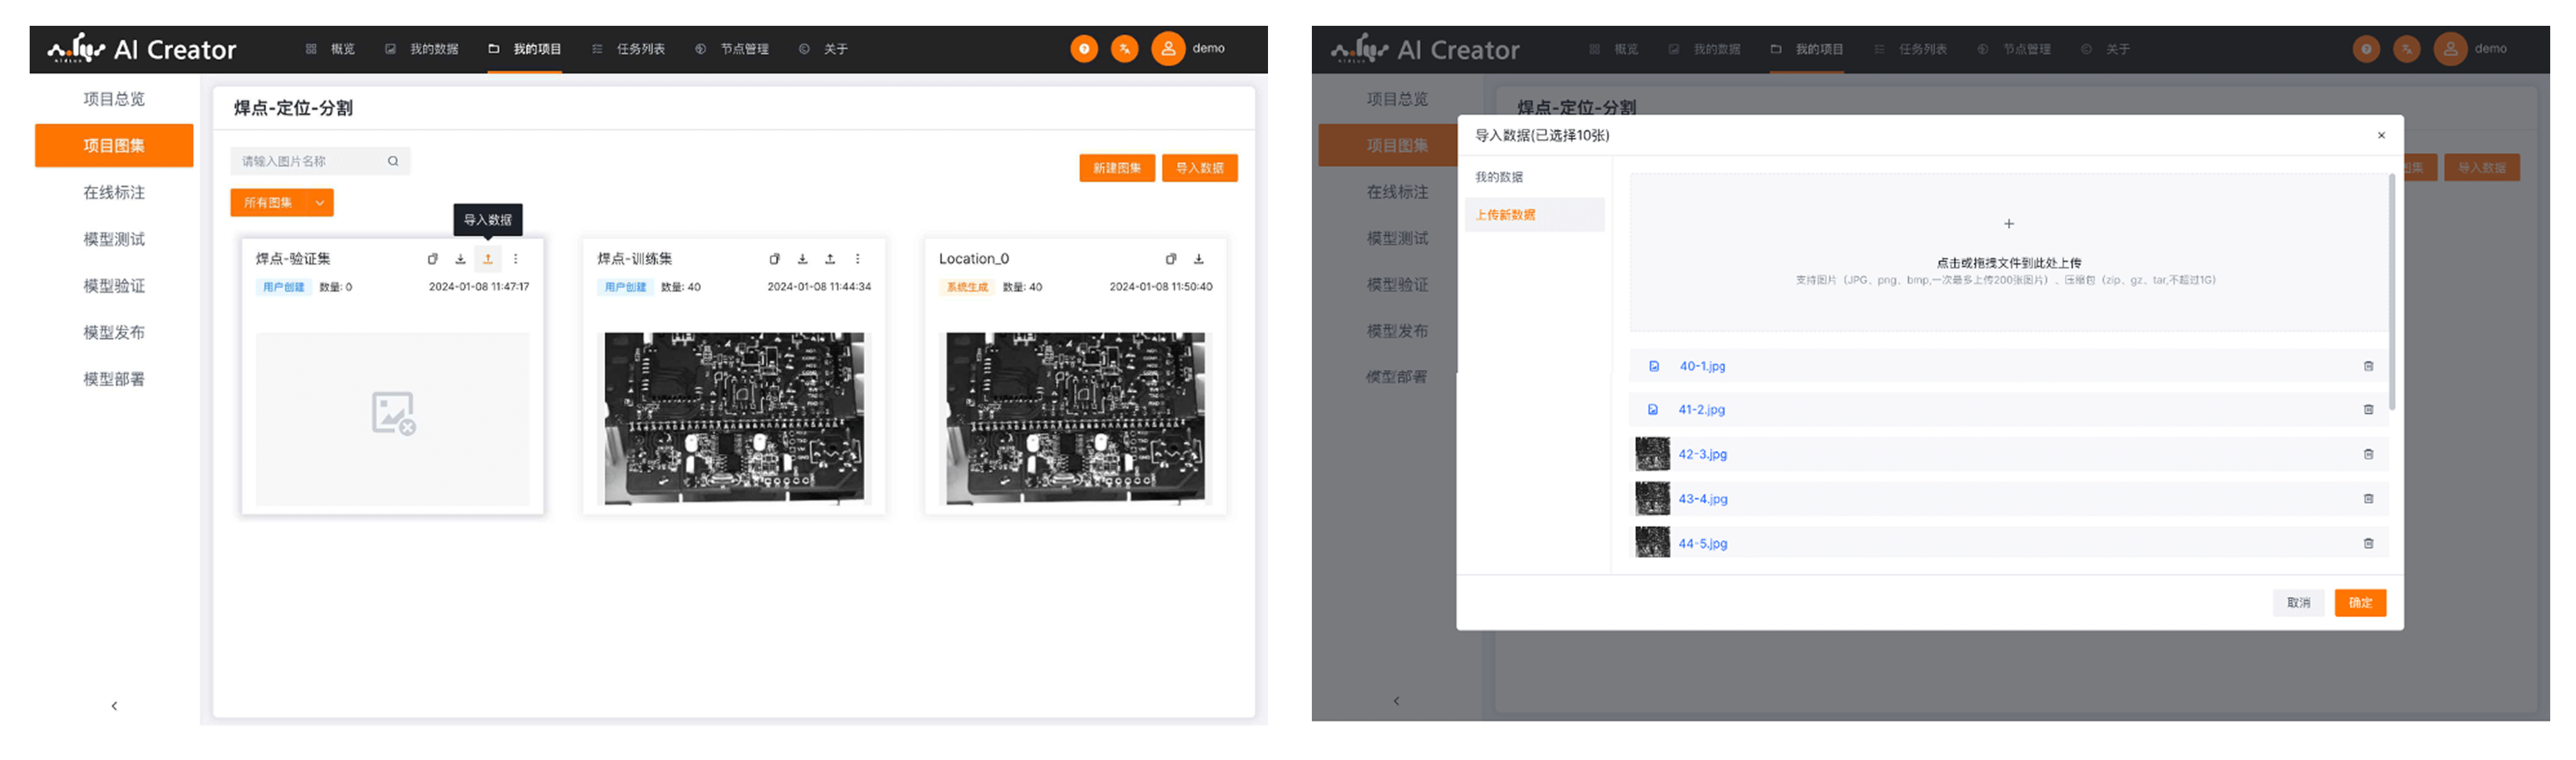
Within a project, you can also upload images directly to the current project. These images can only be used in the current project.
- Click "New Image Set", enter the image set name, and click Confirm.
- Click the image set's Import Data and select images to upload.
Model Training & Evaluation
Algorithm Module Configuration
Enter the project, click "Online Annotation" on the left, then click "Add Module" and select the algorithm you want to train, for example: Localization.
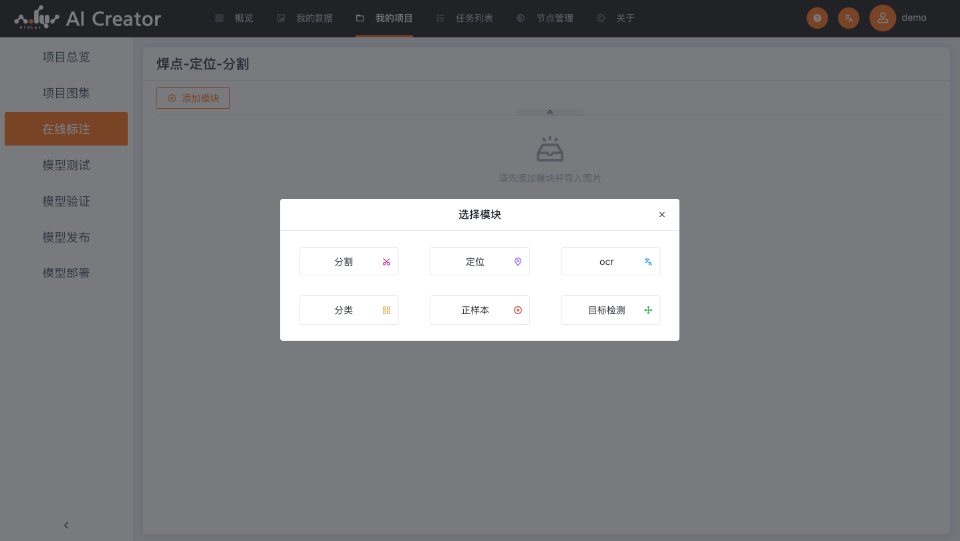
Image Annotation
Online Annotation
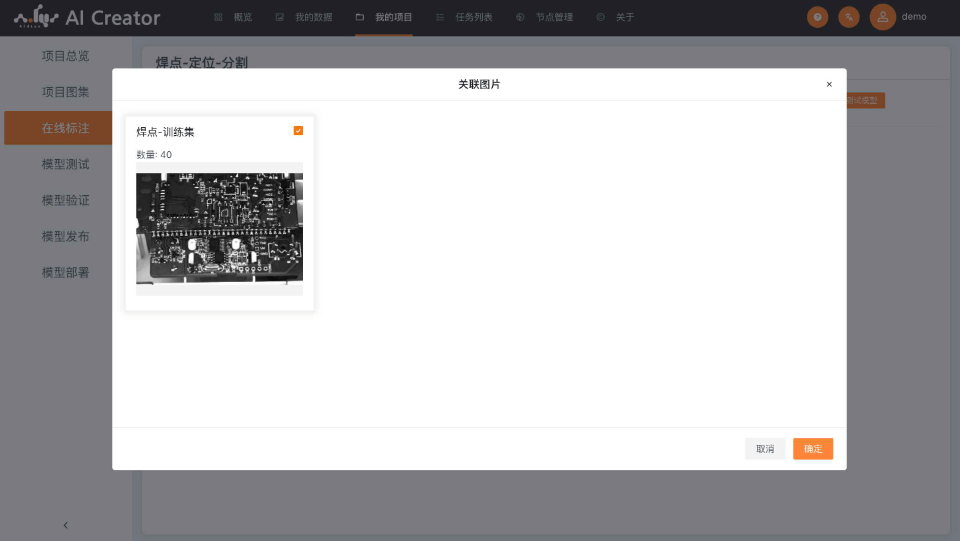
Online annotation requires associating images with the current algorithm module first.
- Click Associate Images and select a project image set, for example: Solder Joints - Training Set.
💡 Note
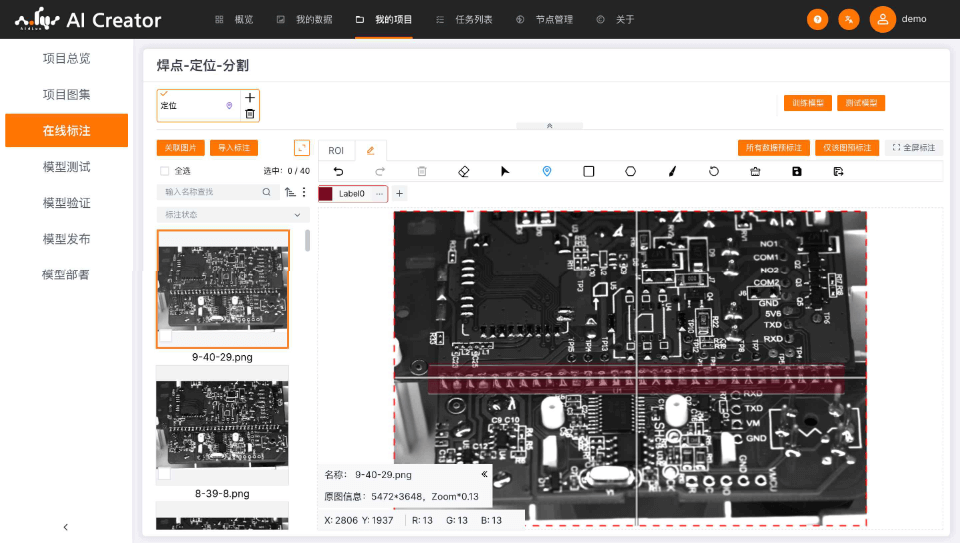
AI Creator supports online annotation and also includes a variety of built-in annotation tools.
- For the localization module, you can use the localization annotation tool or the rectangle/polygon annotation tools. After completing the annotation, you can use the shortcut (Ctrl + S) or the menu to save and move to the next image, quickly saving and annotating the next image. (We recommend annotating more than 10 images for training.)
Offline Annotation Import
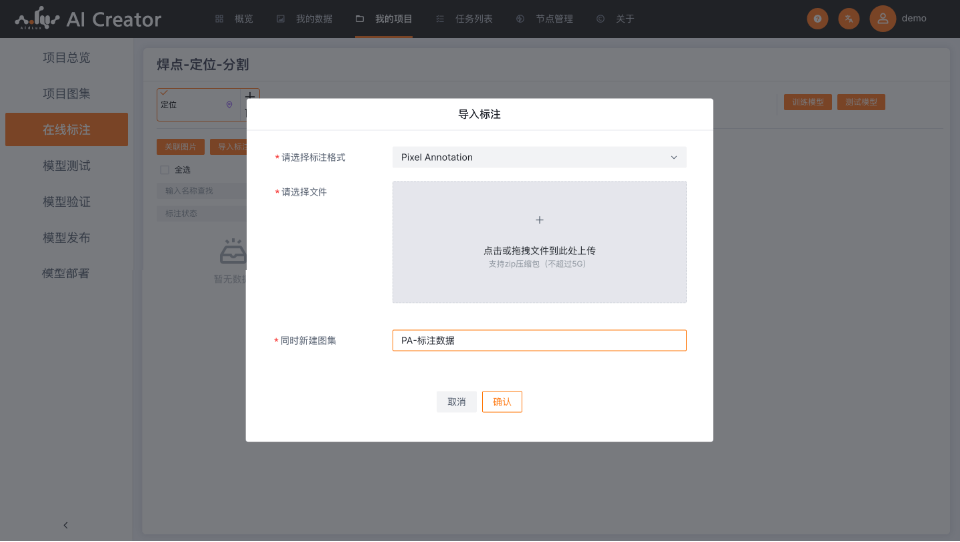
AI Creator also supports offline annotation import, currently supporting two annotation formats: Labelme and Pixel Annotation.
- Click "Import Annotation" in the collapsible panel on the left side of the workspace.
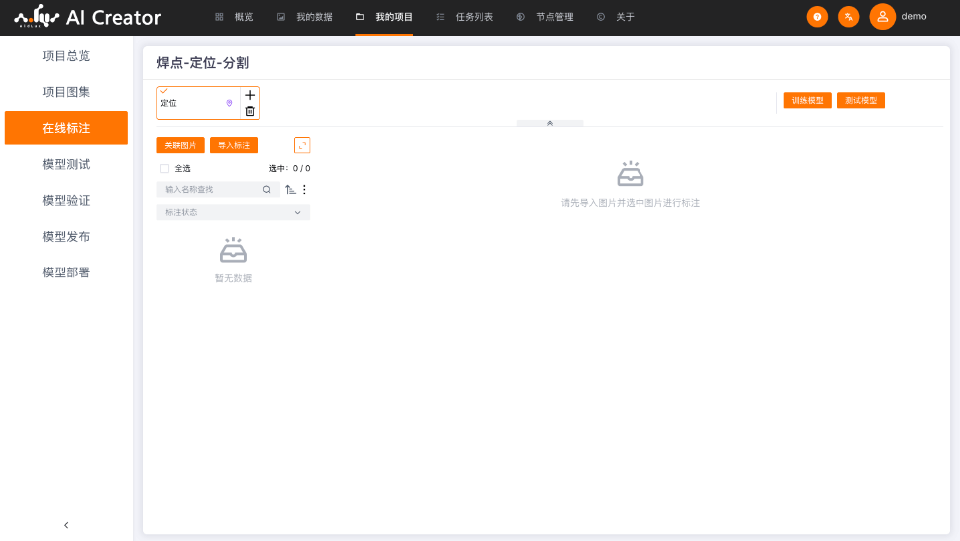
- Select the Pixel Annotation type. The file supports the zip format. Select the file to upload, enter a name for the new image set, and click Confirm.
- AI Creator will identify the relevant information of the annotated data. Select labels to map the offline annotation data to AI Creator labels.
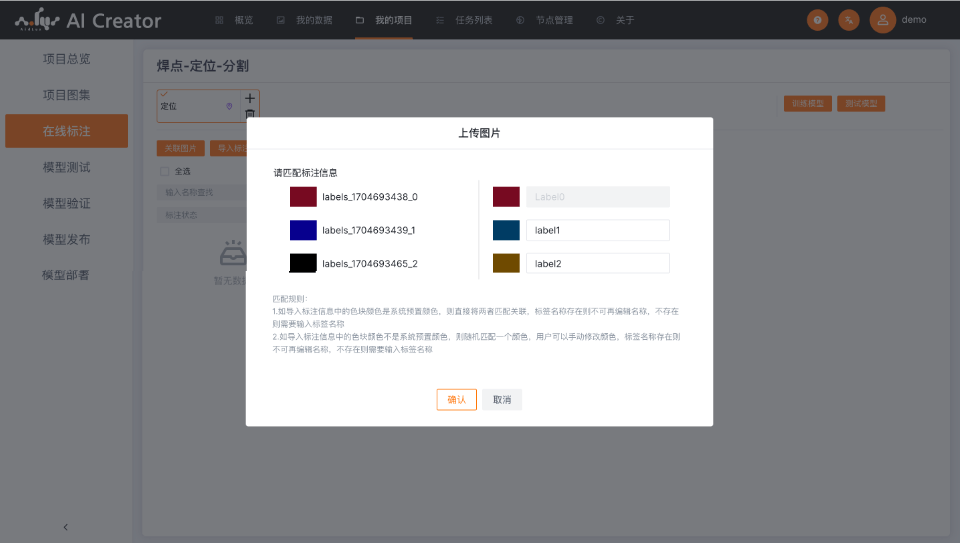
After the import completes, the offline annotation data can be edited and viewed in AI Creator.
Model Training
Once data feature annotation is complete, model training can begin.
- Click "Train Model" on the right side of the workspace.
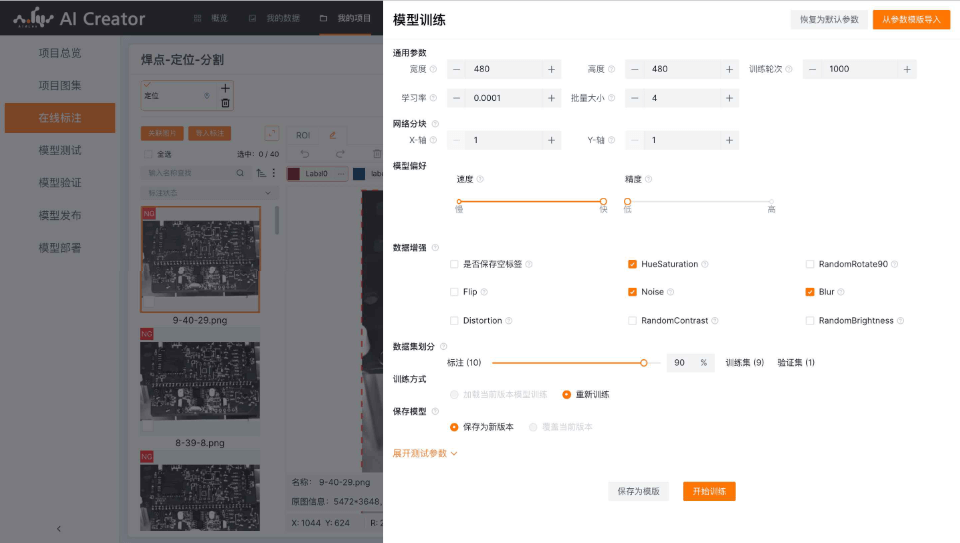
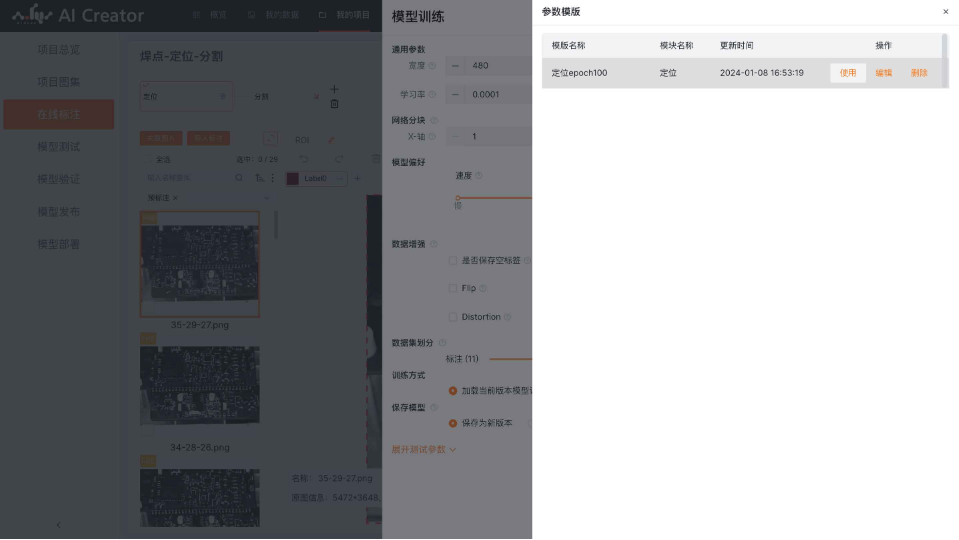
AI Creator provides default parameter configurations and also recommends parameters based on the data. Each parameter has a detailed supplementary description. For parameter templates, see Training Parameter Templates.
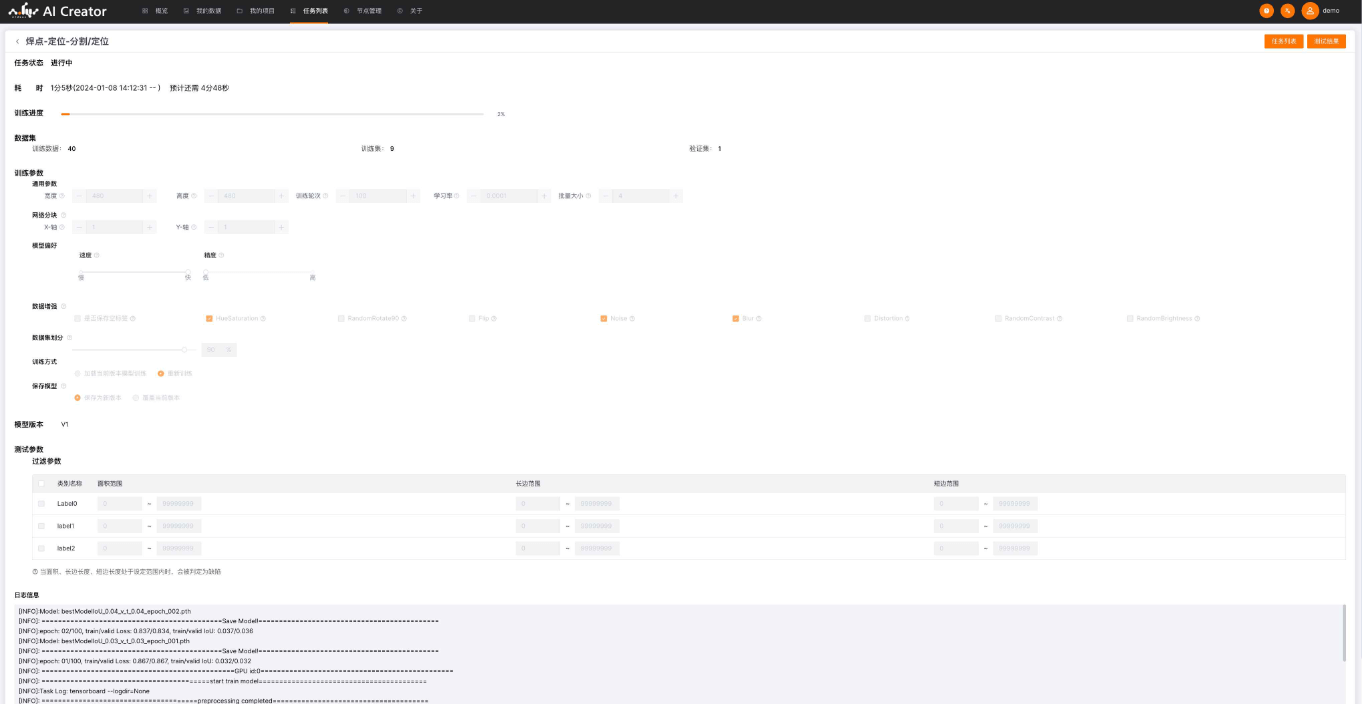
- After clicking "Start" to train, you will enter the training details page, where you can view the current task's training parameters, estimated duration, and training logs.
💡 Note
If you exit the details page, you can find the currently training task under "Task List > Training Tasks".
Model Evaluation
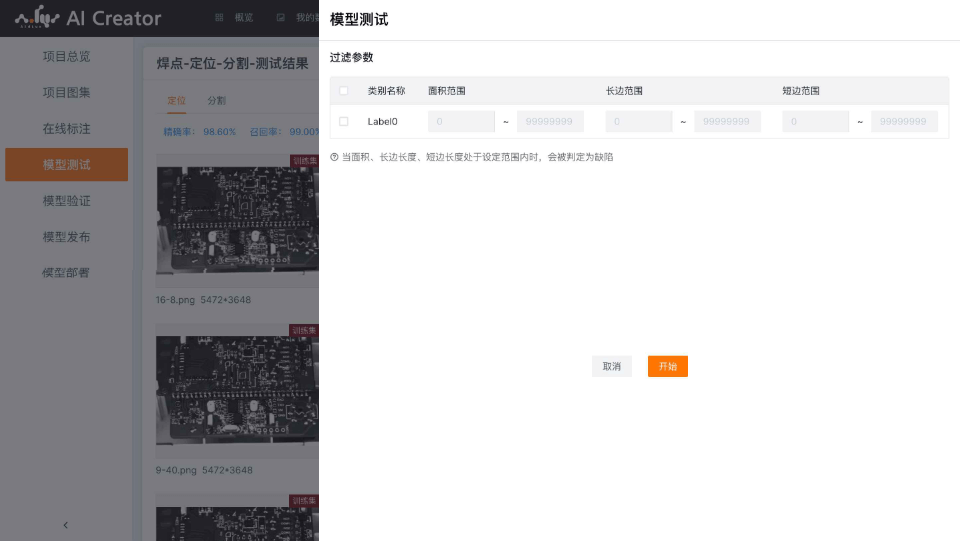
After model training completes, a model evaluation is automatically performed once, i.e., a test task is run using the trained model, and evaluation data for the model is generated based on the test results. You can also set test parameters separately in the test results to evaluate the model.
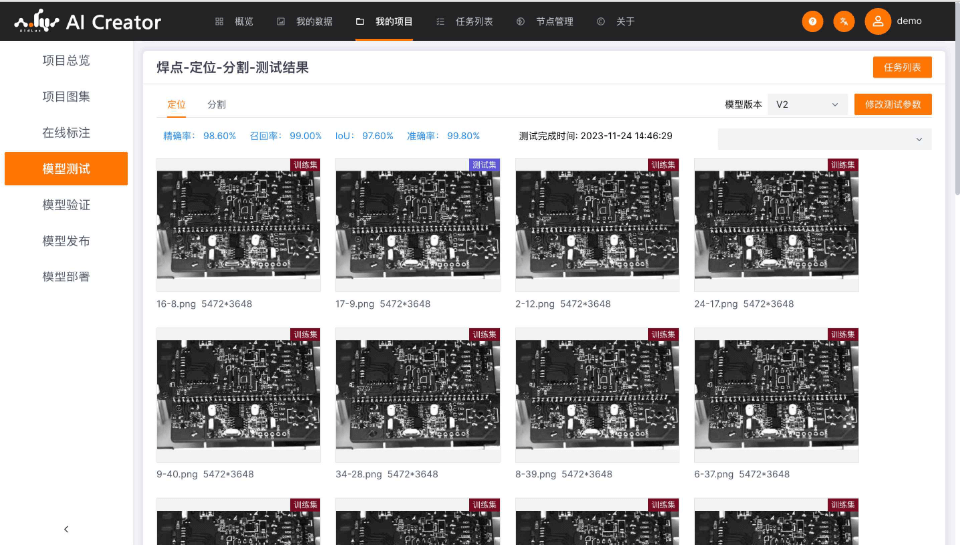
After the test task completes, click an image on the project test results page to view the test result.
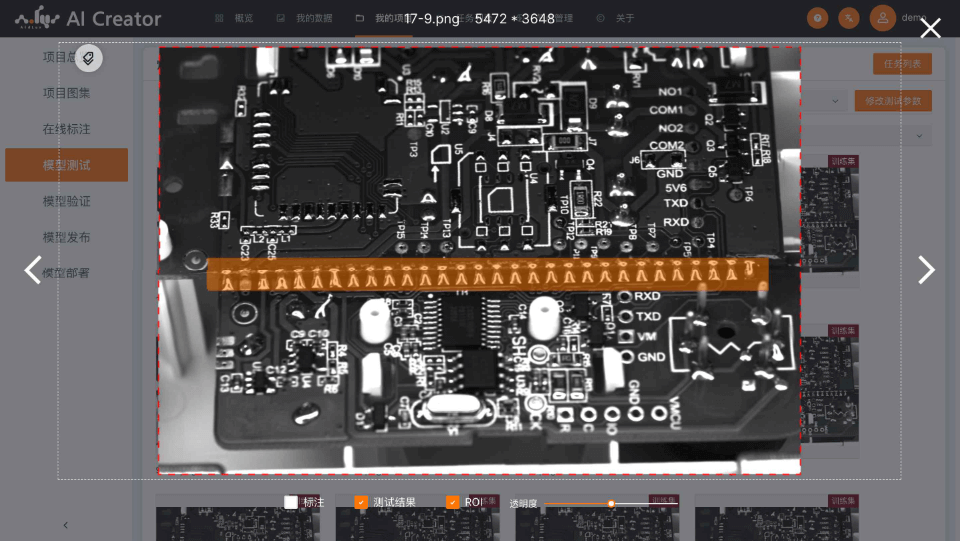
On the test result image details page, you can switch between annotation and test results to more conveniently review the performance of the current model.
Adding an Algorithm Module
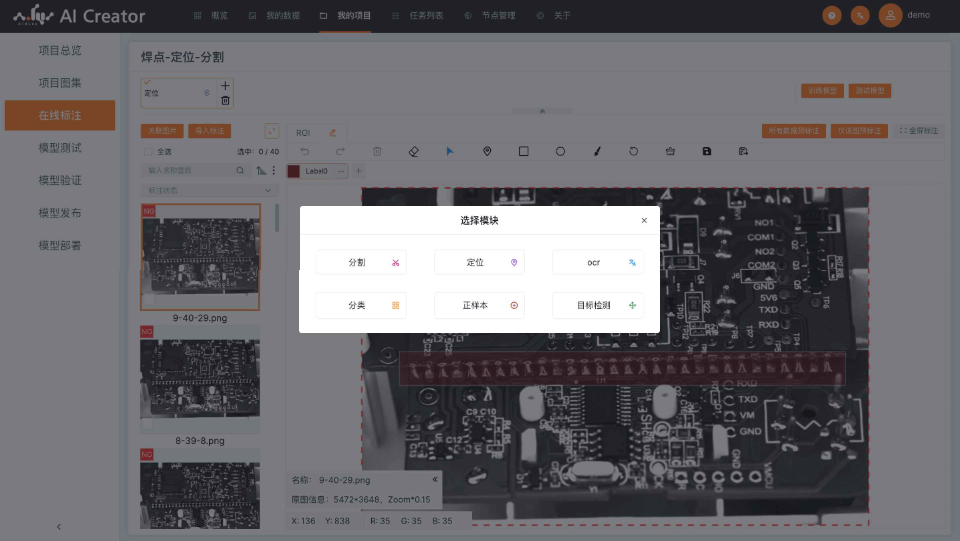
Once the preceding module is trained, you can add another module, for example a "Segmentation" module.
- Click the "+" button after the "Localization" module and select the "Segmentation" module.
The image data of the segmentation module comes from the prediction results of the preceding module. When the preceding module has new test result updates, the "Import Preceding Images" button will turn green and show a small red dot.
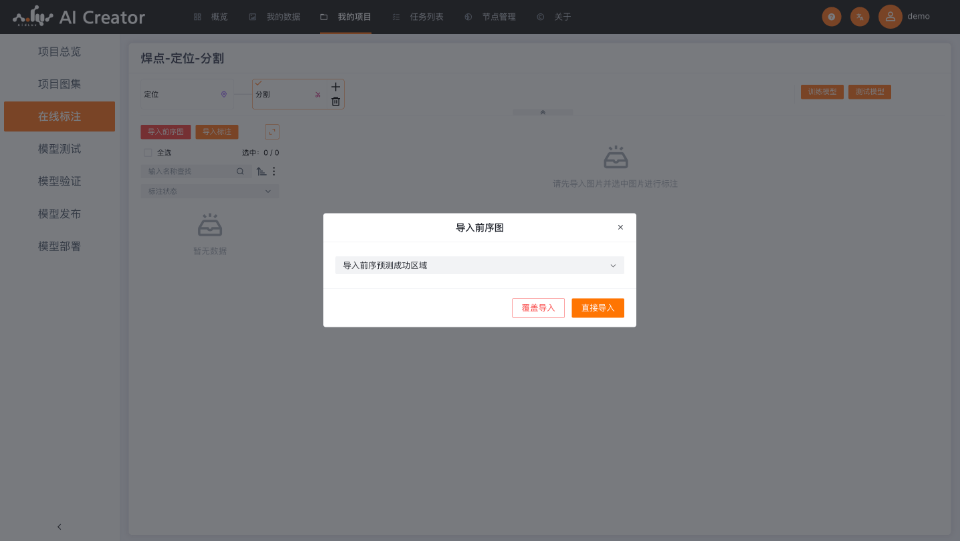
- Click Import Preceding Images and select the successful preceding prediction results to import the prediction results of the previous algorithm module.
Direct Import: skips images that already exist in the current module and imports only the newly added parts.
Overwrite Import: overwrites the images that already exist in the current module. This may be needed when the preceding module has generated a new model.
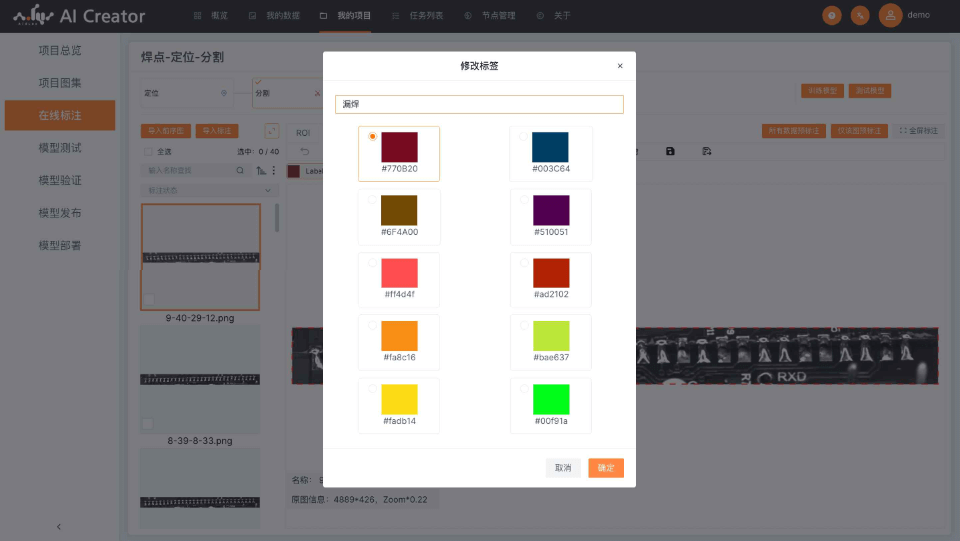
For segmentation annotation, if there are multiple defect types, you can create defect labels in advance. 3) Click the "+" button in the label bar under the annotation toolbar to add a label, or click the "···" button on a label to modify it.
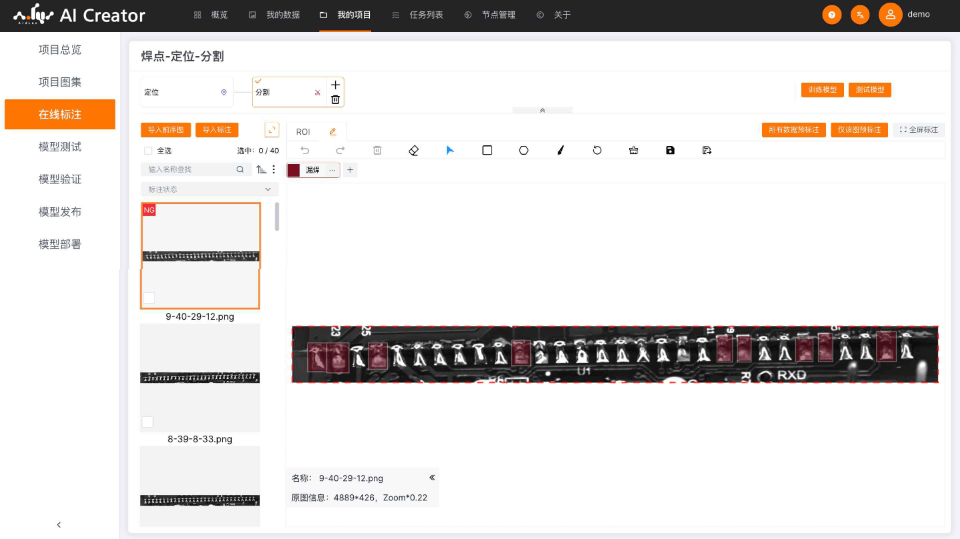
- Select the defect label and annotation tool to annotate the image data.
- The remaining process is the same as Image Annotation → Model Training → Model Evaluation. Complete annotation, training, and model evaluation in sequence. Repeat this process several times to obtain a model you are "satisfied" with.
Model Validation
After multiple rounds of model training and evaluation, you will have obtained a model you are "satisfied" with. You can use the model validation feature to validate the model's performance.
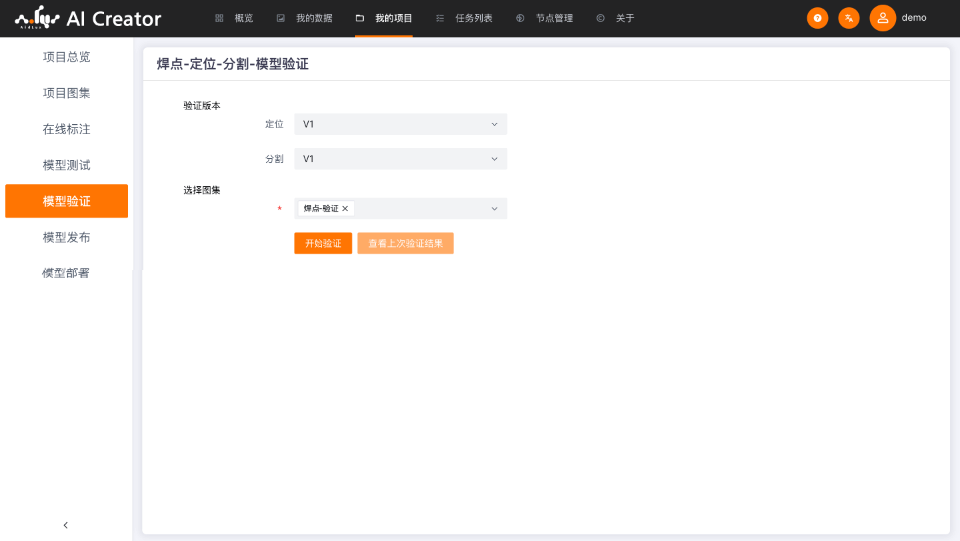
- Click the "Model Validation" button in the project list or on the project annotation page, select the model version and validation image set (Solder Joints - Validation Set) for validation.
💡 Note
The validation task can be tracked under "Task List > Validation Tasks".
After the validation task completes, you can view the model validation results.
- Click "Task List > Validation Tasks", find the corresponding validation task, and click "View Results". Alternatively, enter via Project -> Annotation Workspace -> Model Validation -> View Last Validation Results.
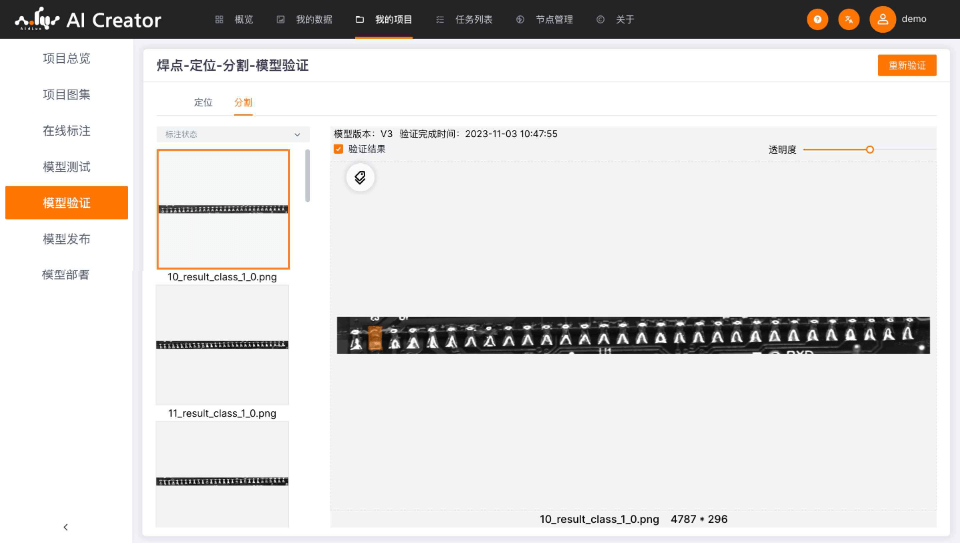
The model validation results are displayed overlaid on the original image. You can check/uncheck "Validation Result" to hide or show the validation results, allowing you to conveniently and efficiently review the model's performance.
Model Publishing & Download
After model training completes, you can directly download a single model. Combined with the APLUX AI model deployment and optimization platform: AIMO
Model Optimization
Trained models can be optimized to formats such as Qualcomm DLC / QNN and TFLite using AIMO (Model Optimization Platform).
One-click Optimization
In the project, click the "Model Publishing" menu and then click One-click Optimization to select the optimization options. Select the target platform or model format to optimize as needed. AI Creator will automatically optimize the trained model through AIMO.
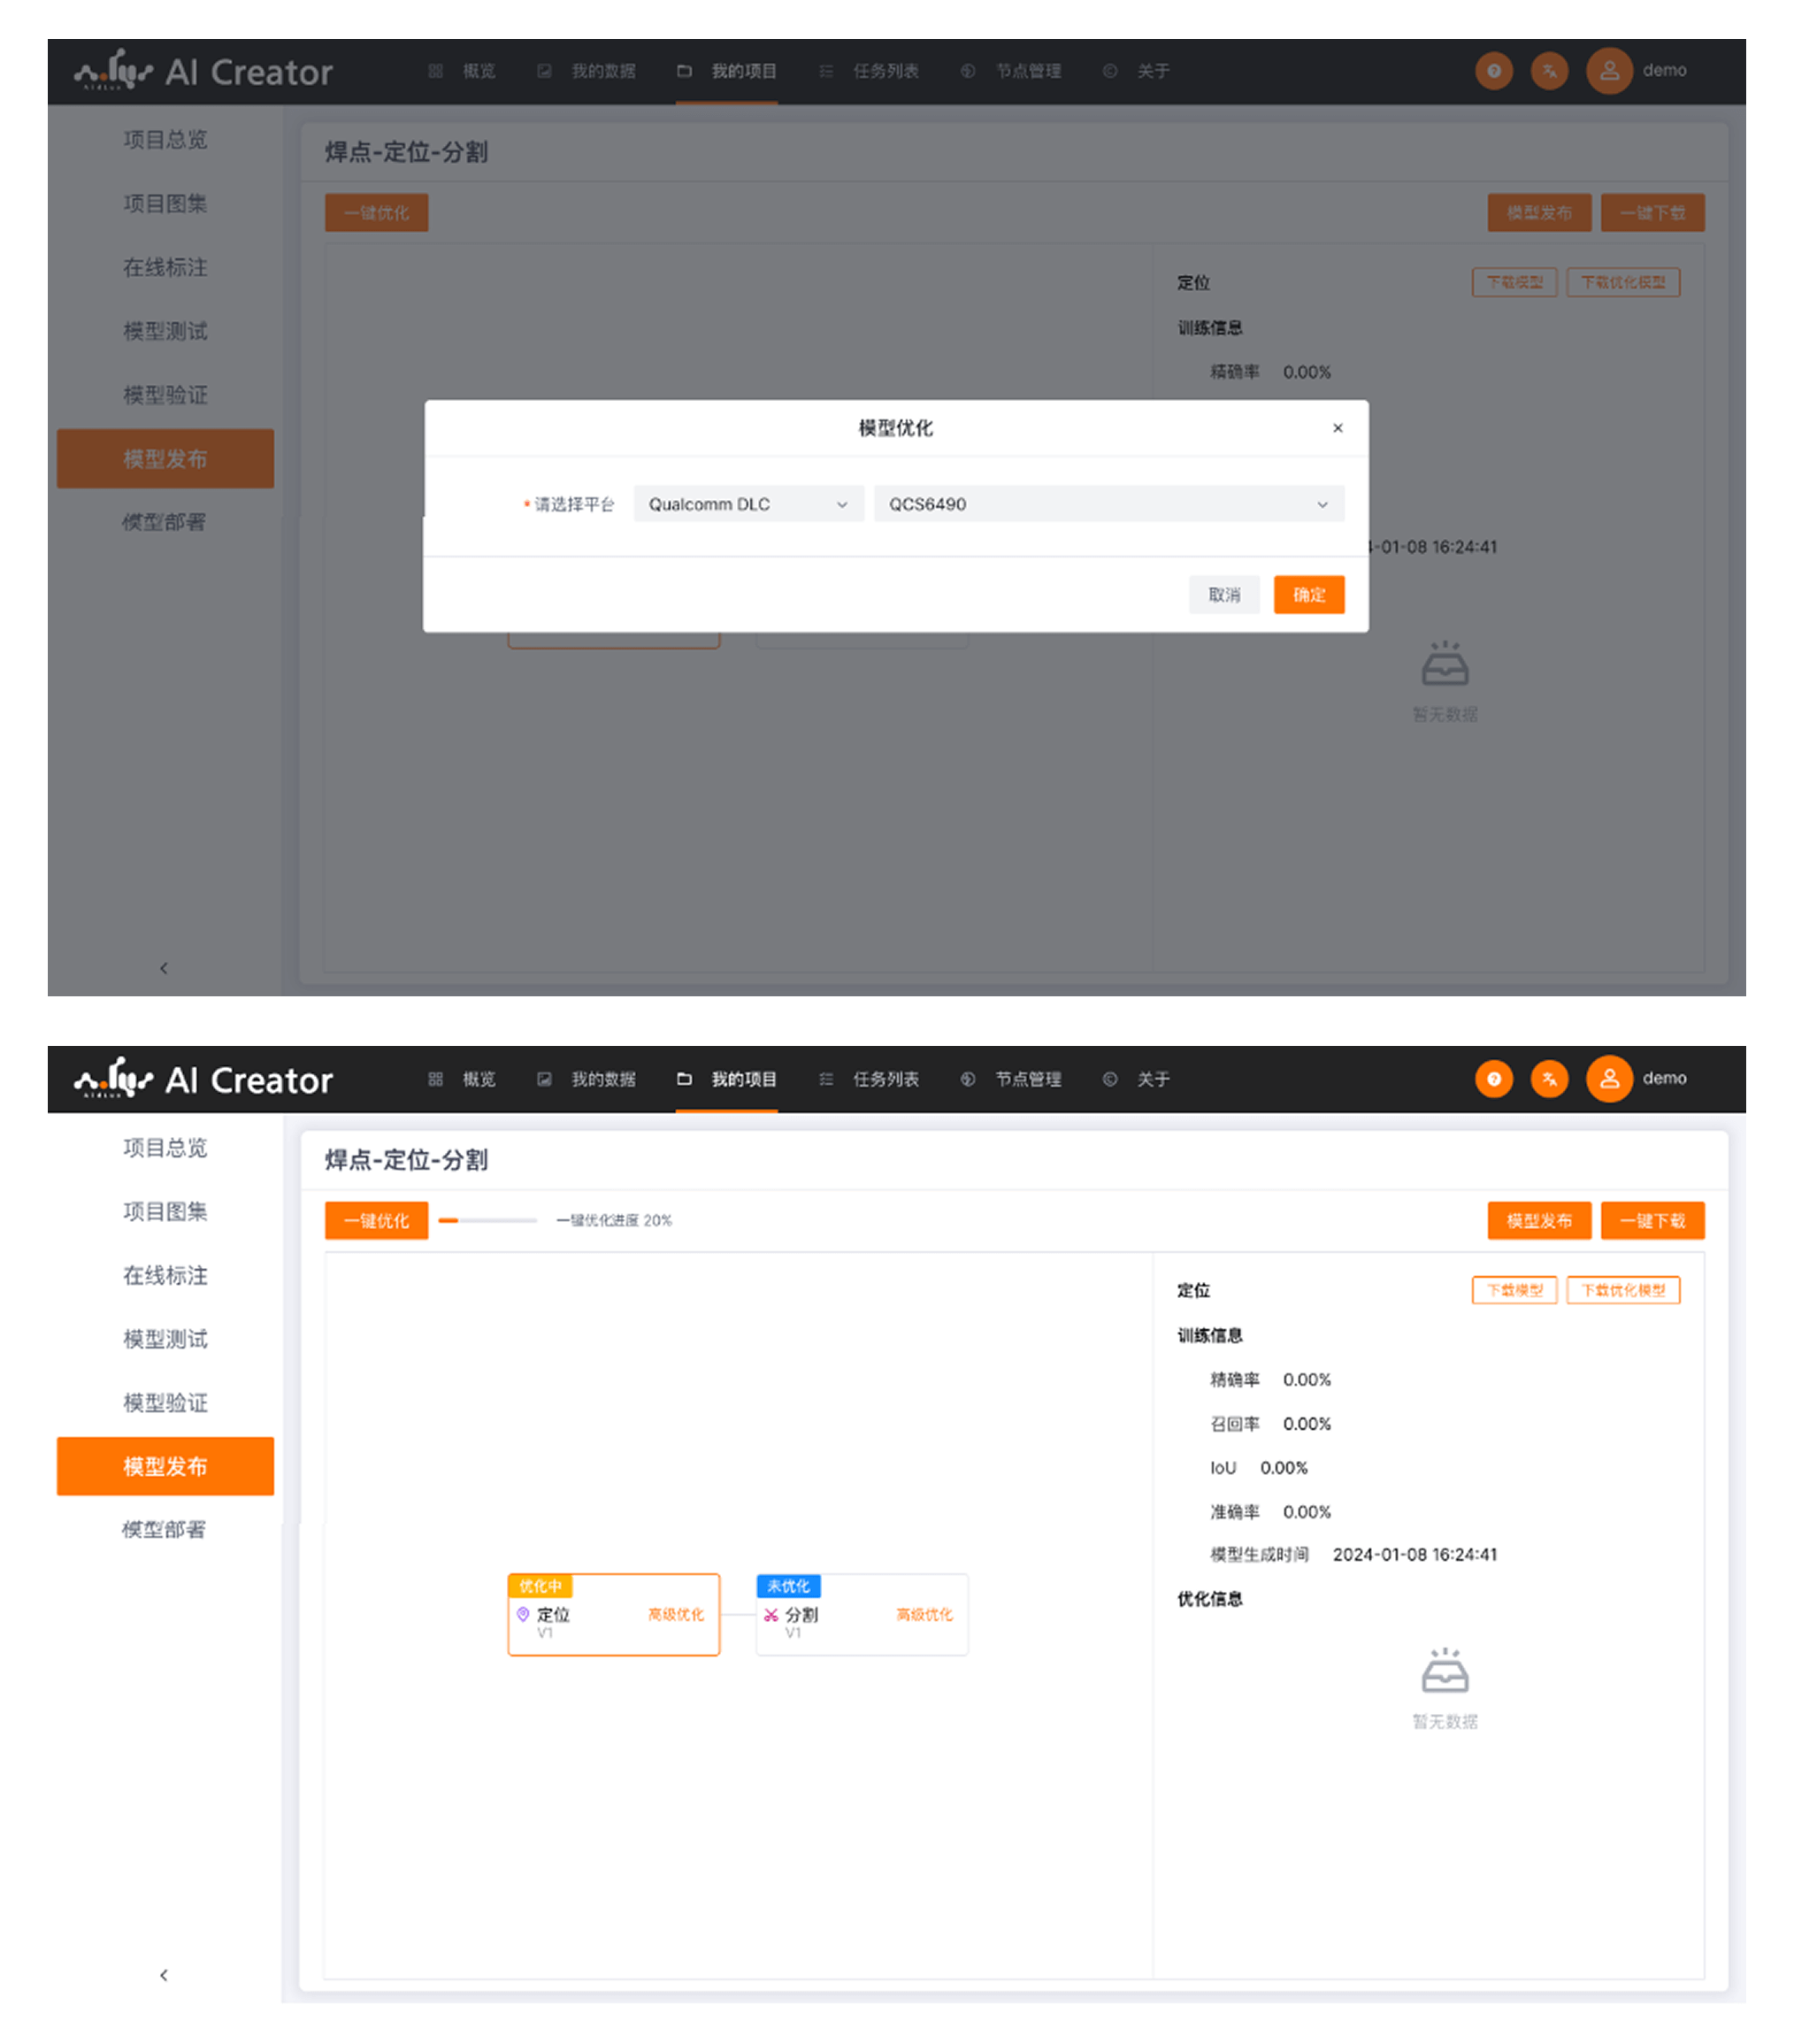
Advanced Optimization
If you need to add options such as quantization or mixed precision for model optimization, you can use the advanced optimization options.
Click "Advanced Optimization" on the module to invoke AIMO. After submission, it will return to AI Creator, and the optimization progress will be updated in real time.
💡 Note
For AIMO usage instructions, see: Model Optimization Platform (AIMO) User Guide
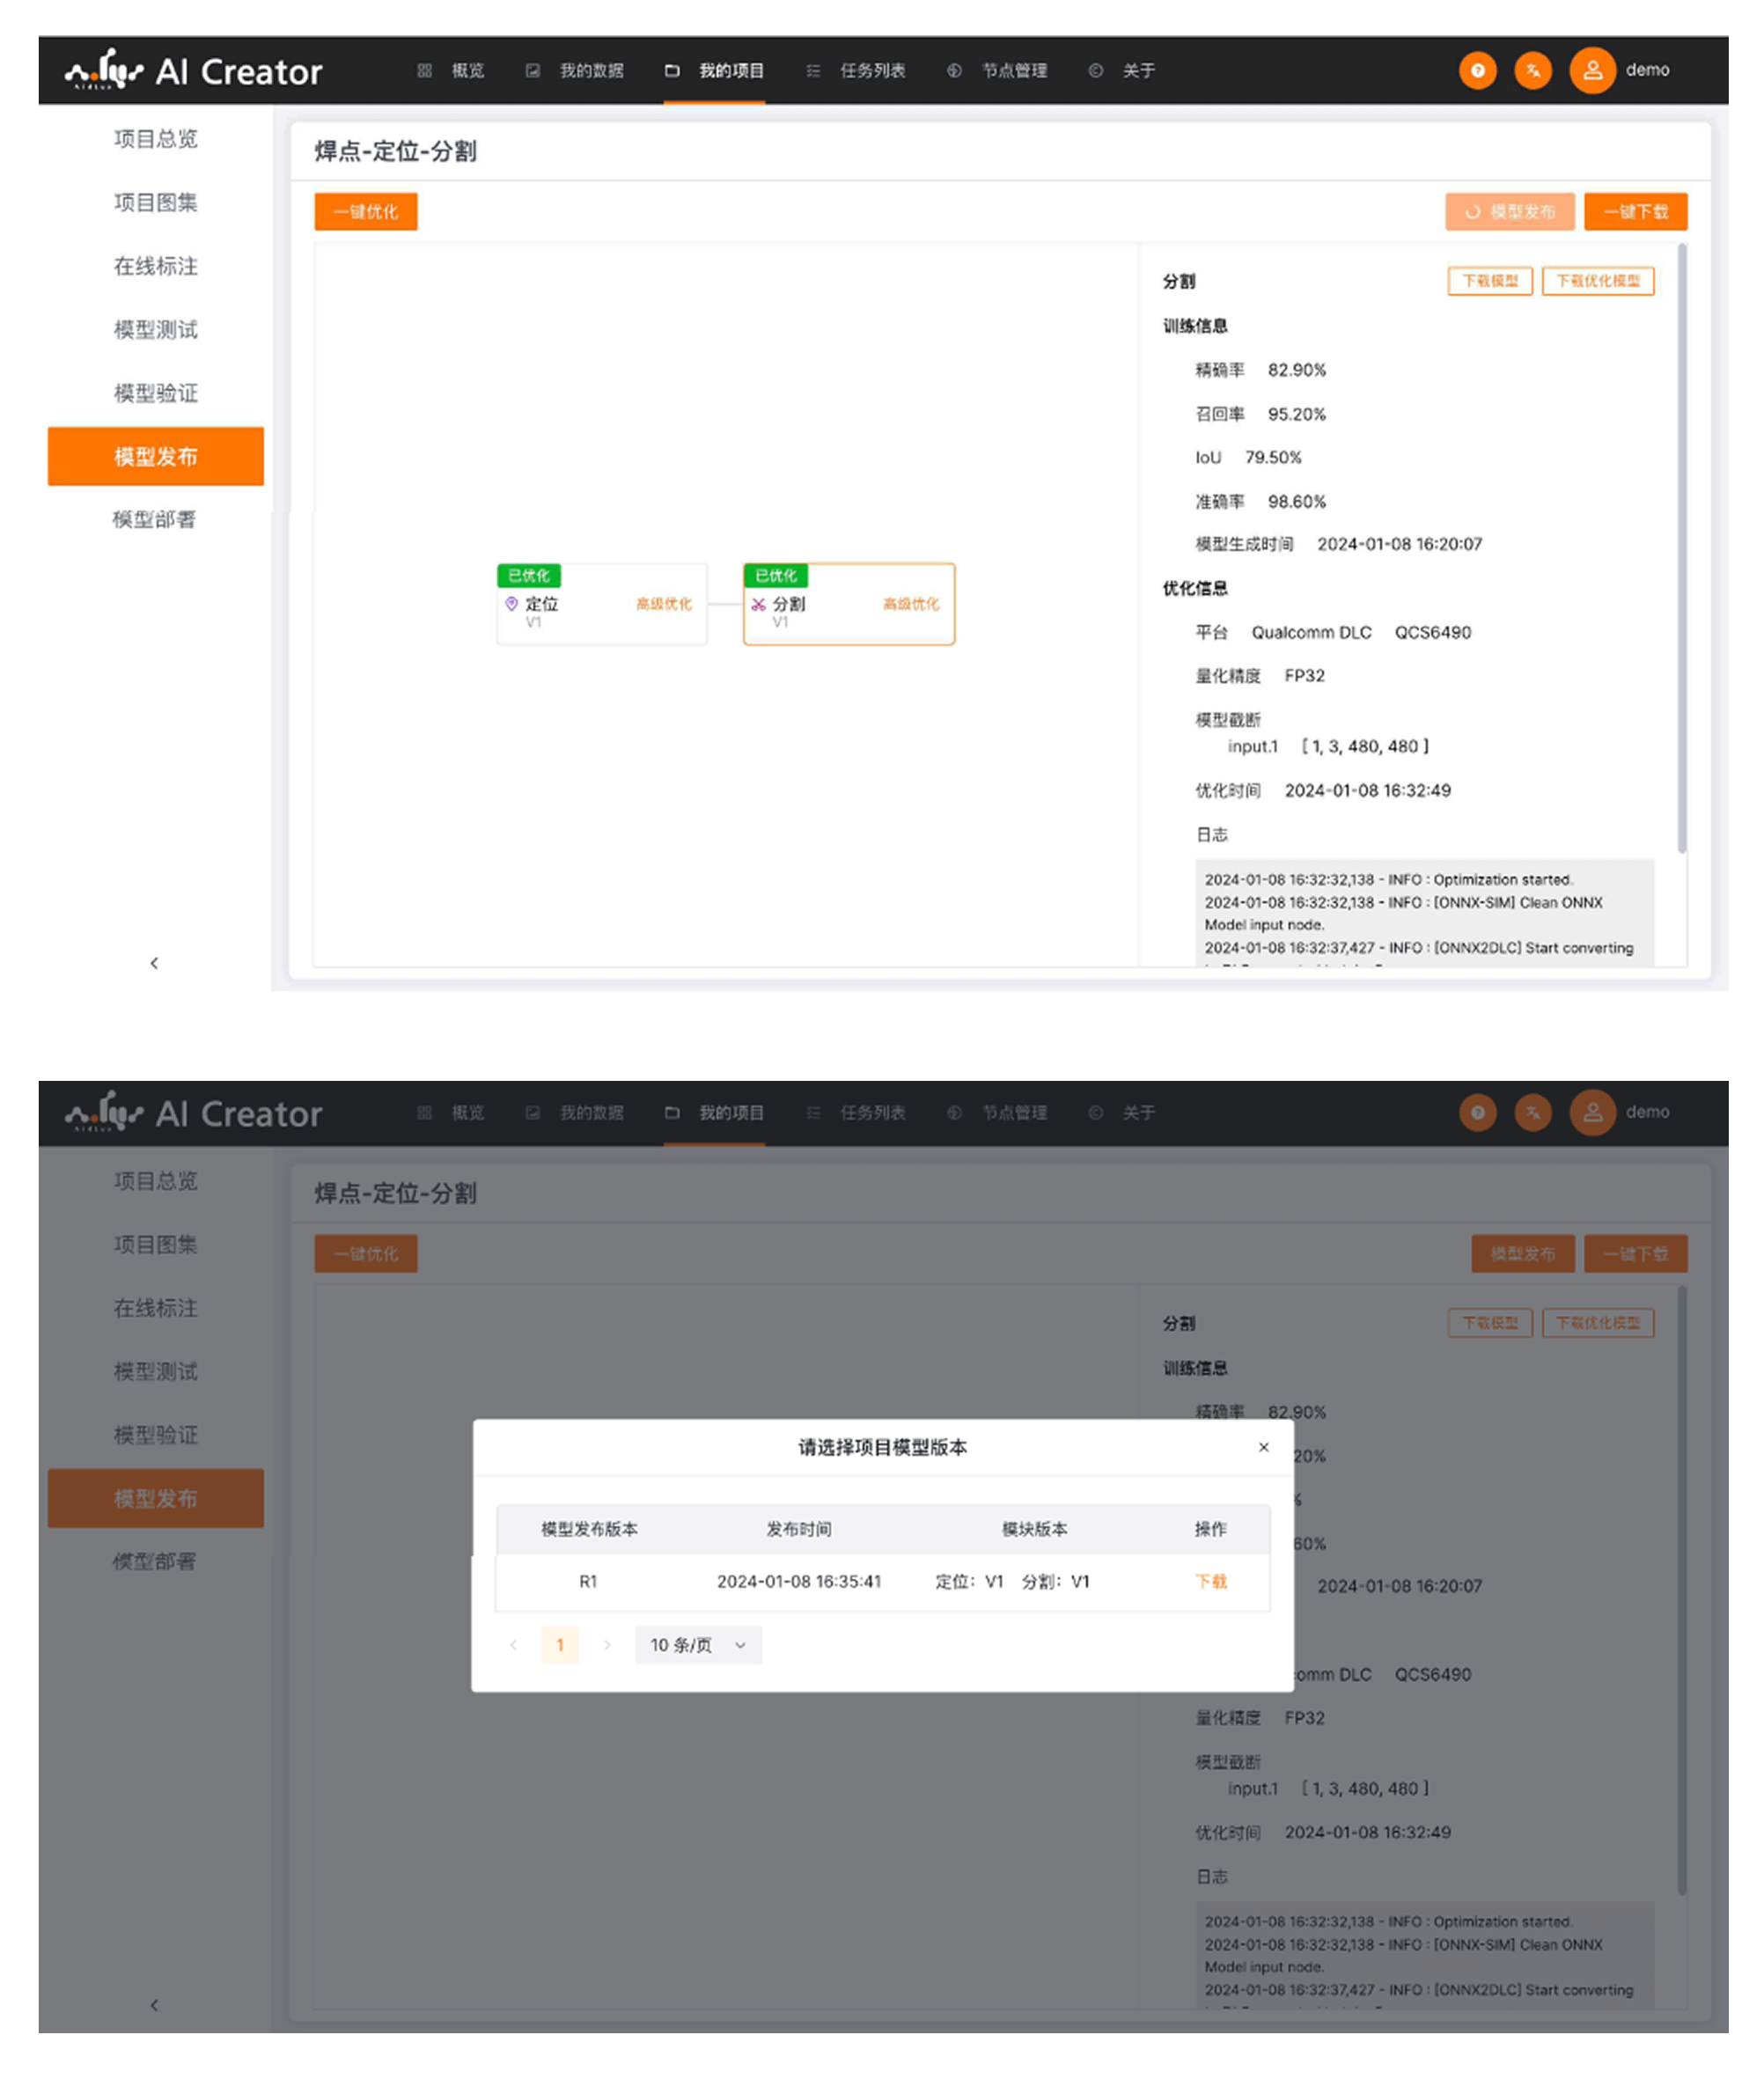
Model Publishing
Once all models under the current project have been optimized, you can use the "Model Publishing" feature to package the optimized models and their related parameters and publish them as a version.
Model Download
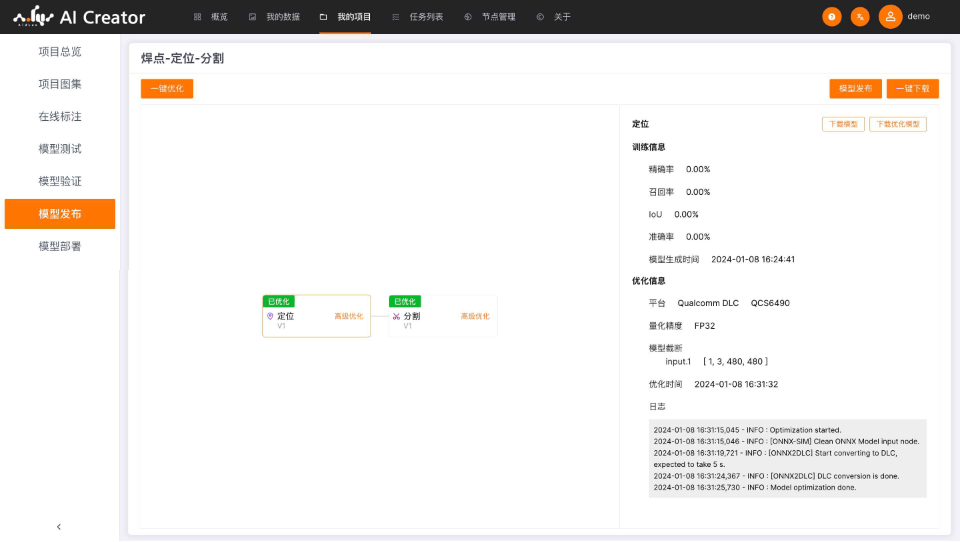
All models downloadable from AI Creator are encrypted and must be loaded and run with the AidLite SDK. If you need to obtain unencrypted/original models, contact us to enable the relevant access control.
Trained models can be downloaded on the project overview and project annotation pages for the original model of a specified algorithm module.
Other Related Operations
Upload Images to the Public Dataset
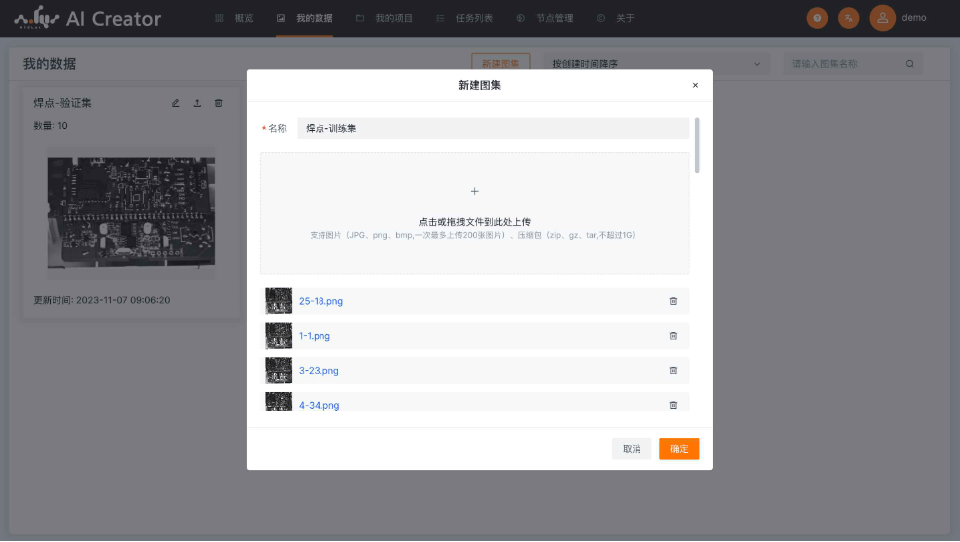
Click the "My Data" menu in AI Creator to enter My Data. The public dataset is available to all projects of the current user. If multiple projects need to use the same dataset, you can upload the data once under My Data.
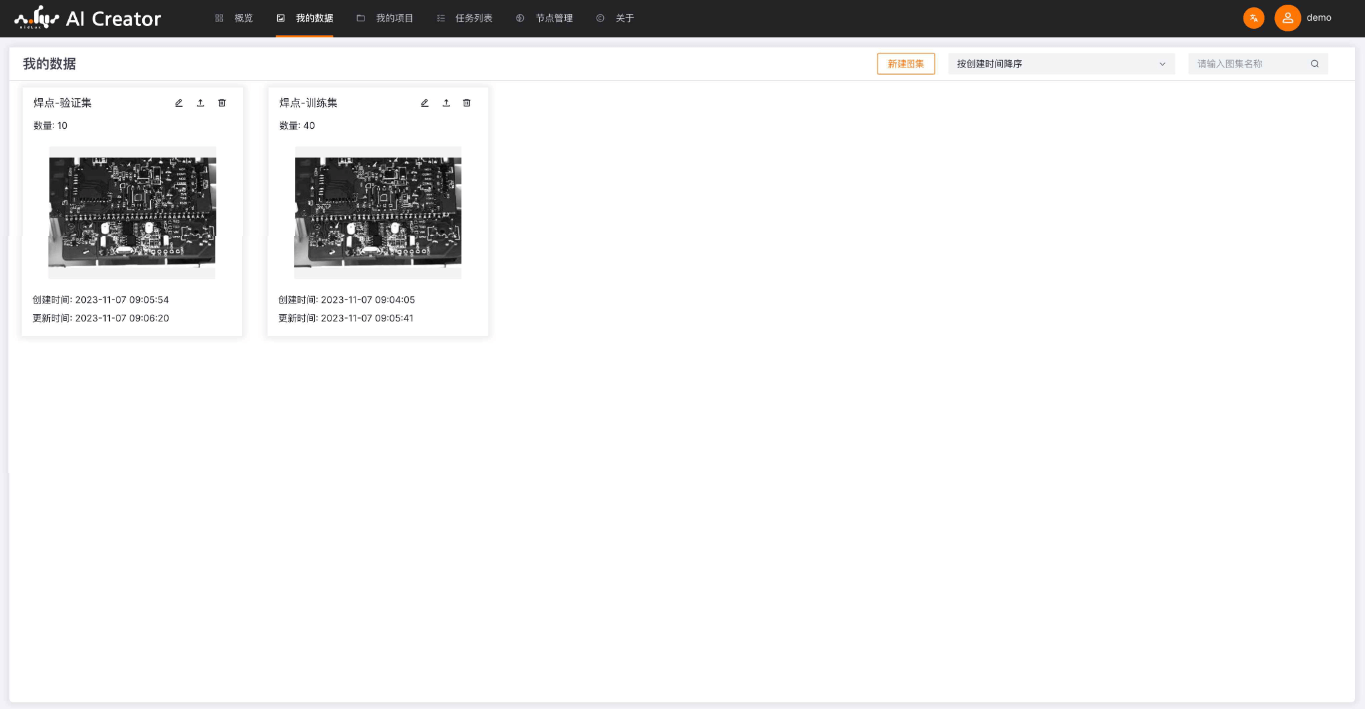
- Click "New Image Set", enter the image set name, select the locally prepared training set images, and click Confirm. Images support JPG, png, and bmp formats, up to 200 images per upload. Archives support zip, gz, and tar, with a single archive not exceeding 1G.
- Upload the validation set data in the same way.
Data Pre-annotation
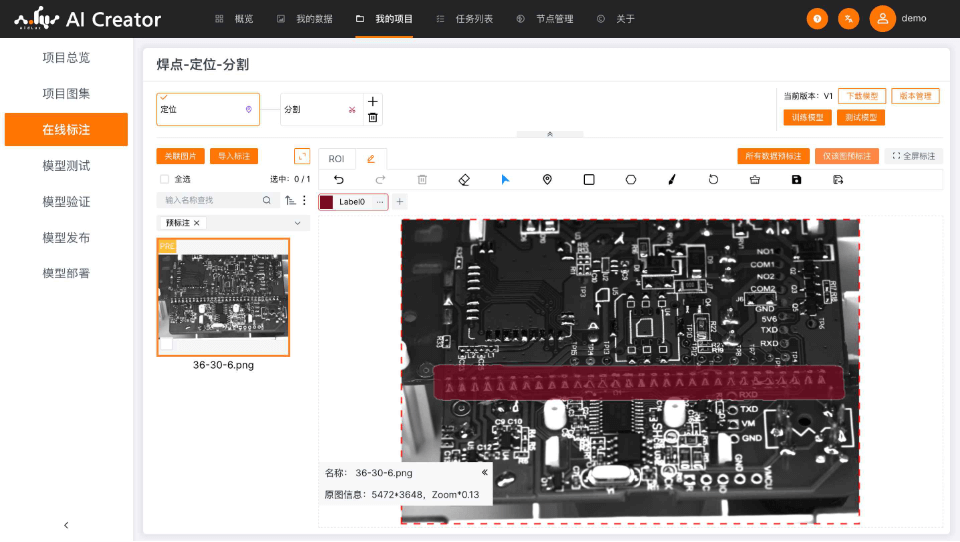
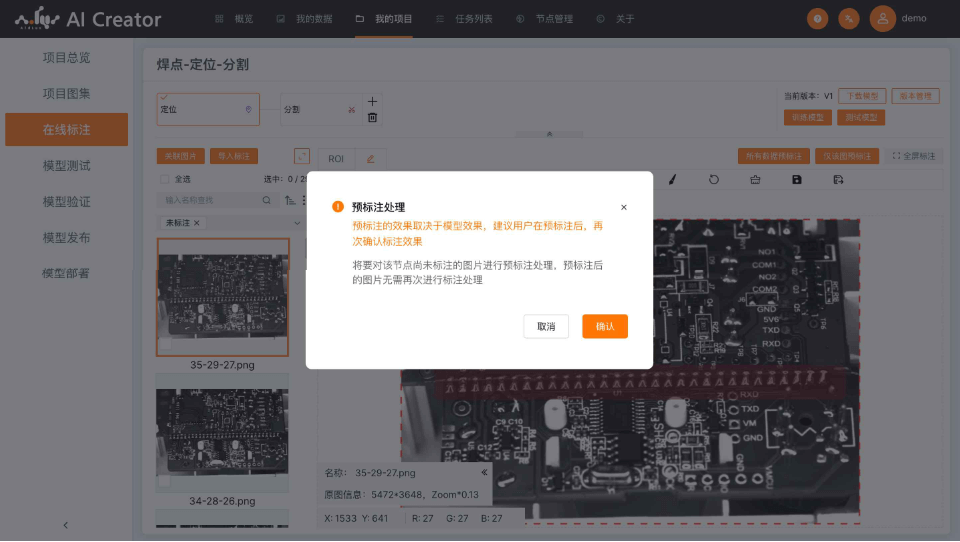
AI Creator 2.1 adds a pre-annotation feature. For incremental training scenarios based on an existing high-quality model, newly added images or unannotated images in a module can be pre-annotated to complete annotation quickly.
- Click "Pre-annotate Only This Image" in the workspace to pre-annotate a single image.
- Click "Pre-annotate All Data" to pre-annotate all unannotated data in the current module, then click Confirm.
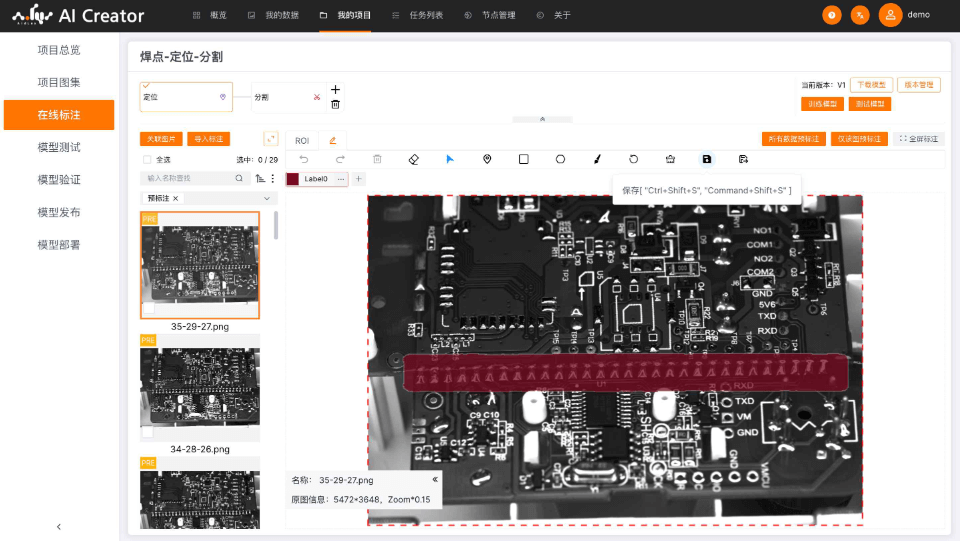
- After pre-annotation completes, review the pre-annotation result of each image in sequence. Once you confirm the annotation is correct, click Save to apply it.
Training Parameter Templates
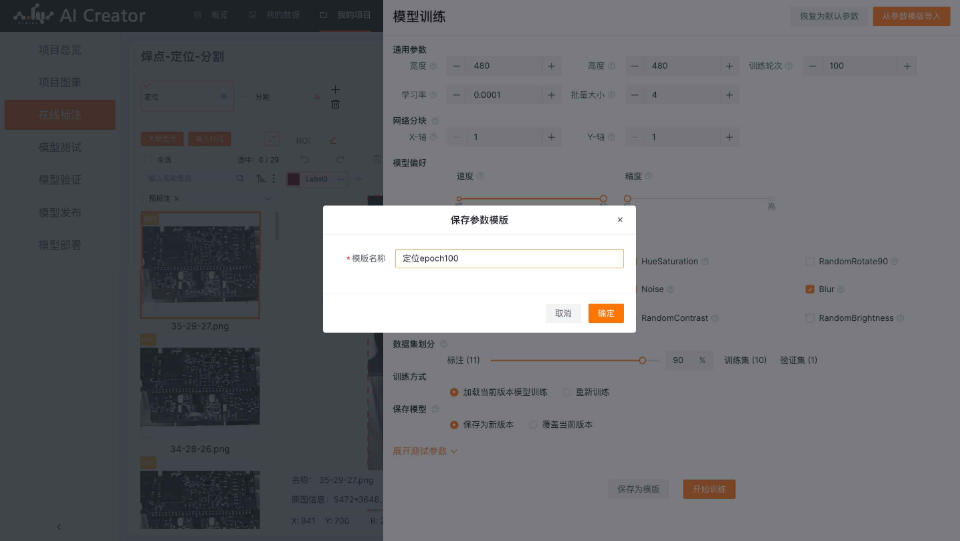
AI Creator supports saving training parameters as templates.
Saving a Template
Click "Model Training" in the project workspace, then click "Save as Template", enter a template name, and save.
Using a Template
Click "Import from Parameter Template" in model training, then select the template to import from the pop-up template list.