Deploying an LLM HTTP Server with AidGenSE
Introduction
Deploying a Large Language Model (LLM) on edge devices refers to compressing, quantizing, and deploying large models that originally run in the cloud onto local devices, enabling offline, low-latency natural language understanding and generation. This chapter is based on the AidGenSE inference engine and demonstrates how to complete the deployment of an LLM HTTP service (compatible with the OpenAI API) on edge devices.
In this case, the large language model inference runs on the device side, and the relevant interfaces are called through the HTTP API to receive user input and return conversation results in real time.
- Device: IQ9075
- System: Ubuntu 24.04
- Model: Qwen3-4B-Instruct
Supported Platforms
| Platform | Running Method |
|---|---|
| IQ9075 | Ubuntu 24.04 |
Prerequisites
IQ9075 hardware
Ubuntu 24.04 system
System Dependency Configuration
Configure the AidLux Repository
# Download the correct public key
sudo wget -O- https://archive.aidlux.com/ubuntu24/public.key | gpg --dearmor | sudo tee /etc/apt/trusted.gpg.d/private-aidlux.gpg > /dev/null

# Edit the source file
sudo vim /etc/apt/sources.list.d/private-aidlux.list

# Add the private key provided by AidLux to the source file
deb [arch=arm64 signed-by=/etc/apt/trusted.gpg.d/private-aidlux.gpg] https://archive.aidlux.com/ubuntu24 noble main

# Update the cache
sudo apt update
After the update, you can obtain the official AidLux SDK dependencies with the following command:
sudo apt list | grep aid | grep unknown# Install software
# Must be installed first; not included with the system
sudo apt install python3 python3-pip libopencv-dev python3-opencv net-tools
# Required before installing aidlite
sudo apt install aidlux-aistack-base aidrtcm
# Install aidlite and its dependencies
sudo apt install aid-lms aidlms-sdk aidlite-sdk cmake
sudo apt-get install libfmt-dev nlohmann-json3-dev
sudo apt install aidlite-*
# Enable DSP support
sudo apt-get install qcom-fastrpc1
sudo apt-get install qcom-fastrpc-dev
# Install the aidgen SDK
sudo apt install aidgen-sdk
sudo apt install aidgen-qnn*
# Install the mms service
sudo apt install aid-mms
# Enable GPU support
sudo apt-add-repository -s ppa:ubuntu-qcom-iot/qcom-ppa
sudo apt install qcom-adreno-cl1
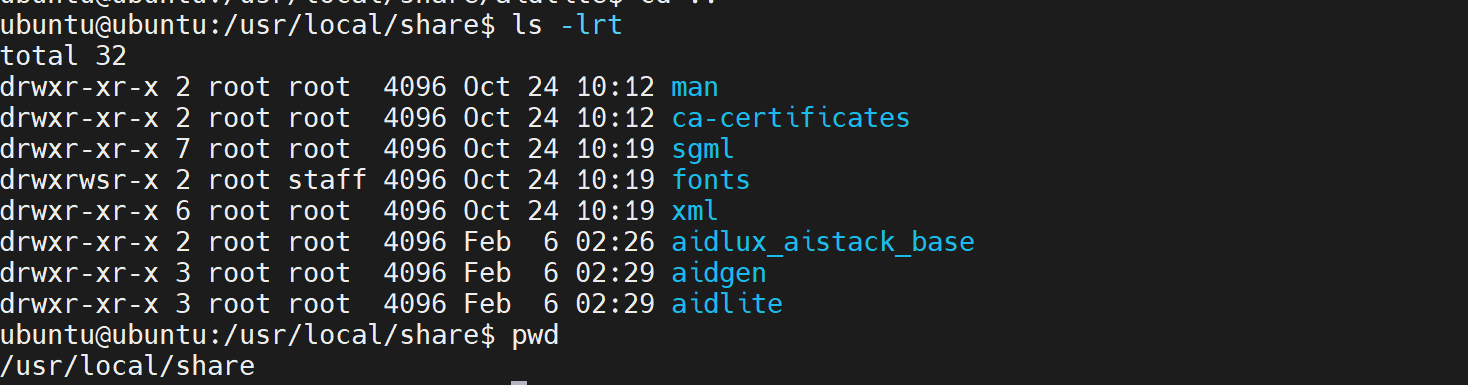
sudo ln -s /usr/lib/aarch64-linux-gnu/libOpenCL.so.1 /usr/lib/aarch64-linux-gnu/libOpenCL.soAfter installation, check that the aidlite and aidgen directories have been added under /usr/local/share.
Device Authorization
Obtain the Device SN Code
cat /sys/devices/soc0/serial_numberObtain the License File
Provide the SN code to the Aplux technical staff to generate a device-specific License file, and place it under /etc/opt/aidlux/license/AidLuxLics.
Activate Authorization
sudo /opt/aidlux/cpf/aid-lms/manager.sh restartCase Deployment
Step 1: Install AidGenSE
# Configure the virtual runtime environment
sudo apt install -y python3-pip python3-venv > /dev/null 2>&1
sudo python3 -m venv /opt/aidlux/aid-python3

# Create the aid-python3 command
echo '#!/bin/bash
exec /opt/aidlux/aid-python3/bin/python3 "$@"' | sudo tee /usr/bin/aid-python3 > /dev/null
sudo chmod +x /usr/bin/aid-python3

# Create the aid-pip3 command
echo '#!/bin/bash
exec /opt/aidlux/aid-python3/bin/python3 -m pip "$@"' | sudo tee /usr/bin/aid-pip3 > /dev/null
sudo chmod +x /usr/bin/aid-pip3

# Install aidgense
sudo apt install aidgense
sudo aidllm system --sys linux --soc 9075
sudo apt install aid-pkg
sudo aidllm install ui
Step 2: Query & Download Models
- View the supported models
# View the supported models
aidllm remote-list api

#------------------------ Example output ------------------------

Current Soc :  9075
Name                                                    Url                                                           CreateTime
hy-mt1.5-1.8b-qnn2.36-w4a16-qcs9075                     aplux/hy-mt1.5-1.8b-qnn2.36-w4a16-qcs9075                     2026-05-15 10:58:39
hy-mt2-1.8b-qnn2.48-w4a16-qcs9075                       aplux/hy-mt2-1.8b-qnn2.48-w4a16-qcs9075                       2026-08-05 16:17:02
...- Download Qwen3-4B-Instruct
# Download the model
aidllm pull api aplux/qwen3-4b-instruct-2507-qnn2.36-w4a16-qcs9075

# View the downloaded models
aidllm list api
Step 3: Start the HTTP Service
# Start the OpenAI API service for the corresponding model
aidllm start api -m qwen3-4b-instruct-2507-qnn2.36-w4a16-qcs9075

# View status
aidllm status api

# Stop the service: aidllm stop api

# Restart the service: aidllm restart api
💡Note
The default port number is 8888.
Step 4: Conversation Testing
Conversation Testing with the Web UI
# Install the UI frontend service
sudo aidllm install ui

# Start the UI service
aidllm start ui

# View UI service status: aidllm status ui

# Stop the UI service: aidllm stop ui
After the UI service starts, visit http://ip:51104.
Conversation Testing with Python
import os
import requests
import json

def stream_chat_completion(messages, model="qwen3-4b-instruct-2507-qnn2.36-w4a16-qcs9075"):

    url = "http://127.0.0.1:8888/v1/chat/completions"
    headers = {
        "Content-Type": "application/json"
    }
    payload = {
        "model": model,
        "messages": messages,
        "stream": True    # Enable streaming
    }

    # Make the request with stream=True
    response = requests.post(url, headers=headers, json=payload, stream=True)
    response.raise_for_status()

    # Read and parse the SSE format line by line
    for line in response.iter_lines():
        if not line:
            continue
        # print(line)
        line_data = line.decode('utf-8')
        # Each SSE line starts with the "data: " prefix
        if line_data.startswith("data: "):
            data = line_data[len("data: "):]
            # End marker
            if data.strip() == "[DONE]":
                break
            try:
                chunk = json.loads(data)
            except json.JSONDecodeError:
                # Print and skip when parsing fails
                print("Unable to parse JSON:", data)
                continue

            # Extract the token output by the model
            content = chunk["choices"][0]["delta"].get("content")
            if content:
                print(content, end="", flush=True)

if __name__ == "__main__":
    # Example conversation
    messages = [
        {"role": "system", "content": "You are a helpful assistant."},
        {"role": "user", "content": "Hello."}
    ]
    print("Assistant:", end=" ")
    stream_chat_completion(messages)
    print()  # New line