YOLOv5 Deployment
Introduction
YOLOv5 is a single-stage object detection network framework. Its main structure consists of four parts: a network backbone composed of a modified CSPNet, a high-resolution feature fusion module composed of an FPN (Feature Pyramid Network), a pooling module composed of SPP (Spatial Pyramid Pooling), and three different detection heads used to detect objects of various sizes.
This chapter demonstrates the deployment, loading, and recognition process of YOLOv5s on an edge device. Two deployment methods are provided:
- AidLite Python API
- AidLite C++ API
In this case, model inference runs on the device-side NPU computing unit, and the code calls relevant interfaces to receive user input and return results.
- Device: IQ8275
- System: Ubuntu 24.04
- Source model: YOLOv5s
- Quantized model precision: INT8
- Model Farm model reference: YOLOv5s-INT8
Supported Platforms
| Platform | Execution Method |
|---|---|
| IQ8275 | Ubuntu 24.04 |
Prerequisites
IQ8275 hardware
Ubuntu 24.04 system
System Dependency Configuration
Configure the AidLux Package Source
# Download the correct public key
sudo wget -O- https://archive.aidlux.com/ubuntu24/public.key | gpg --dearmor | sudo tee /etc/apt/trusted.gpg.d/private-aidlux.gpg > /dev/null

# Edit the source list file
sudo vim /etc/apt/sources.list.d/private-aidlux.list

# Add the repository provided by AidLux to the source file
deb [arch=arm64 signed-by=/etc/apt/trusted.gpg.d/private-aidlux.gpg] https://archive.aidlux.com/ubuntu24 noble main

# Update the package cache
sudo apt update
After the update is complete, you can use the following command to list the SDK dependencies officially provided by AidLux:
sudo apt list | grep aid | grep unknown# Install software
# Must be installed first because they are not included in the system by default
sudo apt install python3 python3-pip libopencv-dev python3-opencv net-tools
# Must be installed before aidlite
sudo apt install aidlux-aistack-base aidrtcm
# Install aidlite and its dependencies
sudo apt install aid-lms aidlms-sdk aidlite-sdk cmake
sudo apt-get install libfmt-dev nlohmann-json3-dev
sudo apt install aidlite-*
# Enable DSP support
sudo apt-get install qcom-fastrpc1
sudo apt-get install qcom-fastrpc-dev
# Install aidgen-sdk
sudo apt install aidgen-qnn240-sdk
# Install the mms service
sudo apt install aid-mms
# Enable GPU support
sudo apt-add-repository -s ppa:ubuntu-qcom-iot/qcom-ppa
sudo apt install qcom-adreno-cl1
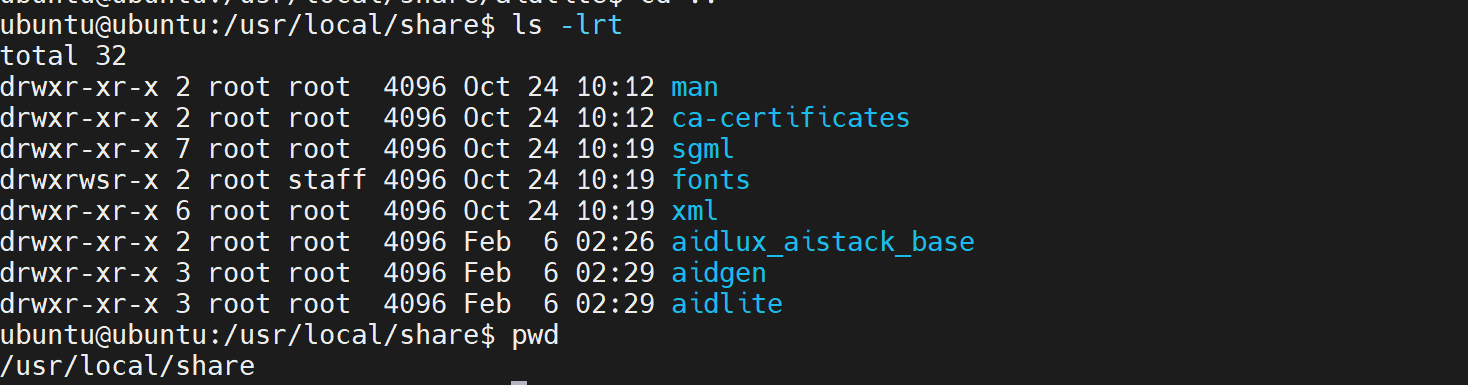
sudo ln -s /usr/lib/aarch64-linux-gnu/libOpenCL.so.1 /usr/lib/aarch64-linux-gnu/libOpenCL.soAfter the installation is complete, check that the aidlite and aidgen directories have been added under /usr/local/share.
Device Authorization
Get the Device SN
cat /sys/devices/soc0/serial_numberGet the License File
Provide the SN to APLUX technical support so that they can generate the device-specific license file. Place the generated file under /etc/opt/aidlux/license/AidLuxLics.
Activate the License
sudo /opt/aidlux/cpf/aid-lms/manager.sh restartDownload the YOLOv5s-INT8 Model Resources
mms list yolov5s

#------------------------ YOLOv5s models available ------------------------
Model        Precision  Chipset           Backend
-----        ---------  -------           -------
YOLOv5s      INT8       Qualcomm QCS6490  QNN2.31
YOLOv5s      INT8       Qualcomm QCS8550  QNN2.31
YOLOv5s      FP16       Qualcomm QCS8550  QNN2.31
YOLOv5s      W8A16      Qualcomm QCS6490  QNN2.31
YOLOv5s      W8A16      Qualcomm QCS8550  QNN2.31
YOLOv5s-seg  INT8       Qualcomm QCS8550  QNN2.16
YOLOv5s-seg  INT8       Qualcomm QCS6490  QNN2.31

# Download YOLOv5s-int8
mms get -m YOLOv5s -p int8 -c qcs8550 -b qnn2.31 -d /home/ubuntu/yolov5s
cd /home/ubuntu/yolov5s
# Unzip
unzip YOLOv5s_qcs8550_w8a8.zip
💡Note
Developers can also search for and download the model on the Model Farm website.
AidLite SDK Installation
Developers can also refer to the
README.mdin the model folder to install the SDK.
- Ensure the QNN backend version is
≥ 2.31 - Ensure the
aidlite-sdkandaidlite-qnnxxxversions are2.3.x
# AidLite & QNN version check
dpkg -l | grep aidlite
#------------------------ Output similar to the following ------------------------
ii  aidlite-qnn236       2.3.0.230         arm64        aidlux aidlite qnn236 backend plugin
ii  aidlite-sdk          2.3.0.230         arm64        aidlux inference module sdk
QNN & AidLite version update
# Install the AidLite SDK
sudo apt update
sudo apt install aidlite-sdk
sudo apt install aidlite-qnn236

# aidlite sdk c++ check
python3 -c "import aidlite; print(aidlite.get_library_version())"

# aidlite sdk python check
python3 -c "import aidlite; print(aidlite.get_py_library_version())"
AidLite Python API Deployment
Run the Python API example
cd /home/ubuntu/yolov5s/code

# --target_model: model file path
# --imgs: image input
# --invoke_nums: number of inference iterations
python3  python/run_test.py --target_model /home/ubuntu/yolov5s/models/QCS8550/W8A8/cutoff_yolov5s_qcs8550_w8a8.qnn231.ctx.bin --imgs ./python/bus.jpg --invoke_nums 10
You can see the model inference time (in ms) and the detection results on the command line:
=======================================
QNN inference 10 times :
 --mean_invoke_time is 1.5697240829467773
 --max_invoke_time is 2.2764205932617188
 --min_invoke_time is 1.477956771850586
 --var_invoketime is 0.05570707855895307
=======================================
5 regions detected
1 [668, 385, 141, 500] 0.86635846 person
2 [219, 407, 125, 465] 0.86257815 person
3 [55, 393, 178, 515] 0.845101 person
4 [3, 207, 812, 601] 0.8401416 bus
5 [0, 551, 73, 325] 0.5058796 person
Image saved to ./python/yolov5s_result.jpg
=======================================
AidLite C++ API Deployment
Run the C++ API example
cd /home/ubuntu/yolov5s/code/cpp

mkdir build && cd build
cmake ..
make
./run_yolov5
You can see the model inference time (in ms) and the detection results on the command line:
The C++ code runs 10 inference iterations by default.
current thread_idx[1] [9] get_output_tensor cost time : 0.911757
repeat [10] time , input[21.061591] --- invoke[16.763899] --- output[16.023339] --- sum[53.848829]ms
postprocess cost time : 0.158227 ms
Result id[0]-x1[209.905304]-y1[242.500031]-x2[284.438965]-y2[518.384033]
Verify result : idx[0] id[0] coverage_ratio[0.983873]
Result id[0]-x1[105.769806]-y1[228.641464]-x2[234.684357]-y2[546.474487]
Verify result : idx[0] id[0] coverage_ratio[0.129211]
Verify result : idx[1] id[0] coverage_ratio[0.000000]
Verify result : idx[2] id[0] coverage_ratio[0.934018]
Result id[0]-x1[474.906281]-y1[228.192184]-x2[558.729797]-y2[524.893982]
Verify result : idx[0] id[0] coverage_ratio[0.000000]
Verify result : idx[1] id[0] coverage_ratio[0.952345]
Result id[5]-x1[81.684174]-y1[122.895874]-x2[562.999390]-y2[479.283447]
Verify result : idx[0] id[5] coverage_ratio[0.893258]
The result image result.jpg is saved in the build folder.